First find an image. Here the kingfisher is from https://pixabay.com/p-2046453/?no_redirect
In order to generate the intended circle packing the image is transformed in grey scale. Play with contrast luminosity … For example I used this one and also another.
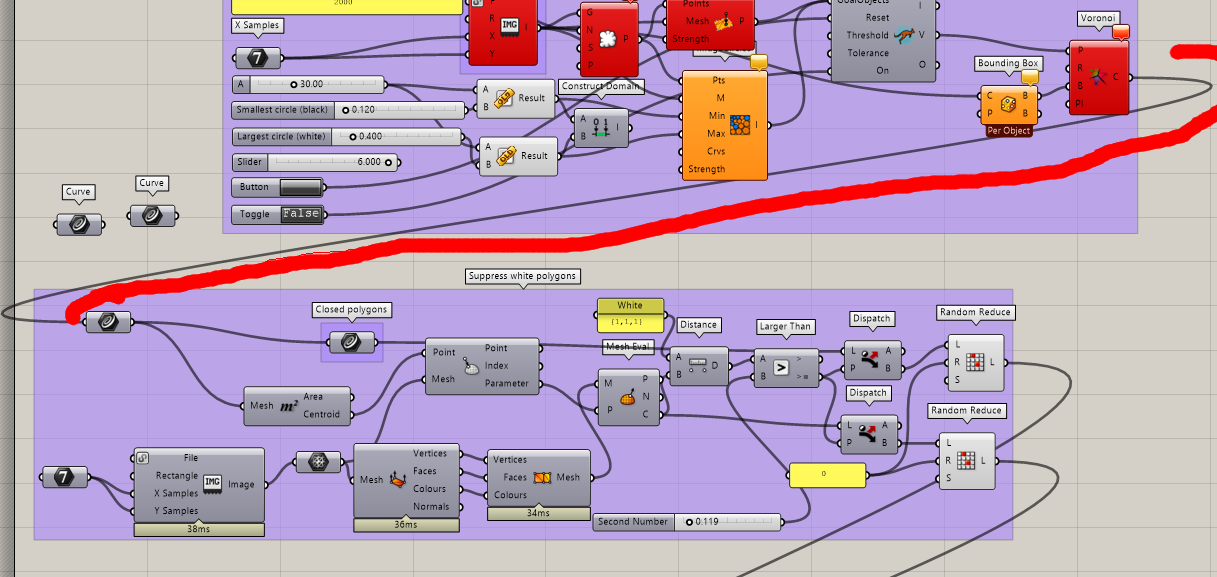
In order to work you must find the good number of circles, the good size. Don’t forget to put the toggle to true and click on Button. I add problem with the assemby in the C# script. I add to put the last KangarooSolver.dll link (right click on component and manage assemblies) in order to make it work in Rhino 6. At the end of the script I capture the polygons, here Voronoi in a curve component and I internalize the data.
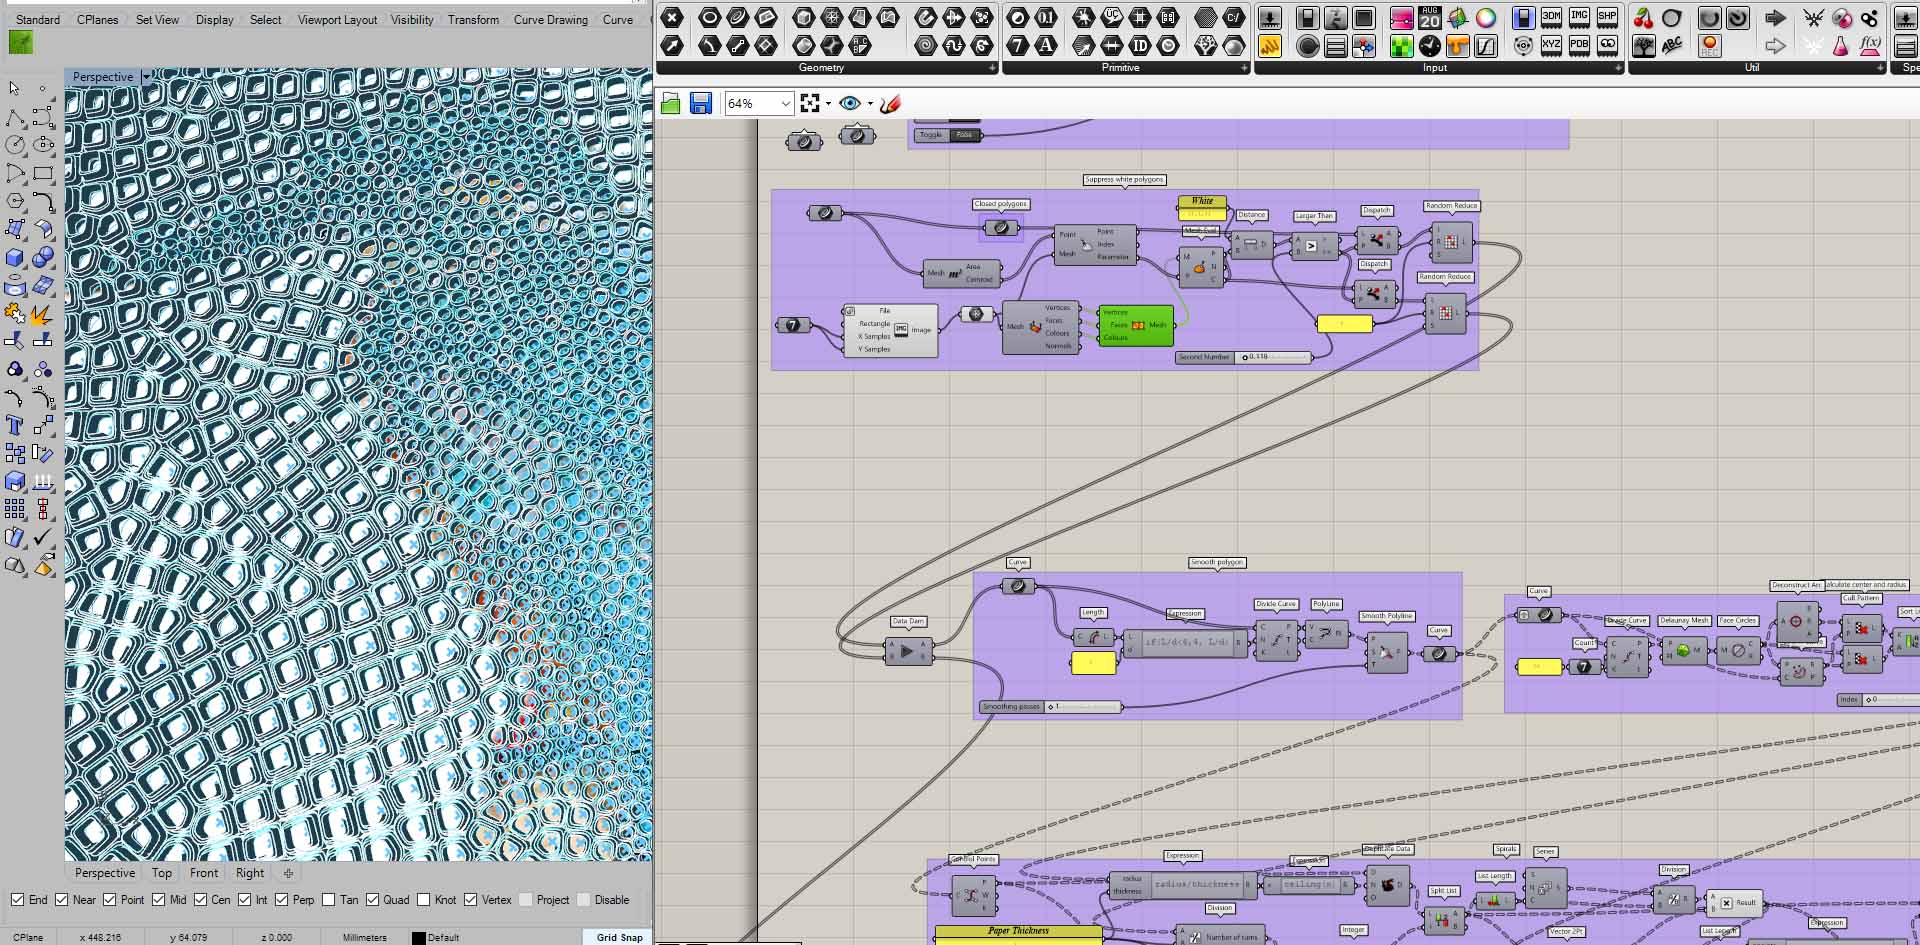
Now use the color image in order to suppress polygon which have a color near the white. Beware when color is transformed to a point in GH it ranges goes from -1 to 1, not 0 to 254.
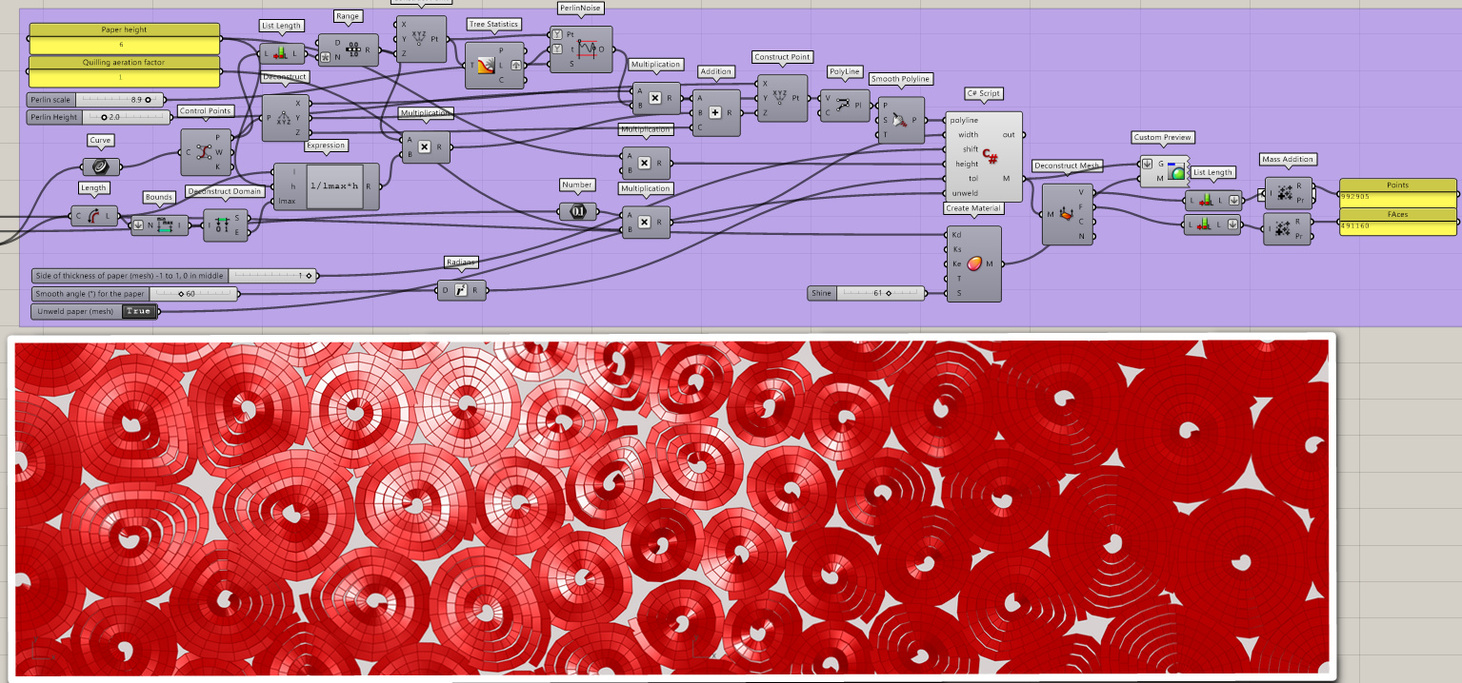
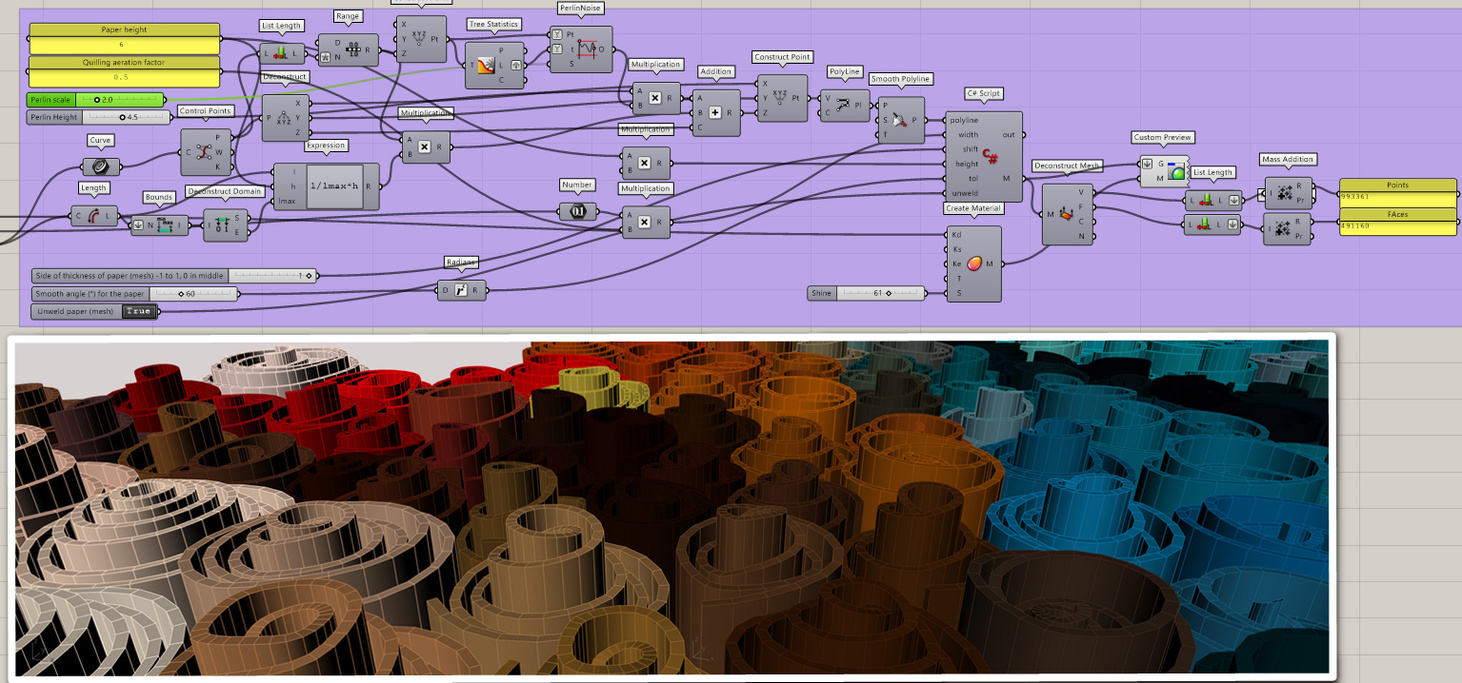
Spiral are then thickened via a script I made in order to limit the number of faces and fasten the script. Offset, loft curves are too slow and too heavy You can make paper thinner. You can play with Perlin noise parameters, see examples below with low noise, no noise, low scale and high noise.
Thanks.
Raytraced without baking is cool, it tooks one hour. It seems a bit long, but I am not able to compare with Vray3 as it is not working yet on Rhino 6. It seems also that Cycles didn’t use all the machine power (on purpose of usability I imagine). I saved rimage file but I don’t know if it contains extra informations.
I have that PC
I think it is cool to have a good renderer in Rhino. I am happy with vray but the simple interaction between Cycles/Rhino and Grasshopper is a plus. Good job Nathan.
Render view with -ViewCaptureToClipboard is also good and very fast. Here 2000 passes with 2 types of paper thickness.
Ah yes, if you used Cycles for Rhino (CfR) then the Cycles engine won’t be as fast. There is a severe loss of speed using the RenderWindow, but since CfR won’t be in Rhino 6 I won’t just yet look into why.
That said, the Raytraced display mode is the exact same engine, and indeed ViewCaptureToClipboard (and -File), will give about all the power Cycles.can give.
Anyway, awesome work on both the GH definition and the renders. Keep 'em coming! (:
For the first image I used the bue icon _Render. “cycles for Rhino”.
I am not sure to understand everything of your reply. So ViewCaptureToClipboard is also working with the raytraced mode ? I never tested that ! Is there some documentation that gives the pros and cons of different ways of rendering an image in Rhino ?
The blue _Render button that starts CfR uses the exact same Cycles render engine as the view mode Raytraced. With regards to render quality there is no difference between CfR and Raytraced - the exact same engine, the exact same features.
There shouldn’t be a difference between the different ways to render, but CfR is just not working as well as it could. For Rhino 6 you’ll be using the ViewCapture* commands on the Raytraced view you wish to capture. You can specify larger resolution and more samples than the active viewport has, so you can do fast look-dev, then capture at resolution and sample count of your liking.
I think I missed something… Rendered view uses Rhino render, Raytraced uses Cycles for Rhino, but CfR won’t be in Rhino? Aaaaand… CfR / Raytraced uses GPU for rendering?
but the import image component that converts color image to meshes causes the whole program collapsing, once which the image path has been synchronized. I wonder if this causes by the limitation of rh5, or I need to do some settings with the import image component.
By default this component is making a mesh with a number of vertices same as the number of pixels. So if you input a big image it could lead to big mesh. Put Xand y at 200 or 300 for example.
Hi @laurent_delrieu Thanks for your reply. It seem more likely the crash coming from the Mesh Eval component. Is there any other way the similar thing by using different component? Quilling_3d_rh5_test1.gh (1.0 MB)
There was a bug with mesh eval when there are no normals on mesh. So you have put normals on mesh.
I thought this was updated. Do you have the last version ?
Hi @laurent_delrieu Thanks for your suggestion. The Mesh Eval basically works now by adding deconstructing and constructing mesh component before it. But how to separate the spirals inside the Kingfisher.
Hello
The suppress “Suppress white polygons” is doing that but you must put an image with white parts. You will see {1,1,1} it is the white in 3d space. Grasshopper converts color to {-1,-1,-1} {1,1,1} cube. So I just filter colors by distance here.
You must link your Voronoi to the curve input
Thanks for your suggestion and tutorial. It really seems that the mesh eval does not work properly, which can not give the color value. I am just trying to solve this with converting to xyz - coordinate and extract the meshes manually. But in terms of the color, how can I get an average color value amount those colored vertexes in the poly mesh? Quilling_3d_rh5_test1.gh (1002.1 KB)
the images I use


 You can make paper thinner. You can play with Perlin noise parameters, see examples below with low noise, no noise, low scale and high noise.