@DavidRutten
Hello David some time ago you showed some beautiful images in Gallery
and also how Custom preview works.
It works well, except I have no Shinyness with create material, in rendered and raytraced mode. When I bake, the material has no glossiness and no reflection.
If I use a material already in Rhino it works.
Does I miss something ? I use BETA (6.0.18012.13241, 01/12/2018)
Thanks
Hello
I just installed the SR4 version, I still have the same behavior. When I bake in Rhino
The diffuse color is OK
The specular color is set to GI
The reflectivity is set to 0%, whatever I do, it I input value between 0 to 1 or 0 to 100 ??
Transparency is OK.
Could be good to have Reflectivity working, with a value like transparency between 0 to 1 ?
@laurent_delrieu, your test file looks the same now as it did ~two years ago, the ‘S’ (Shine) input to Create Material has no effect (R6). What is the recommended procedure for assigning materials to Custom Preview without defining them in the Rhino file first?
Hello @Joseph_Oster,
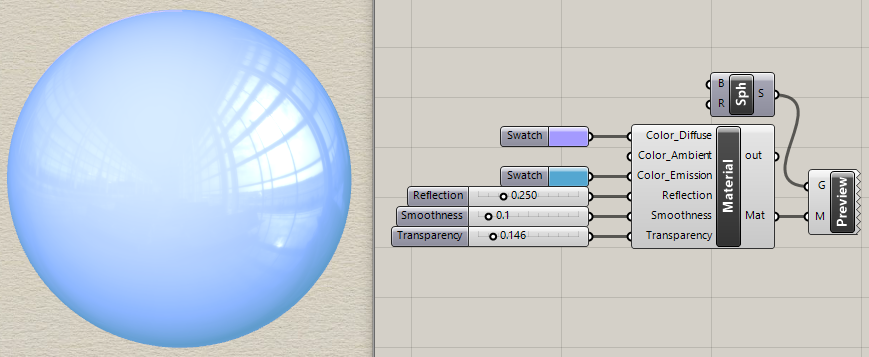
I have a little script that allows me to have some Shininess and Reflexion. As you program it will be easy for you to tweak it if necessary. I have already published it here in this forum and I am quite sure it is from David Rutten code.
    Reflection = Math.Min(Math.Max(Reflection, 0), 1);
    Smoothness = Math.Min(Math.Max(Smoothness, 0), 1);
    Rhino.DocObjects.Material material = new  Rhino.DocObjects.Material();
    //material.SetBitmapTexture(fileName);
    material.ReflectionColor = Colour;
    material.DiffuseColor = Colour;
    material.AmbientColor = System.Drawing.Color.Black;
    material.EmissionColor = System.Drawing.Color.Black;
    material.Reflectivity = Reflection;
    material.ReflectionGlossiness = Smoothness;

    var renderMaterial = Rhino.Render.RenderMaterial.CreateBasicMaterial(material);
    Mat = new GH_Material(renderMaterial);
Thank you kindly @laurent_delrieu. That code from David was from here?
I hacked it up a little to add more params, though I don’t know C#. It works. The reflection is from setting the Environment (not as obvious as one might think ).
To review what I’ve learned about defining materials in R6 over the last few days… Four ways?
Right-click the ‘M’ (Material) input to Custom Preview and choose from the list of materials created in a Rhino file. This has a BIG ADVANTAGE over method #2 since Grasshopper apparently retains the material definition so it still works when the .3dm file (where the material was defined) is not present. Also, the material can be defined on a layer, avoiding a glaring exception error.
A) When the material name is not found in the current .3dm file or B) When the material was defined on a layer instead of using the ‘+’ in the Materials pane; actually, it can happen then too. Method #2 appears to be flawed?
The standard Create Material component. This seems like a far better approach than depending on a Rhino .3dm file in any way but it too is flawed. The ‘Shine (S)’ input appears to be broken.
I applied method #4 to all three files in my current project but was stumped by the inability to rename the output of the C# component to match my programming convention of naming one or both ends of wires…
So I decided to cluster it. At first, I passed geometry to the cluster, thinking I could include the Custom Preview internally. It worked for rendering but baking the cluster had no effect so I had to make it external again.
Still, this is an improvement for me so I created a User Object from it (mMaterial, attached). If one is careful to “disentangle” it from dissimilar copies (standard procedure for working with clusters), unused inputs (I added one more) can be removed to make it more compact.