Unfair and set-up comparisons by xNURBS

I don’t get it. Why is all the intentional unfair bashing of Rhino’s tools by the guy behind xNURBS plug-in? xNURBS is a very nice multi-sided patch tool, but I’m not sure that using bad input geometry on purpose to show how Rhino’s surfacing tools will produce also bad output geometry is a honest way to promote that plug-in and show how good is it. The majority of examples that the xNURBS team or the person behind if posted over the past few years clearly have many imperfections, despite the narrative that promises superior quality.
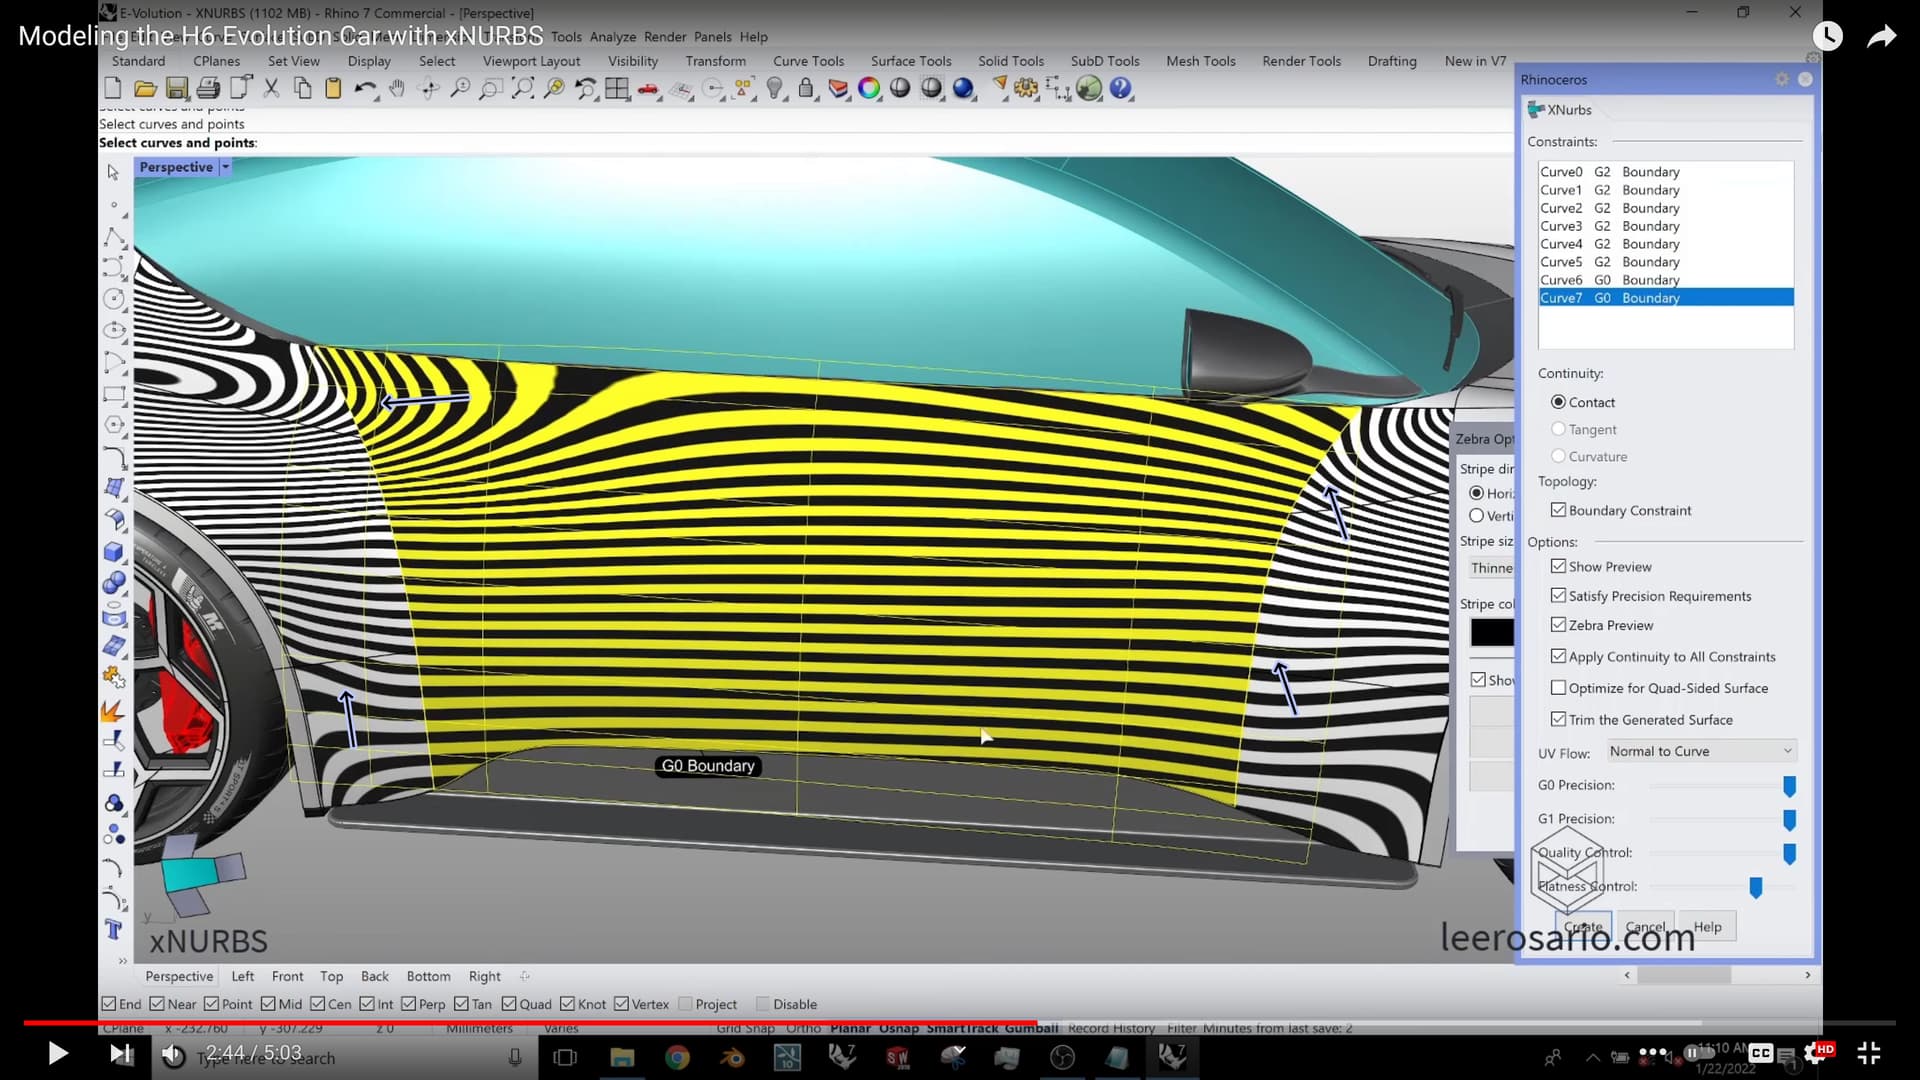
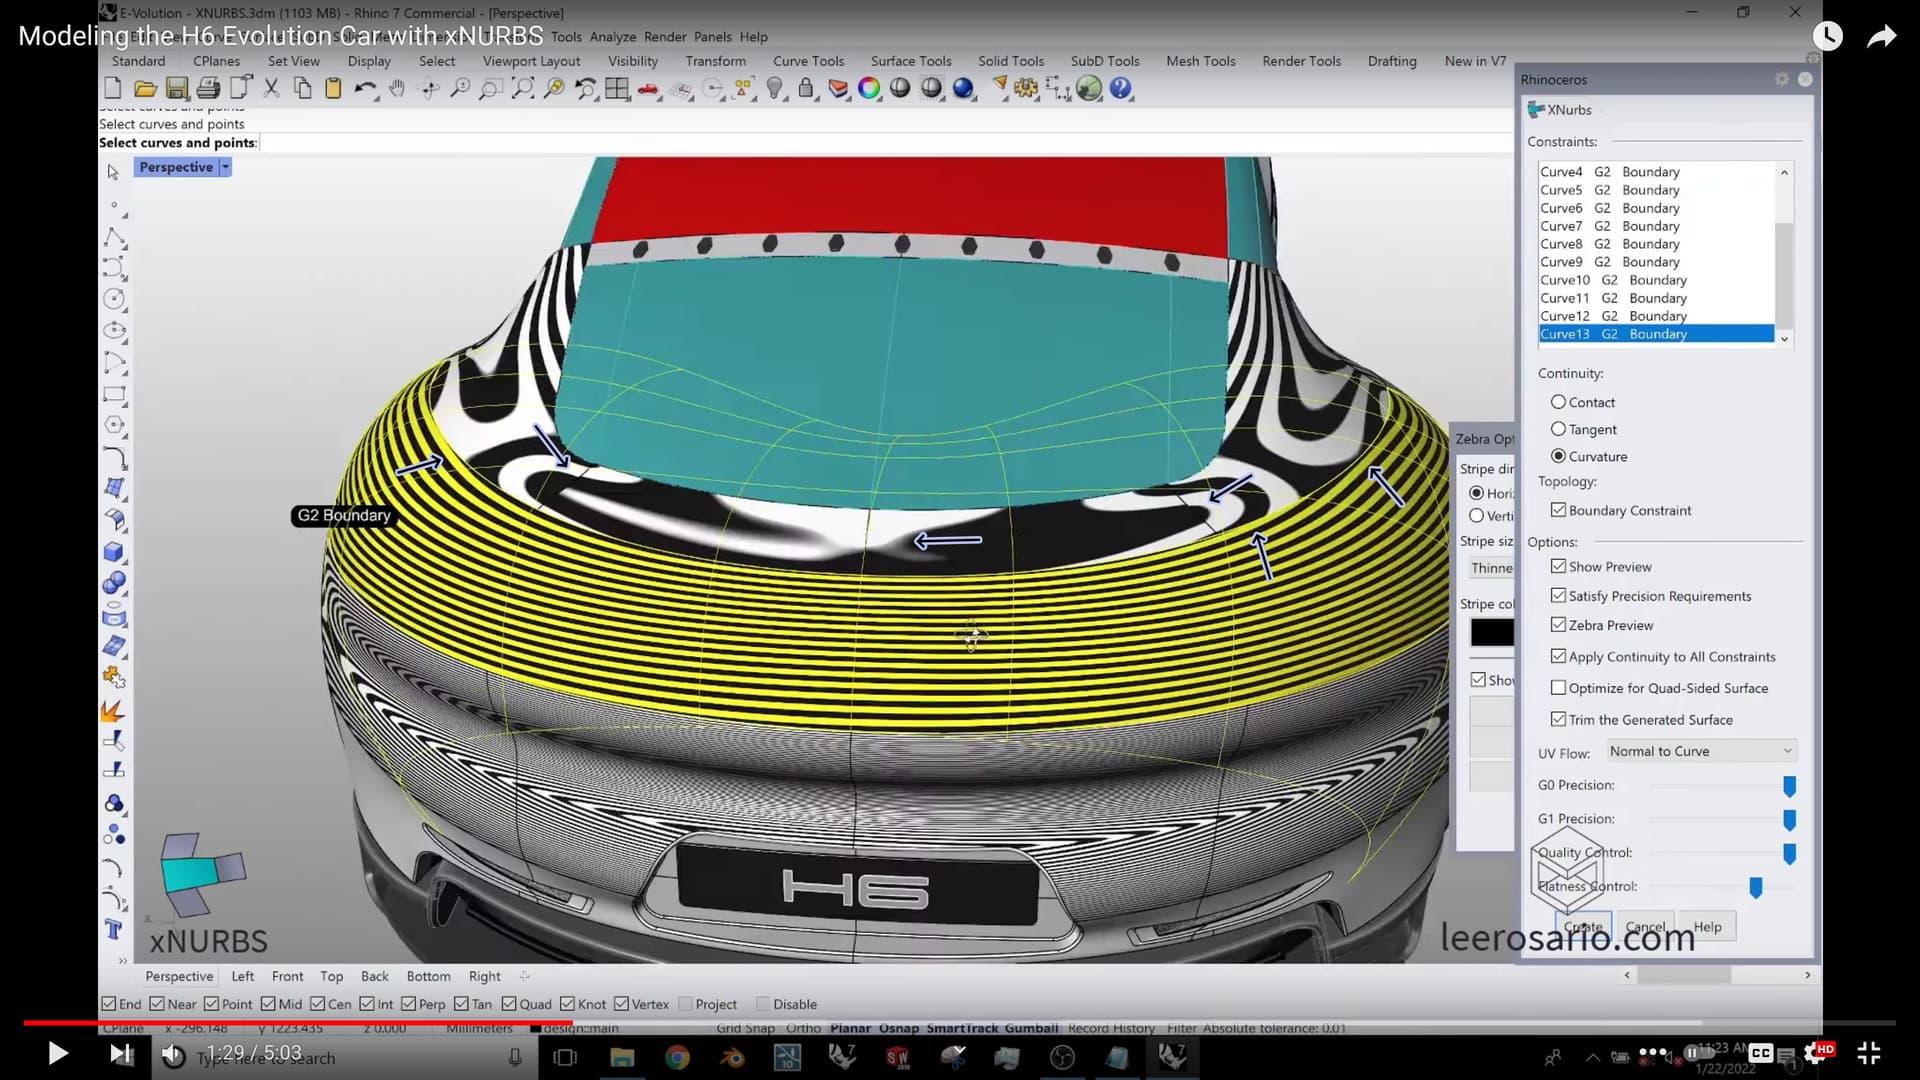
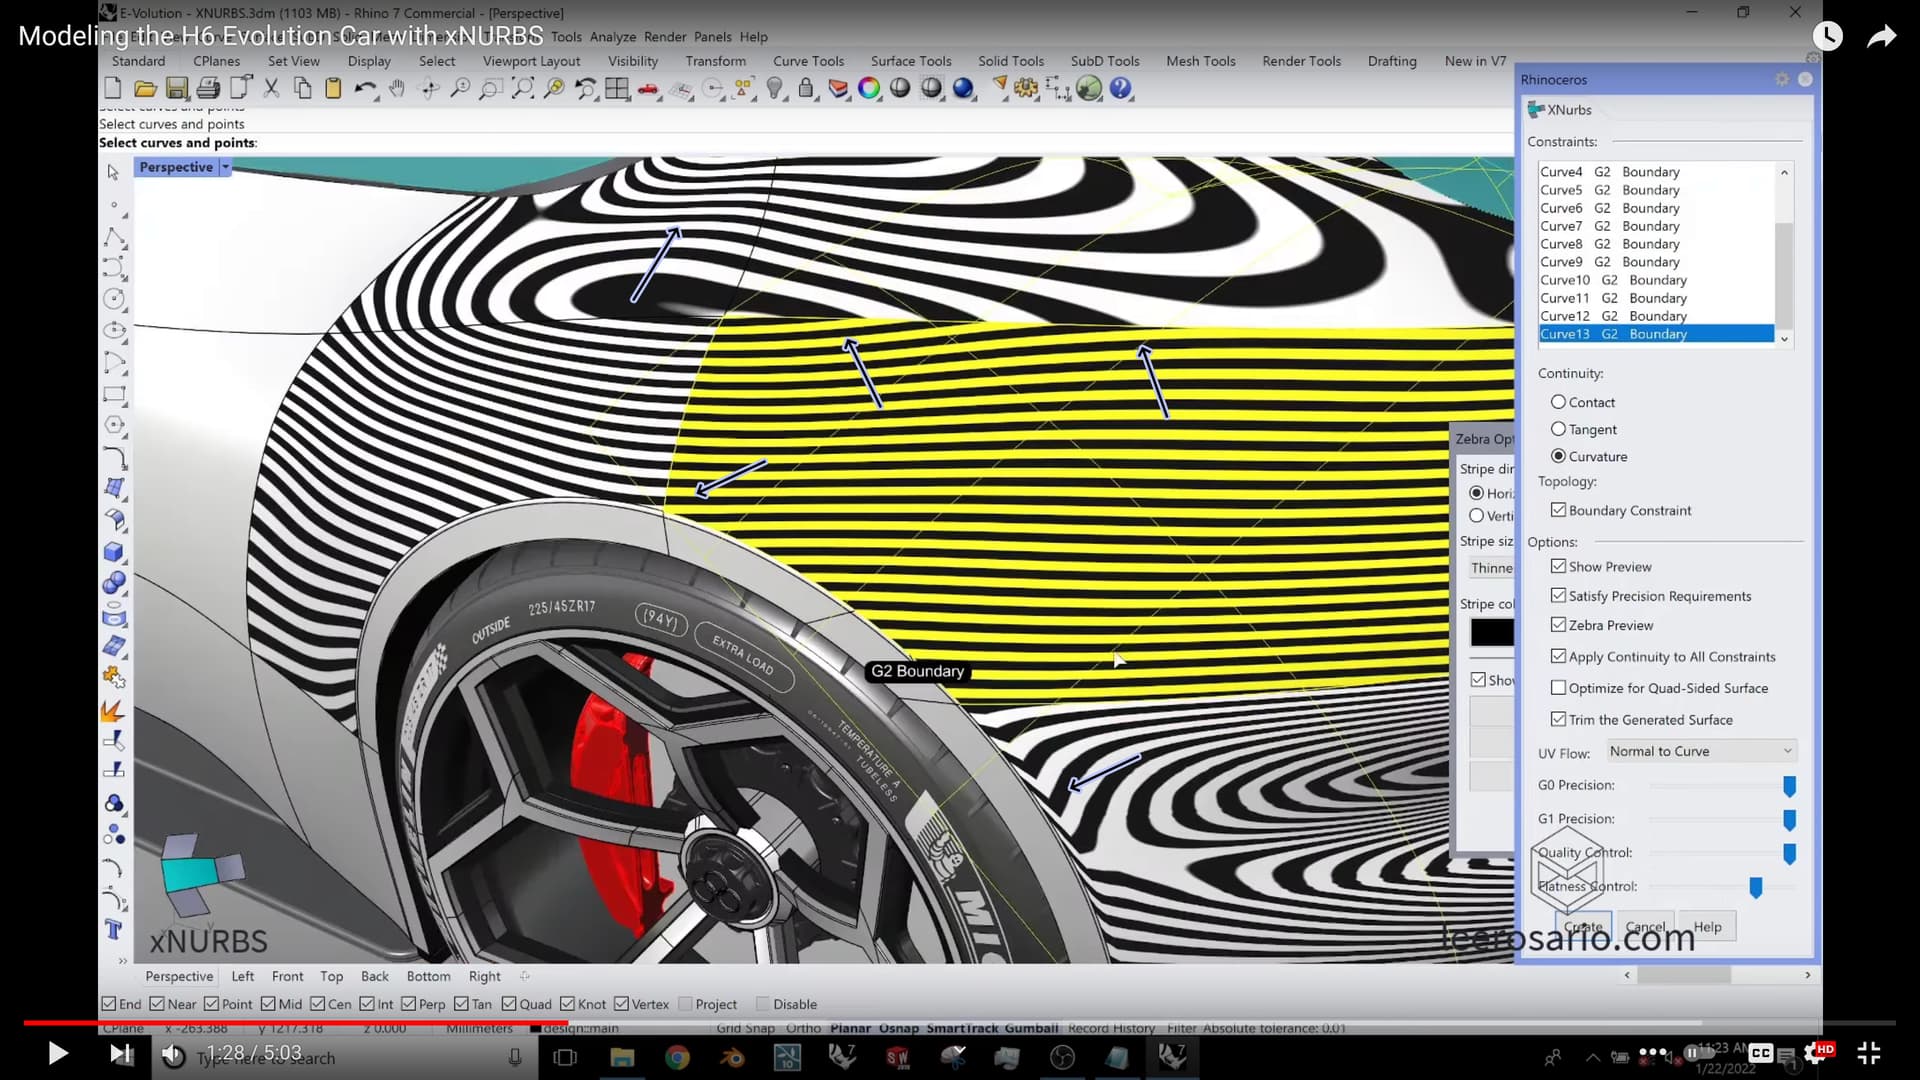
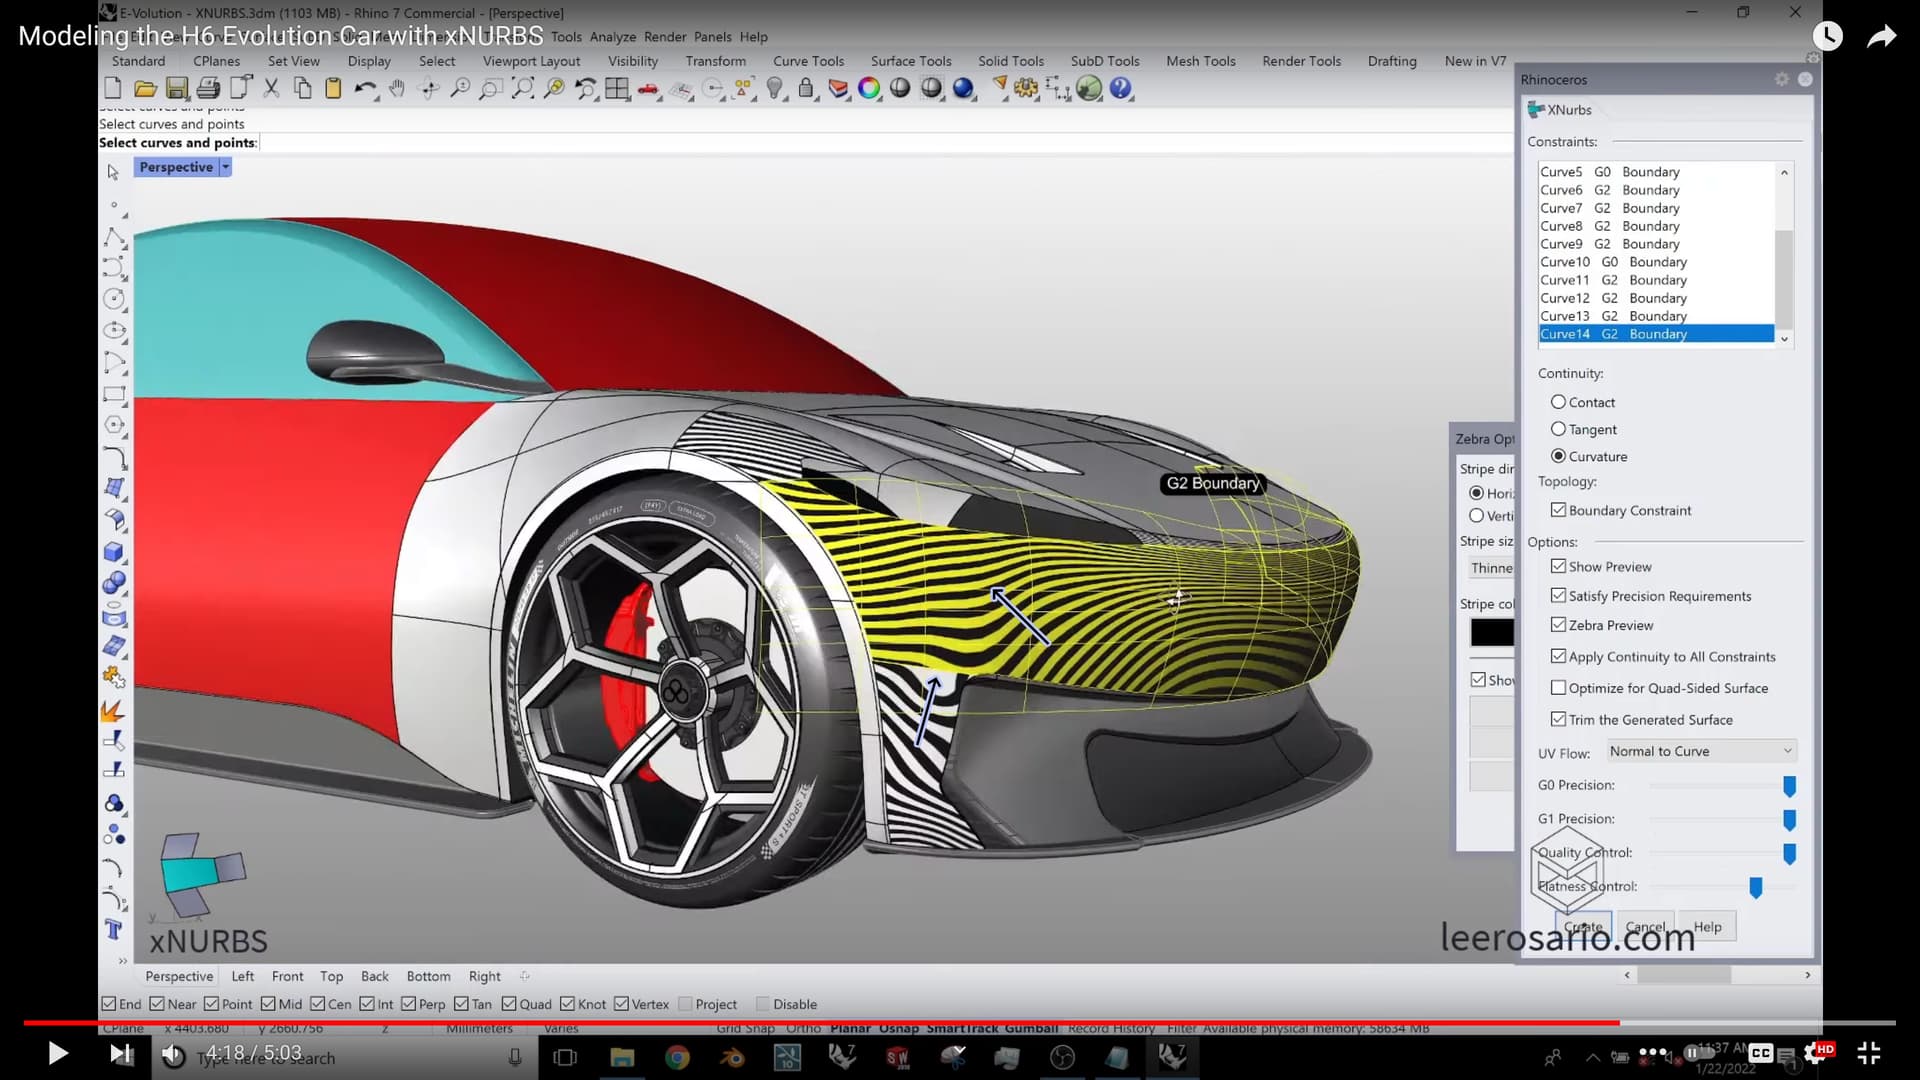
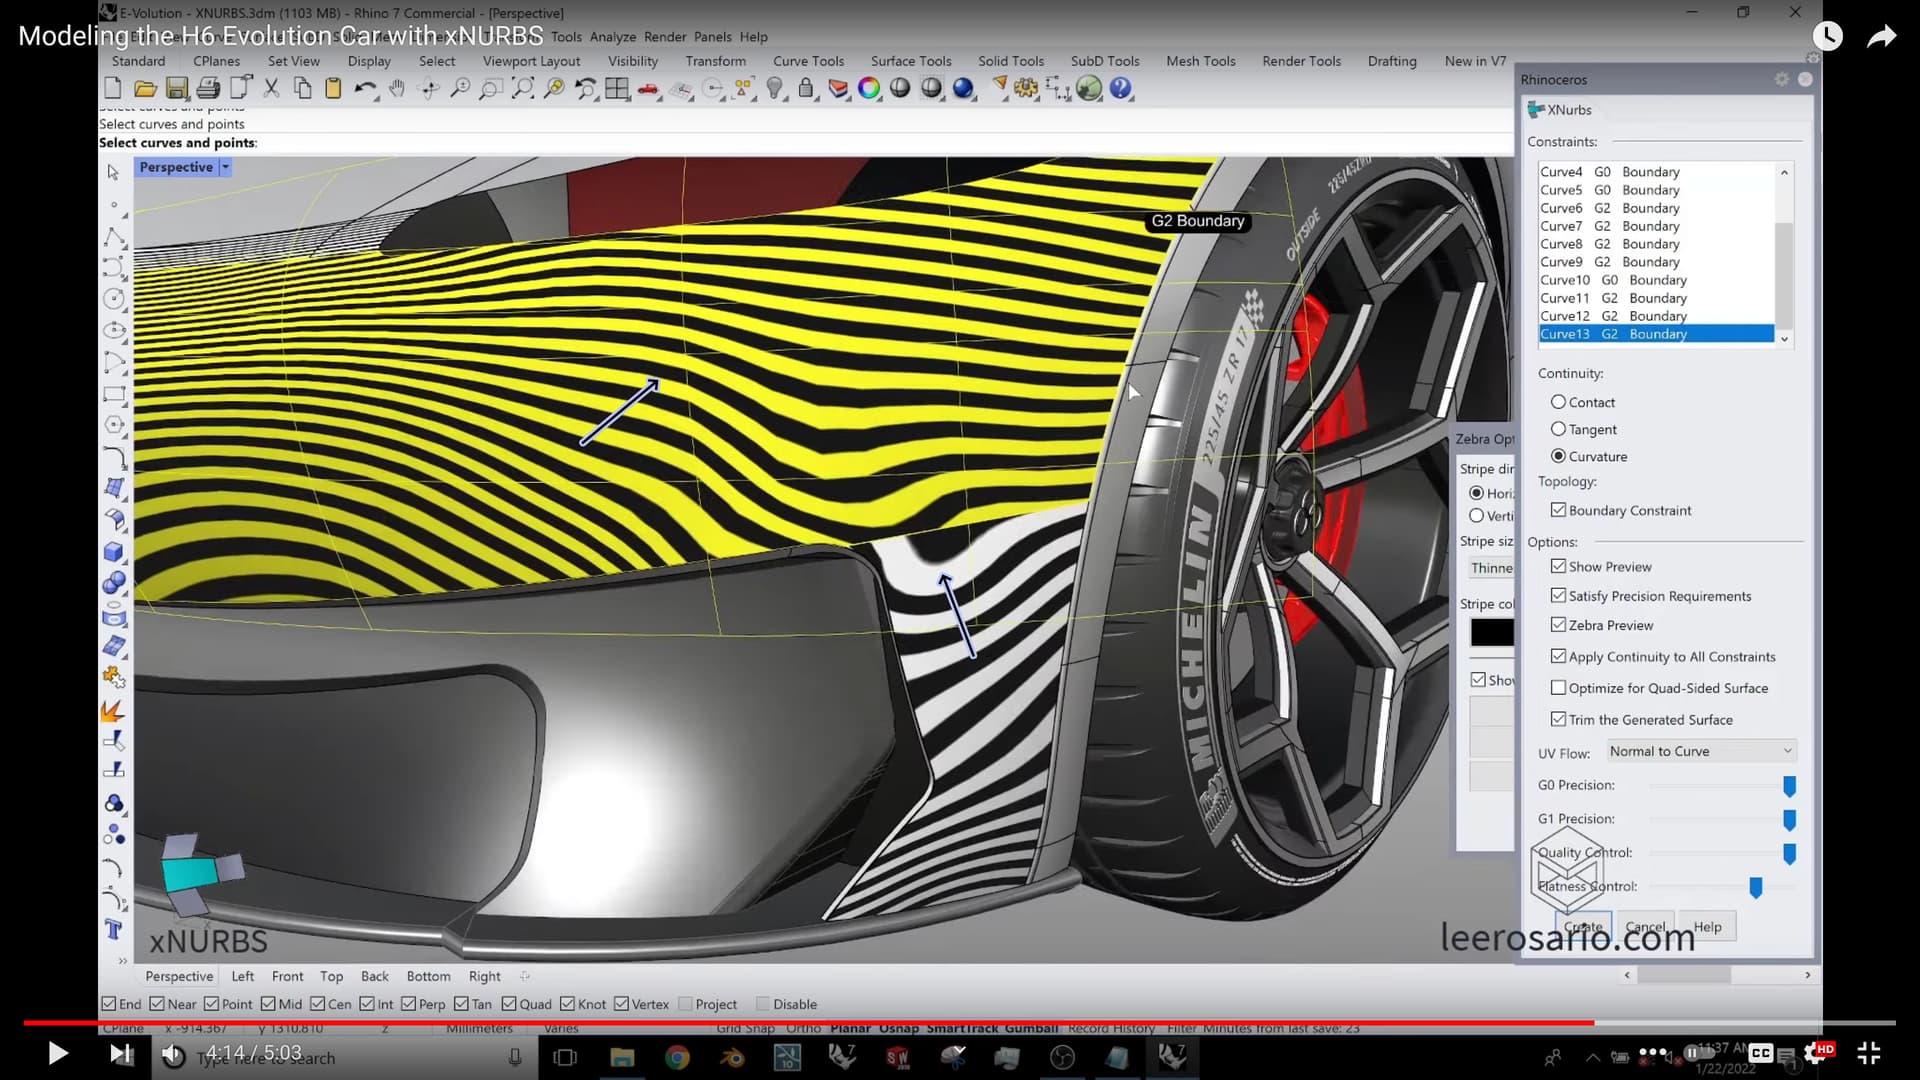
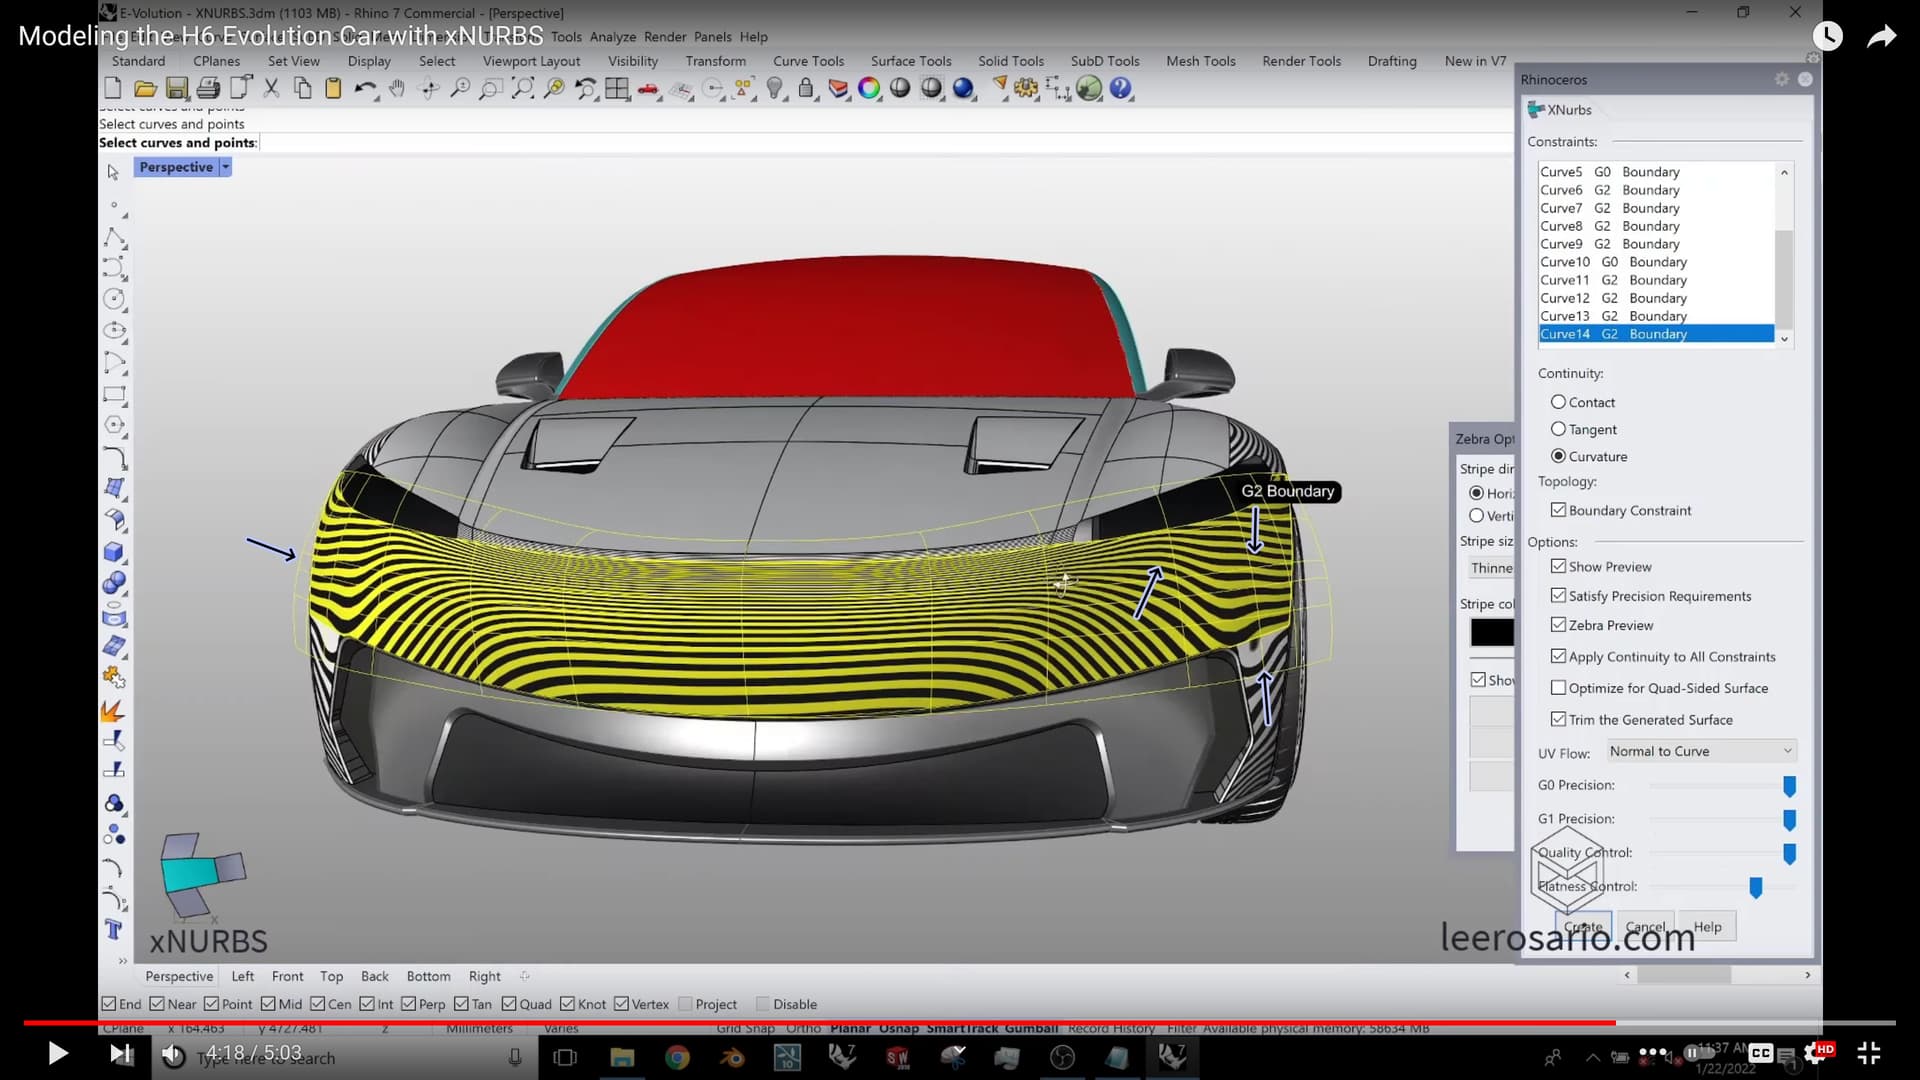
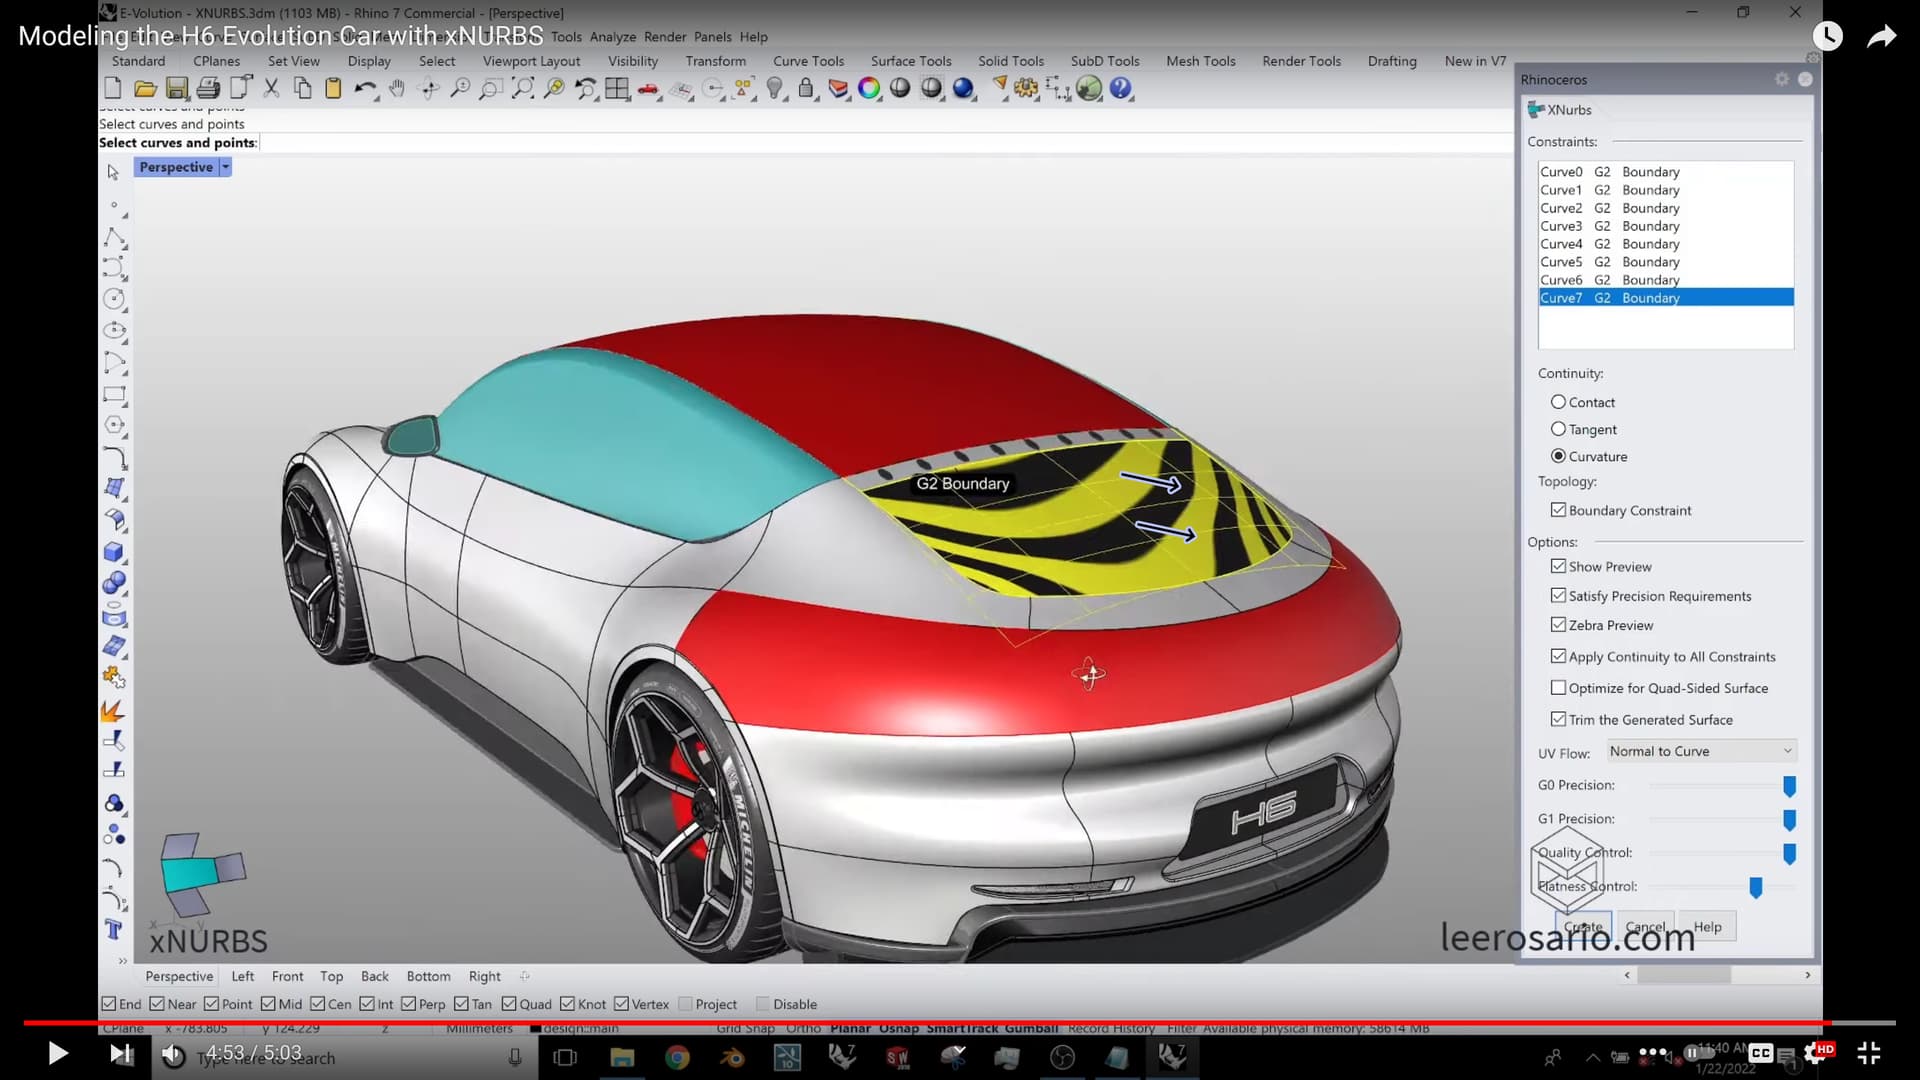
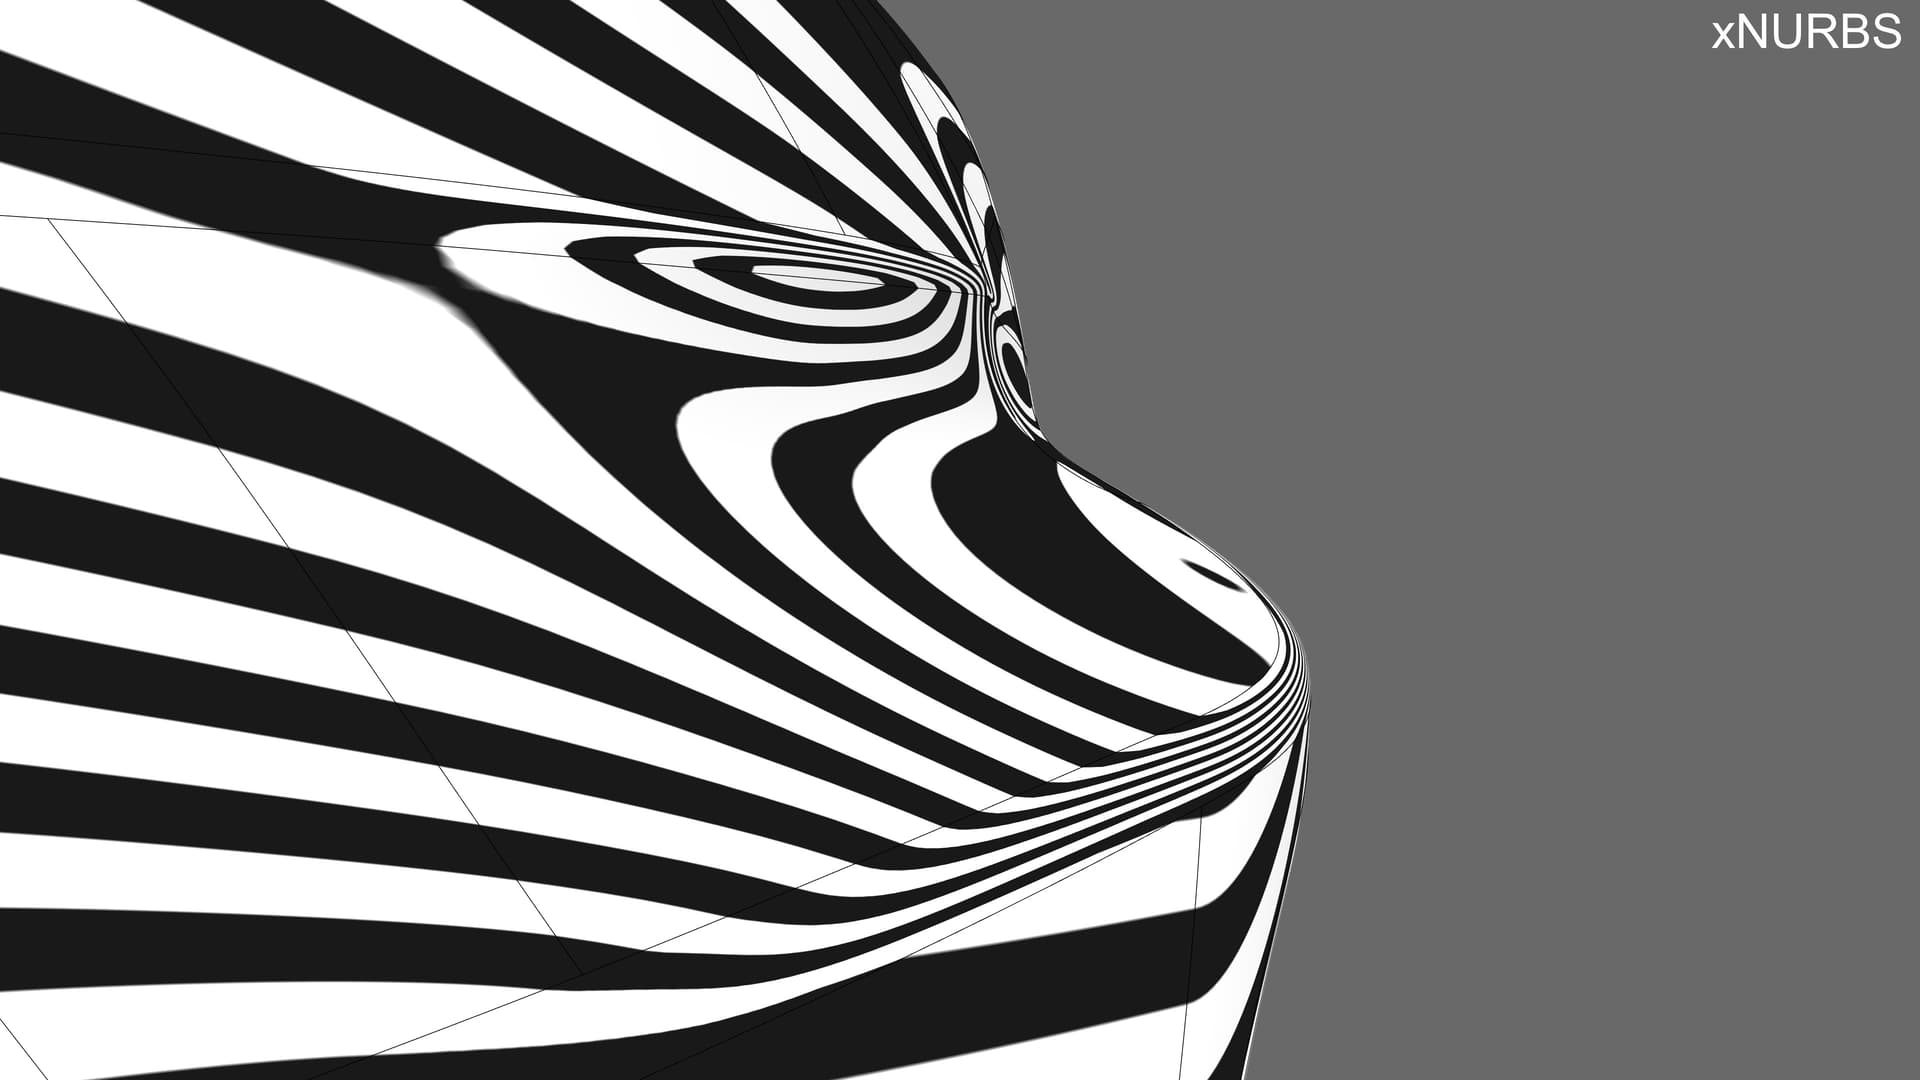
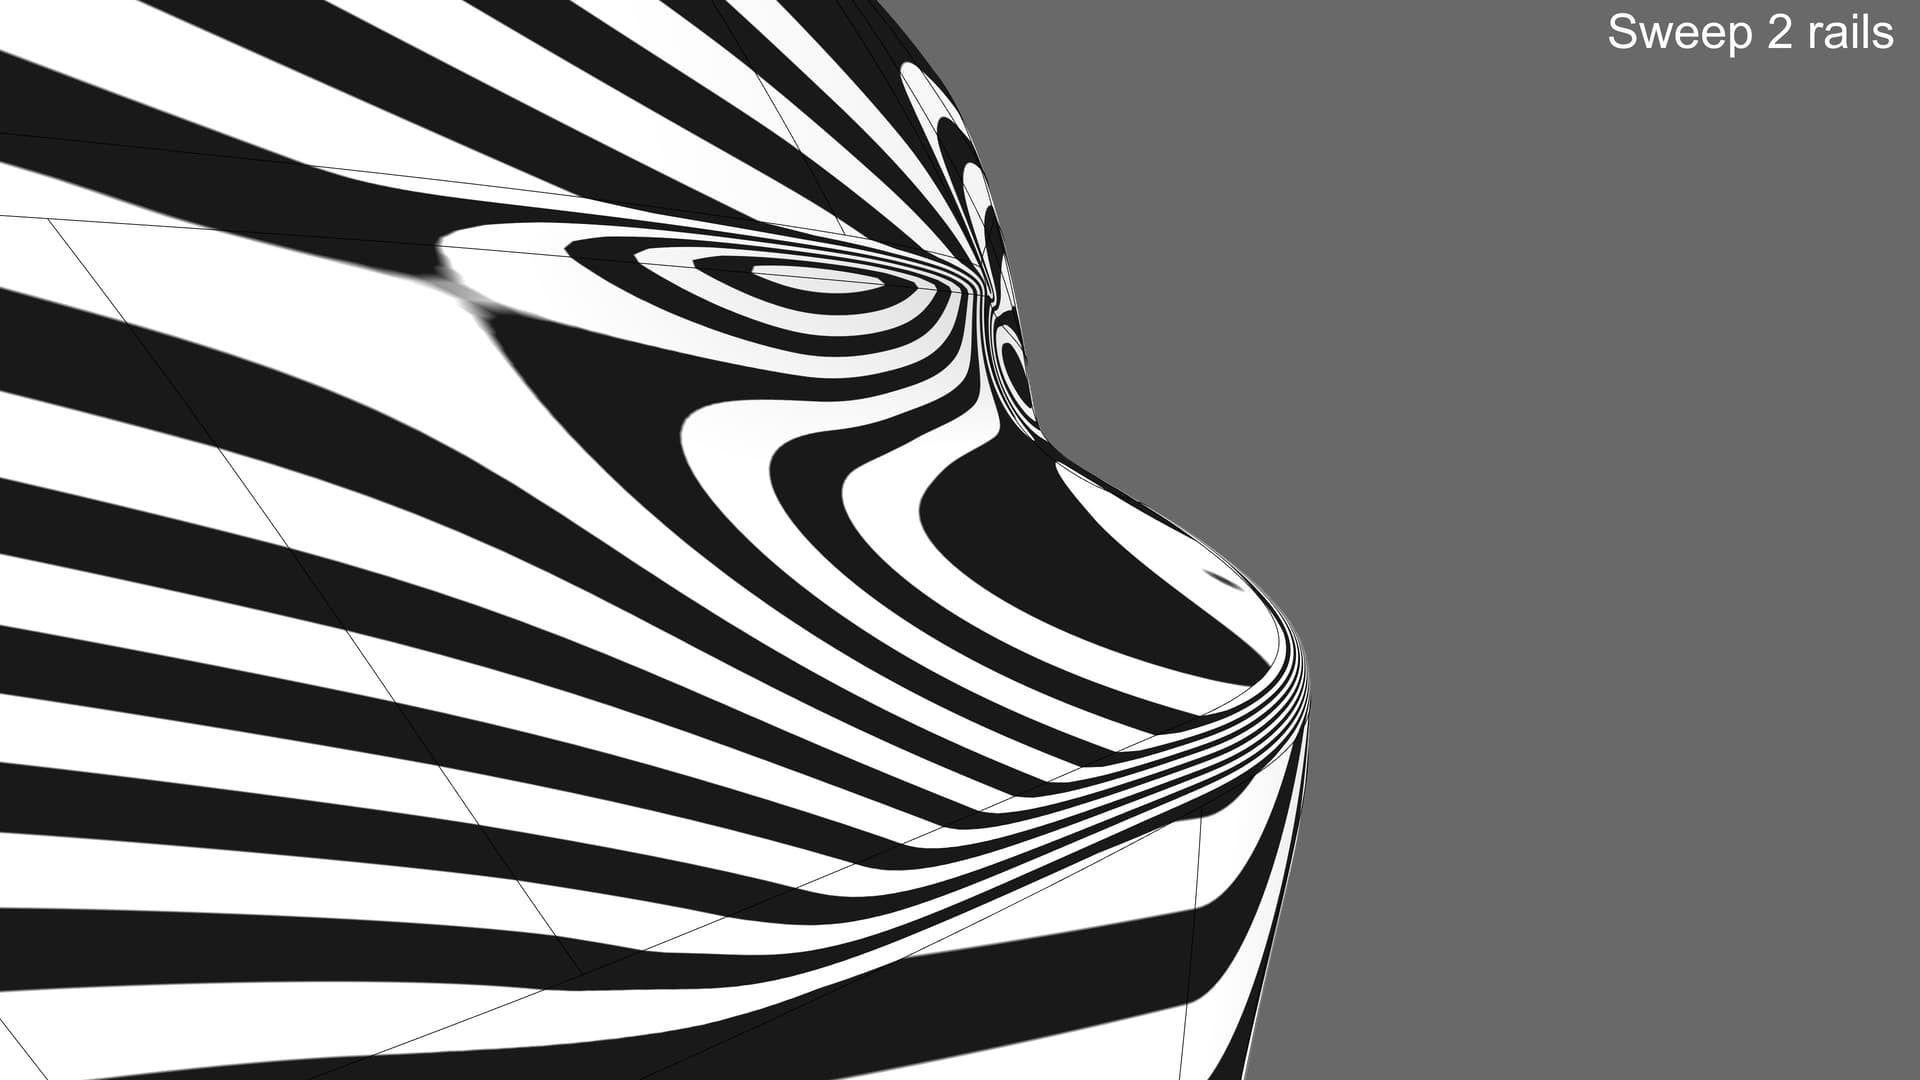
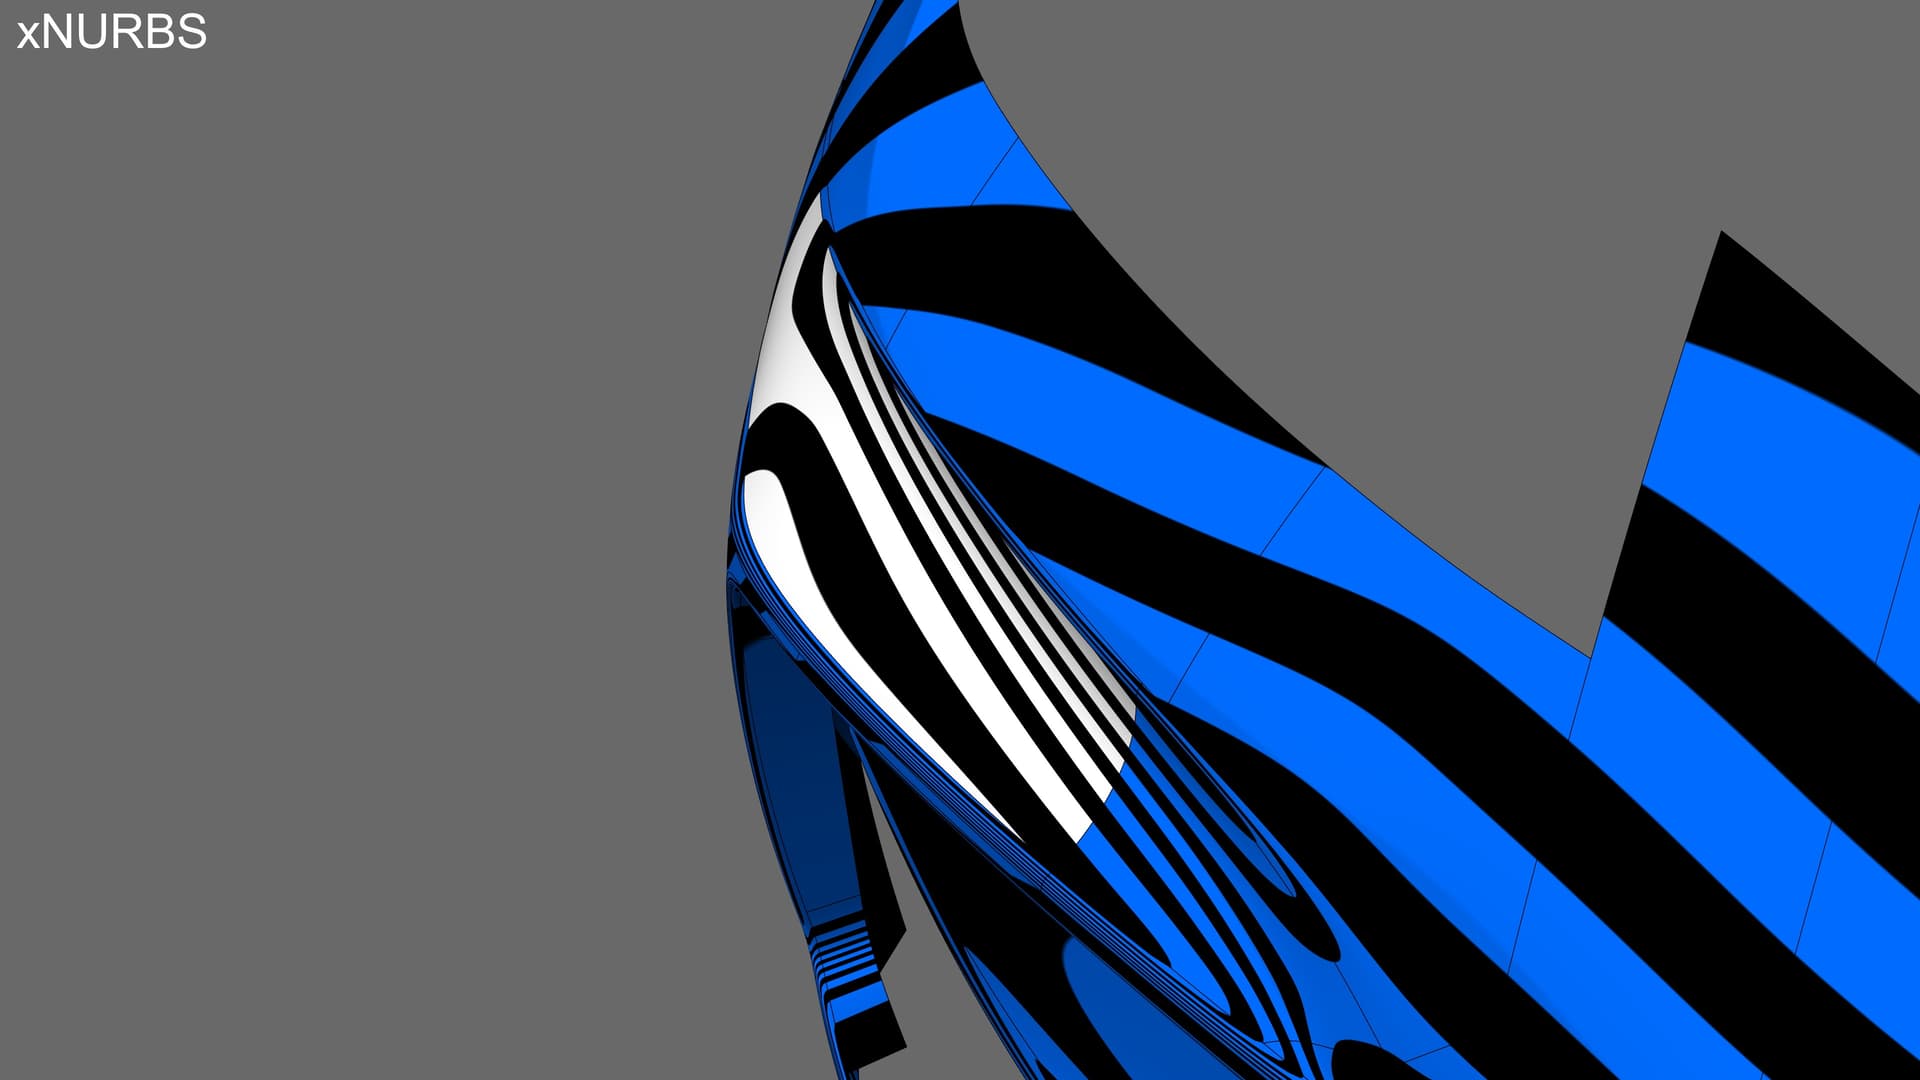
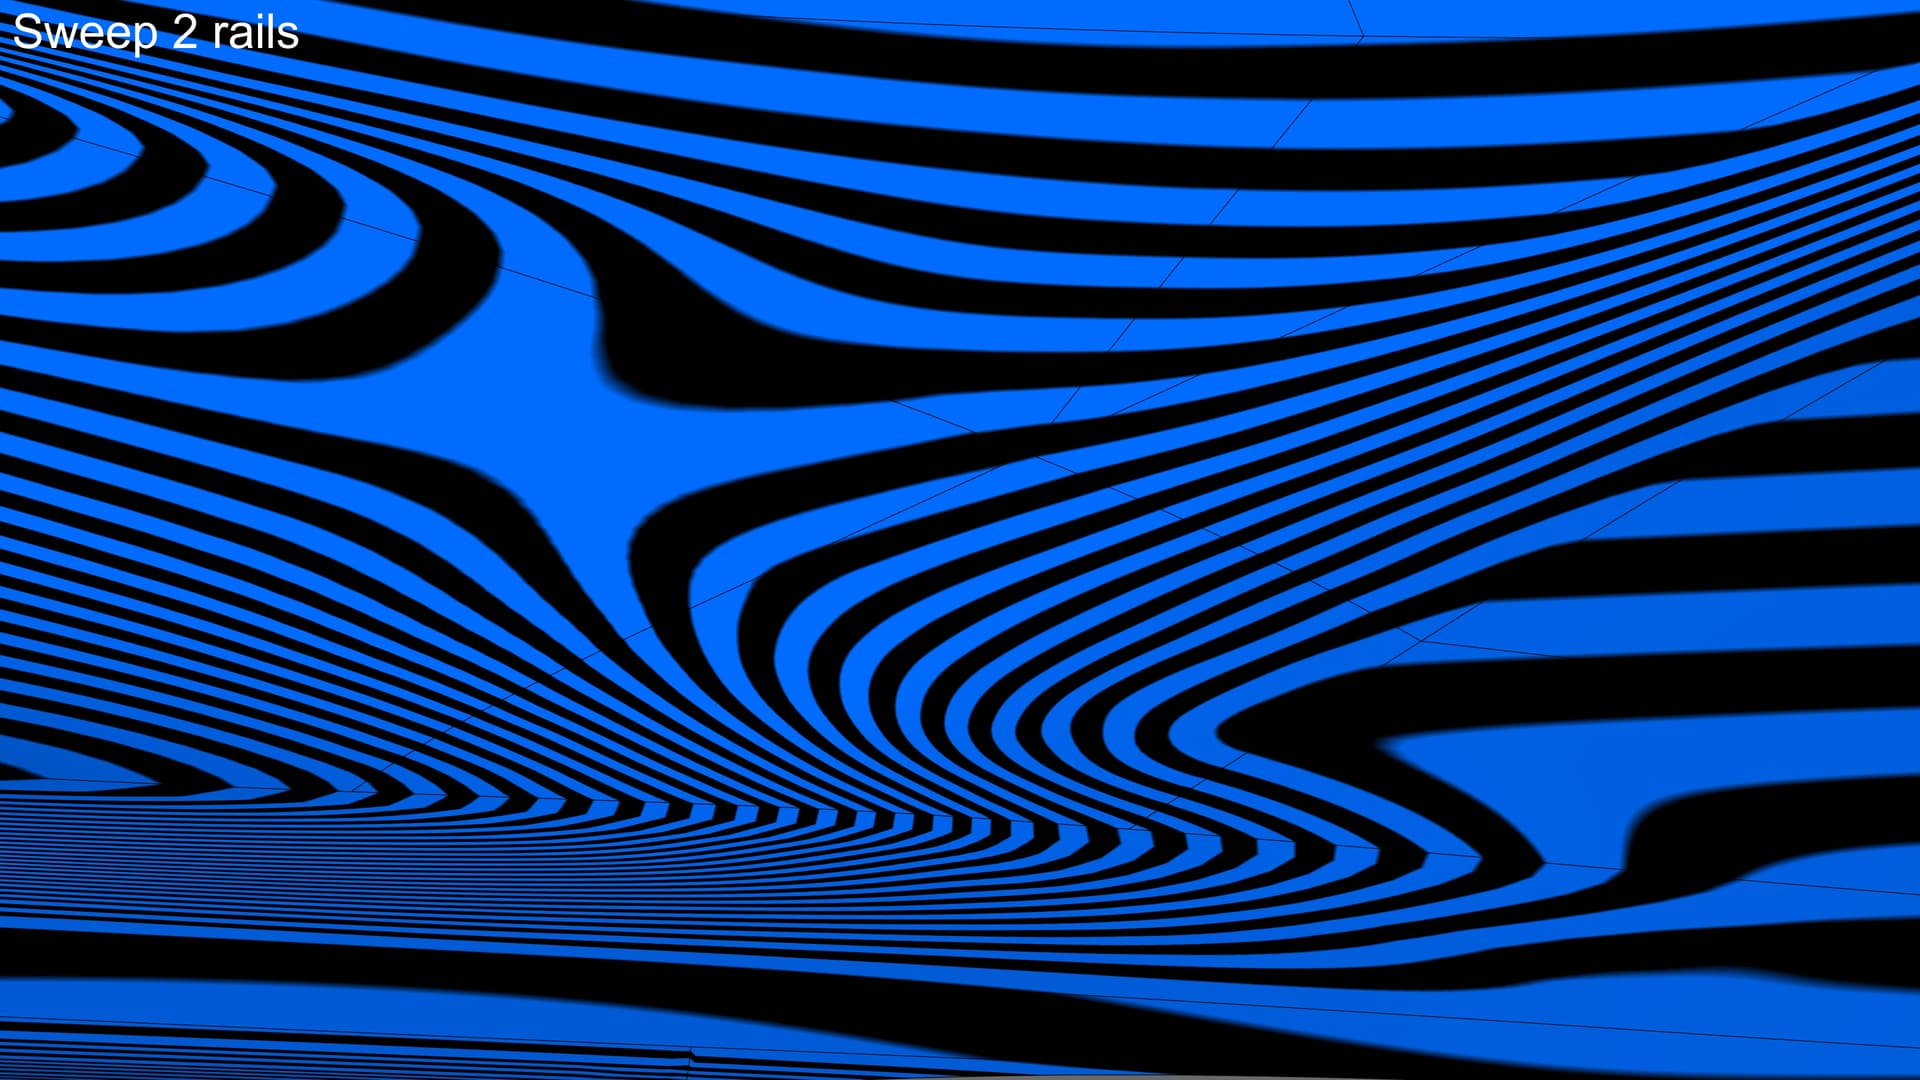
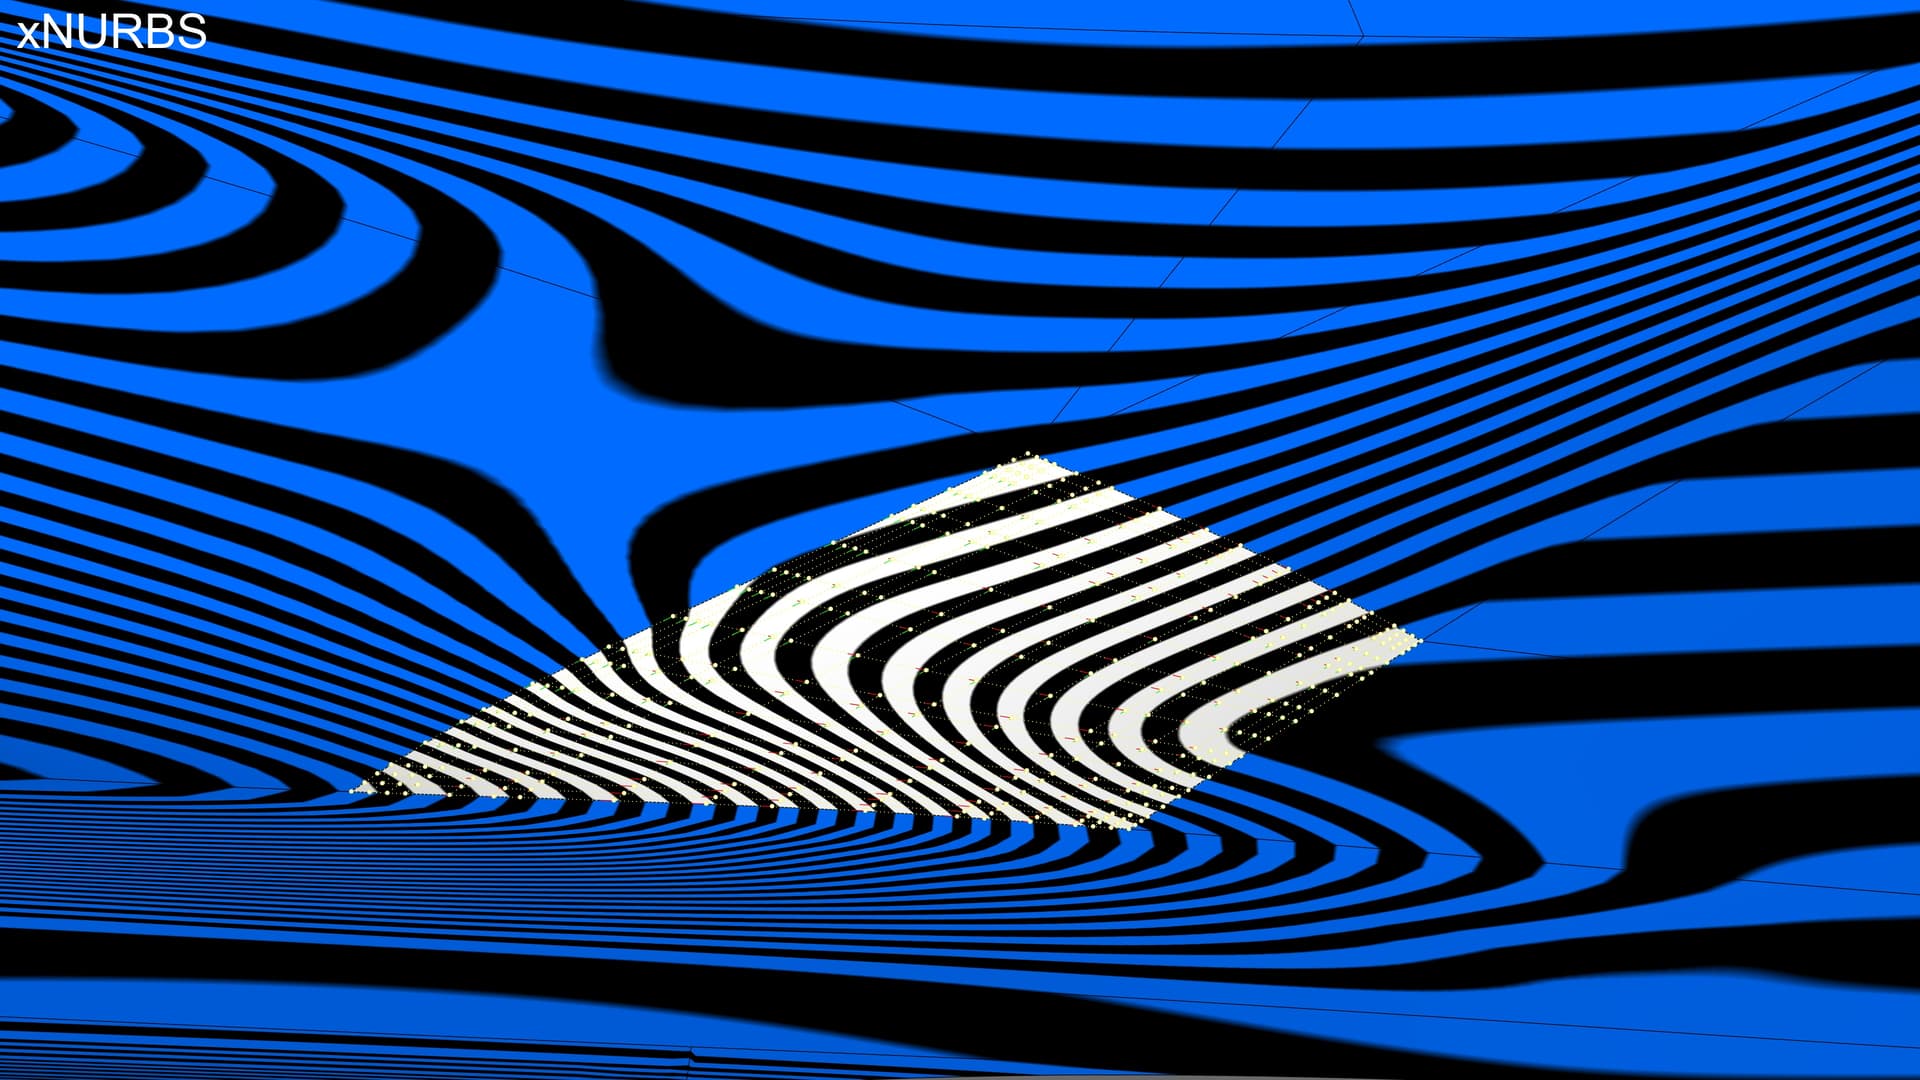
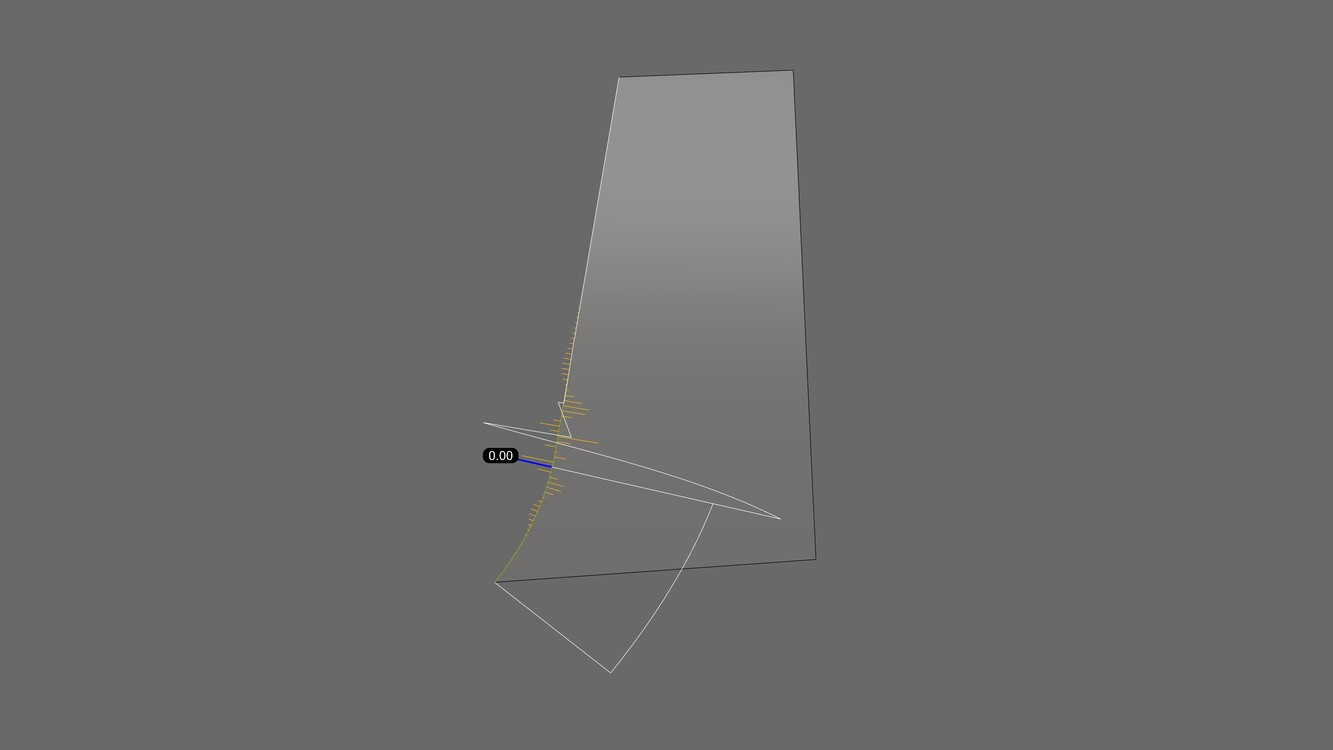
Take this video, for example. It shows a bunch of low quality curves populated with an unnecessary amount of control points placed at random locations to make the modeling more difficult.

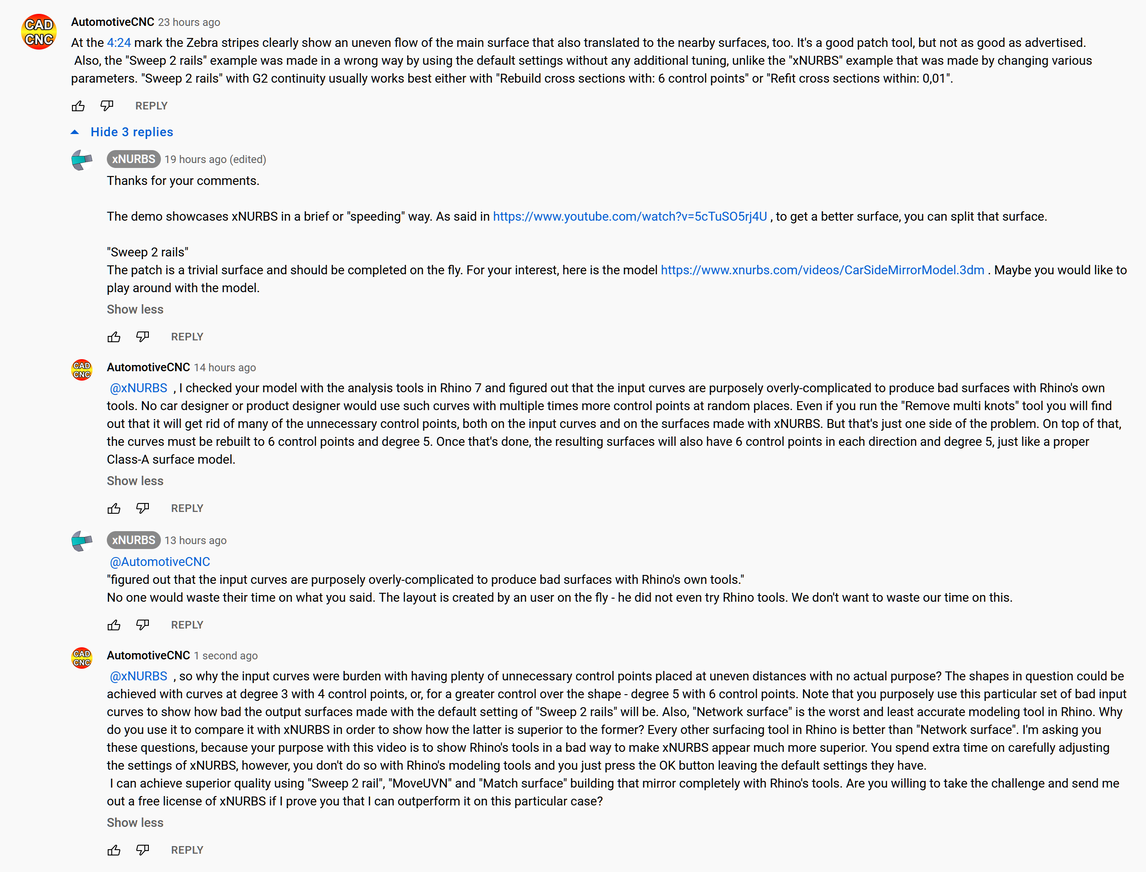
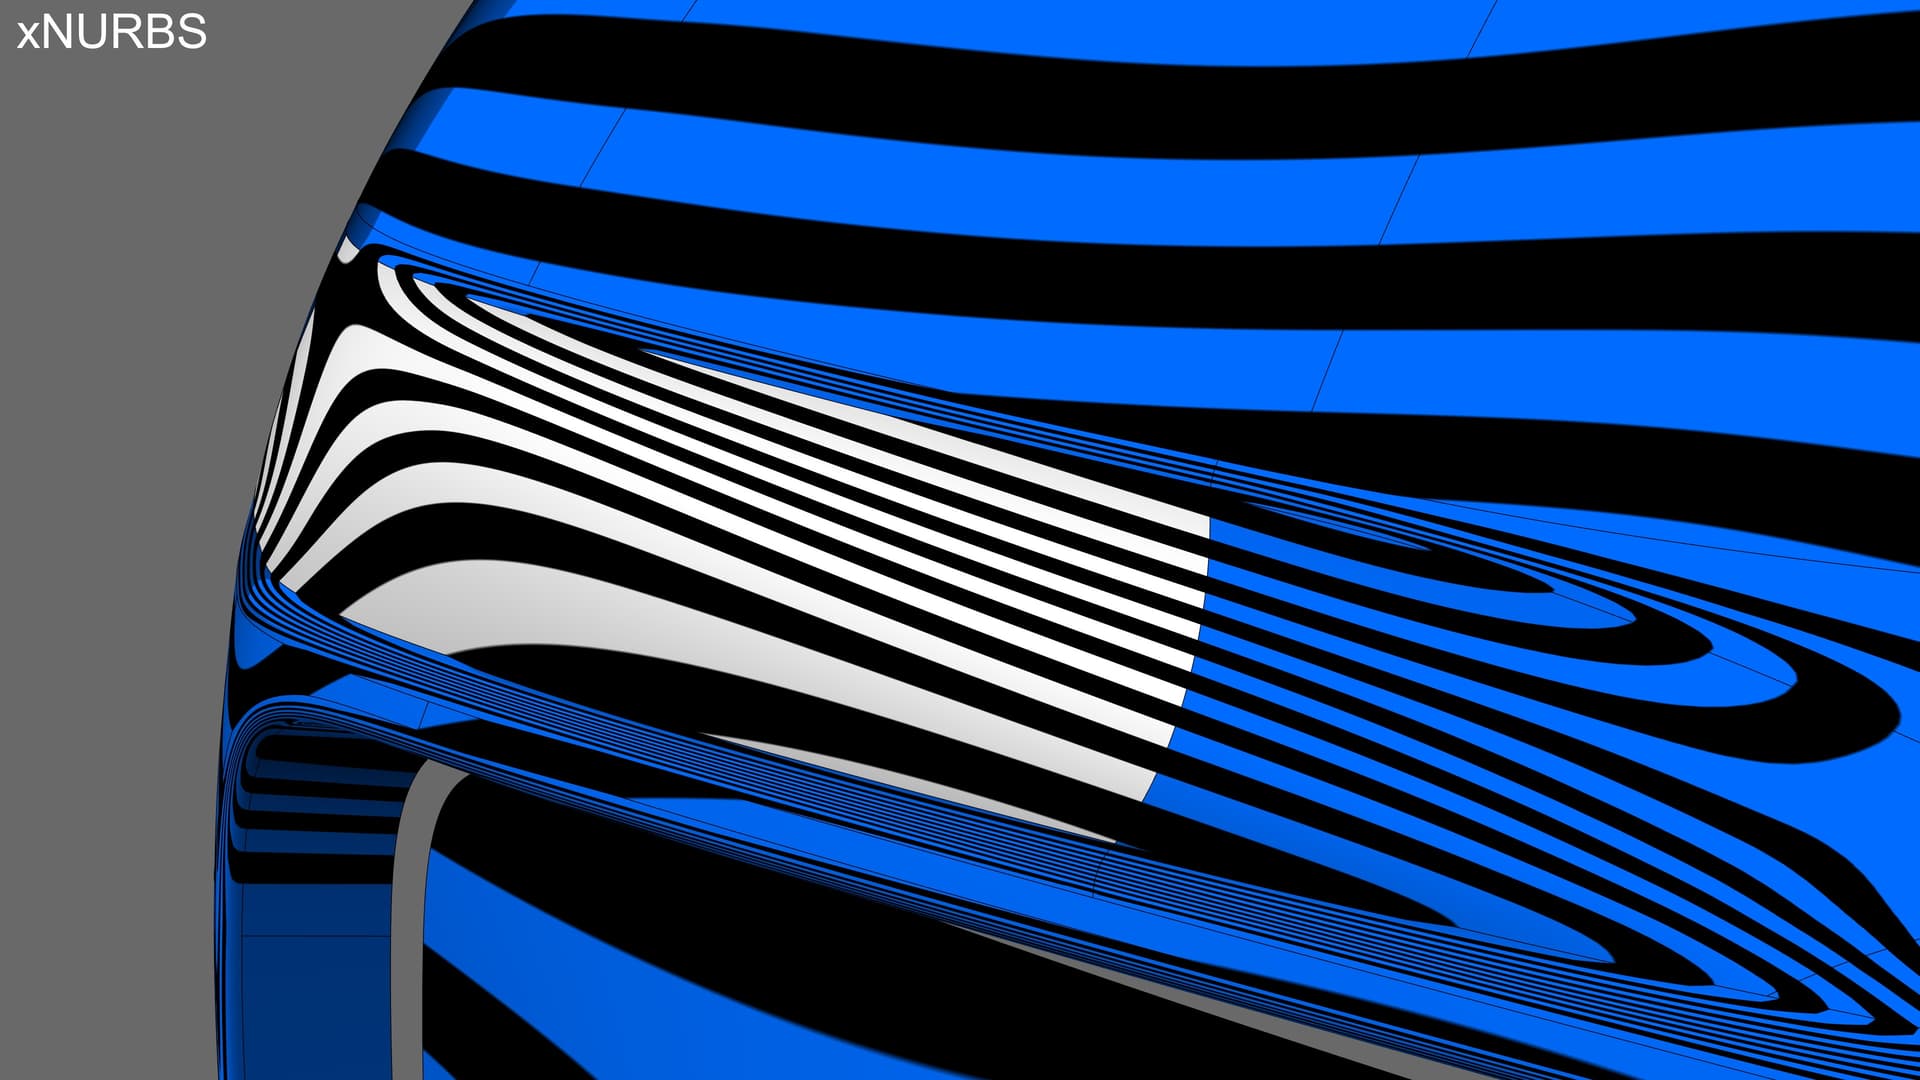
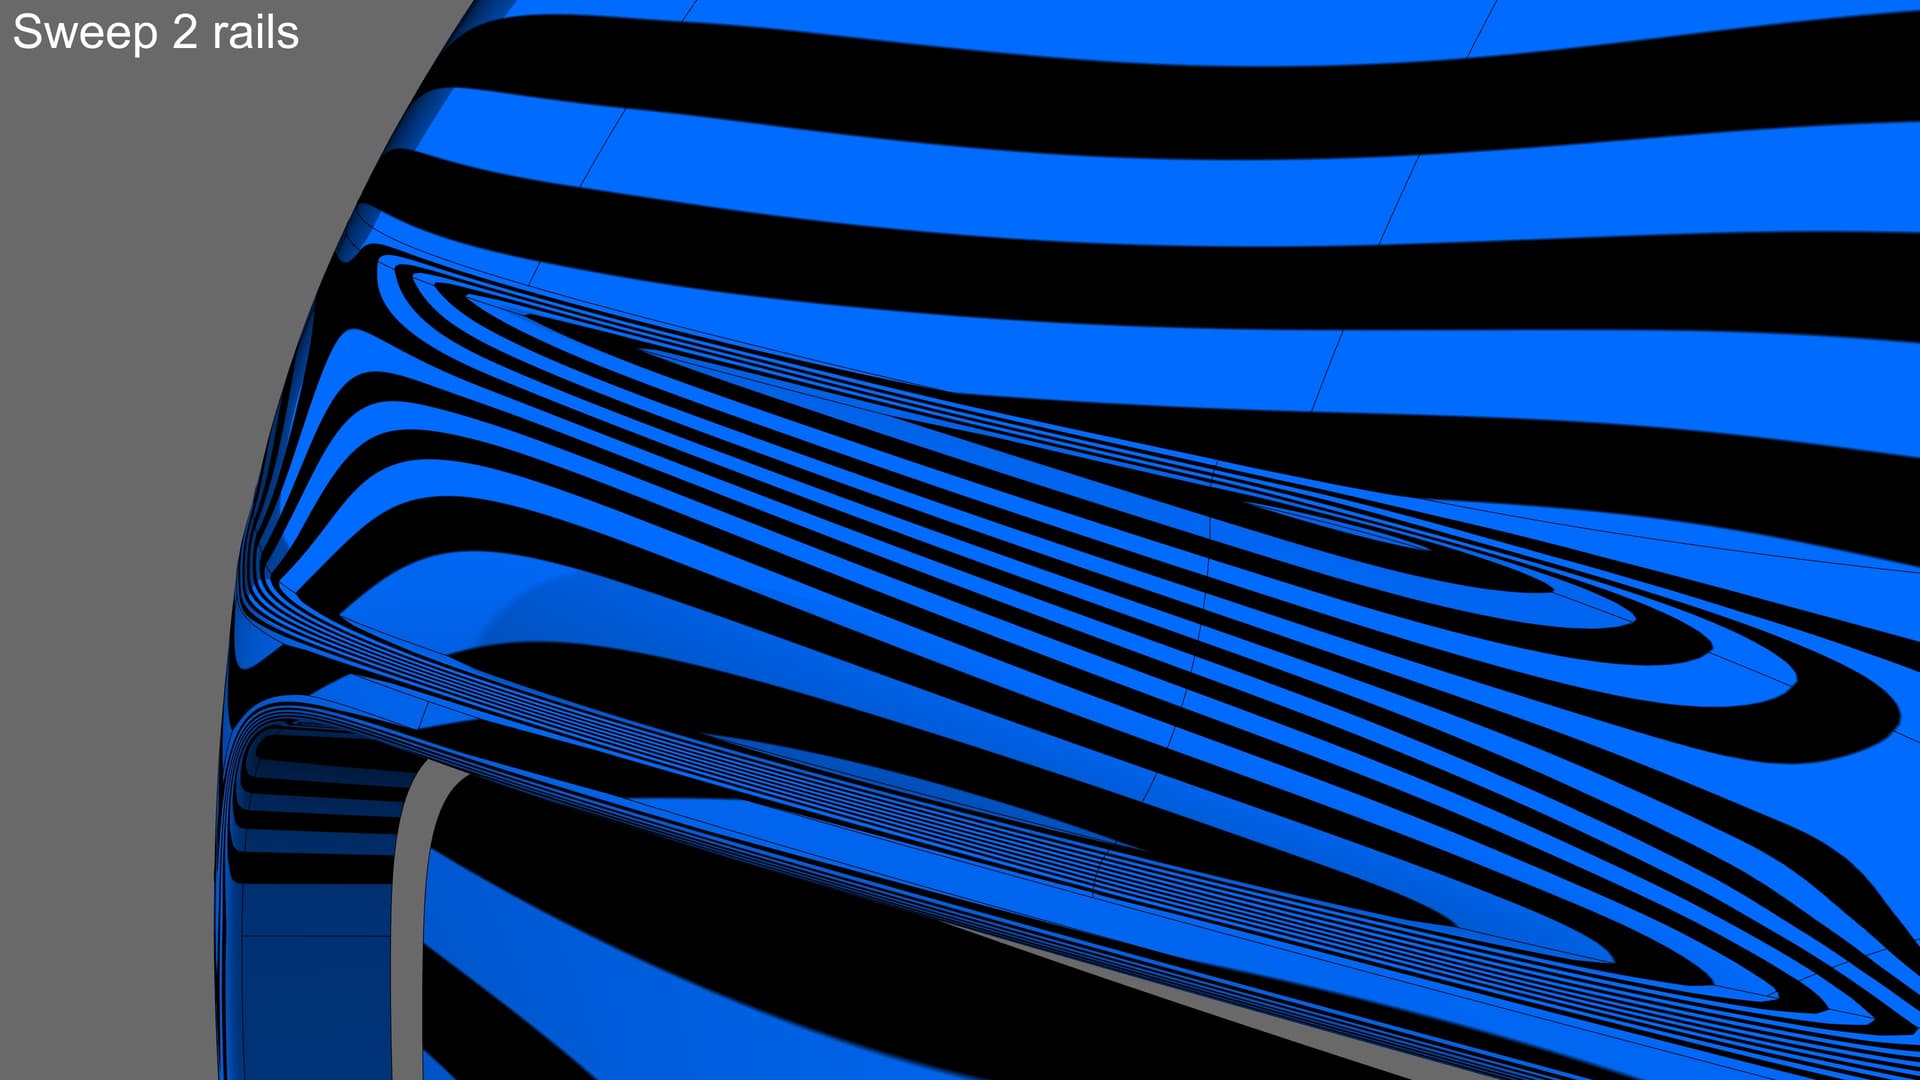
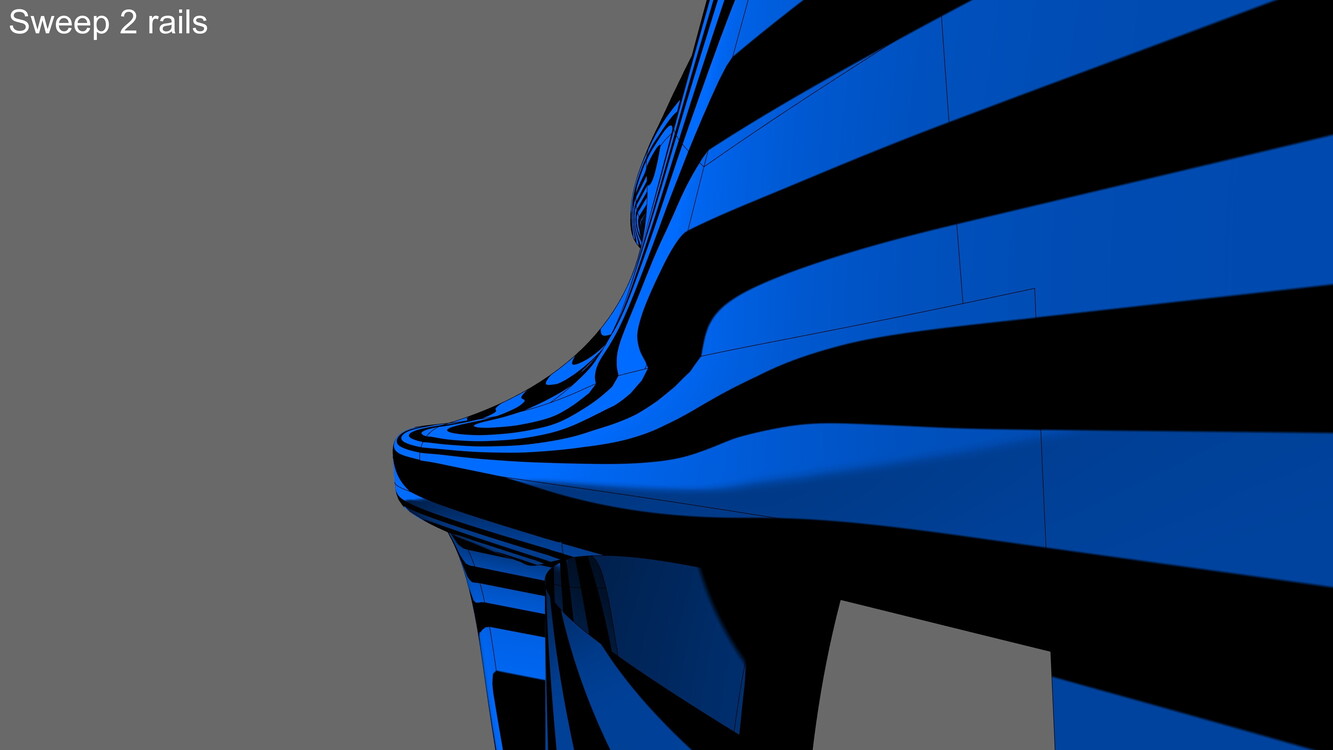
We are having a nice civilized conversation with the gentleman on YouTube under this particular video and he is yet to answer why the geometry in his videos is always setup to perform very badly with Rhino’s surfacing tools prior capturing the videos where xNURBS is eventually shown as the proper solution for these fabricated “difficult cases”. He also tends to compare xNURBS with “Network surface”, which is not a correct way for comparisons, because the latter uses approximation of the input geometry, heavily depends on the user’s settings (which he never does and just clicks the “OK” button) and is widely known as the least good surface tool in Rhino. He also makes some quick comparisons with the “Sweep 2 rails” tool, but again, all he does is to immediately click on the “OK” button with the defaults settings, rather than trying some proper settings prior that. Again, xNURBS is a great tool, but I think that it’s unfair to use such fabricated tactics. I know that it’s a business and companies or sales individuals why try hard to present their products as the best of the best, but at the end of the day, there must be some degree of honesty. It’s like taking a Ferrari on an off-road trip and claiming “That car performs really badly on that rough surface”.

Over the past few years, there have been multiple posts regarding xNURBS on this forum and various people asked why xNURBS failed in certain easy situations. The majority of answers they received was just “You don’t use xNURBS properly”, plus some bad language at times, even though the plug-in simply failed due to imperfections in its core coding. I remember at least 3 examples where I proved to that gentleman that Rhino’s default tools perform better than his xNURBS plug-in, but the answers ware mostly some bad language. While it has its strengths, it’s not as universal as advertised, not it’s capable to produce good quality most of the time.

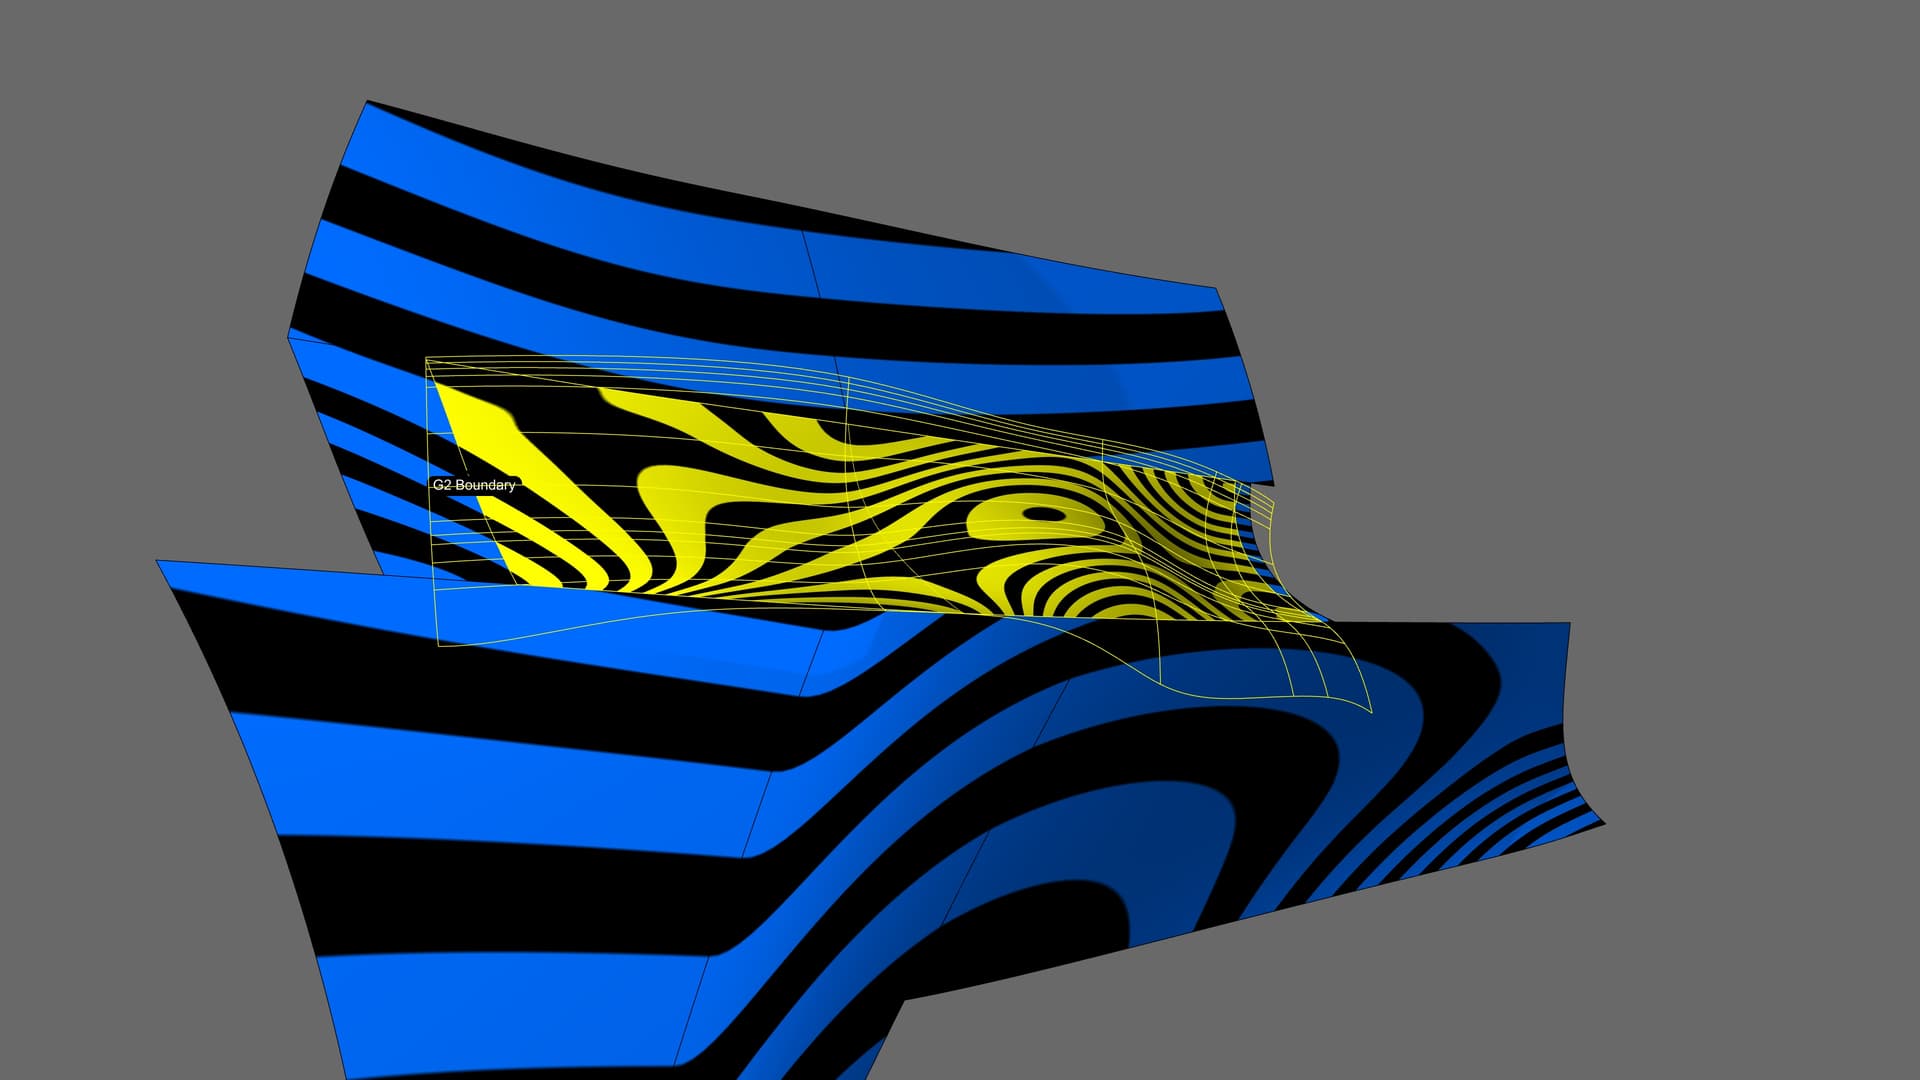
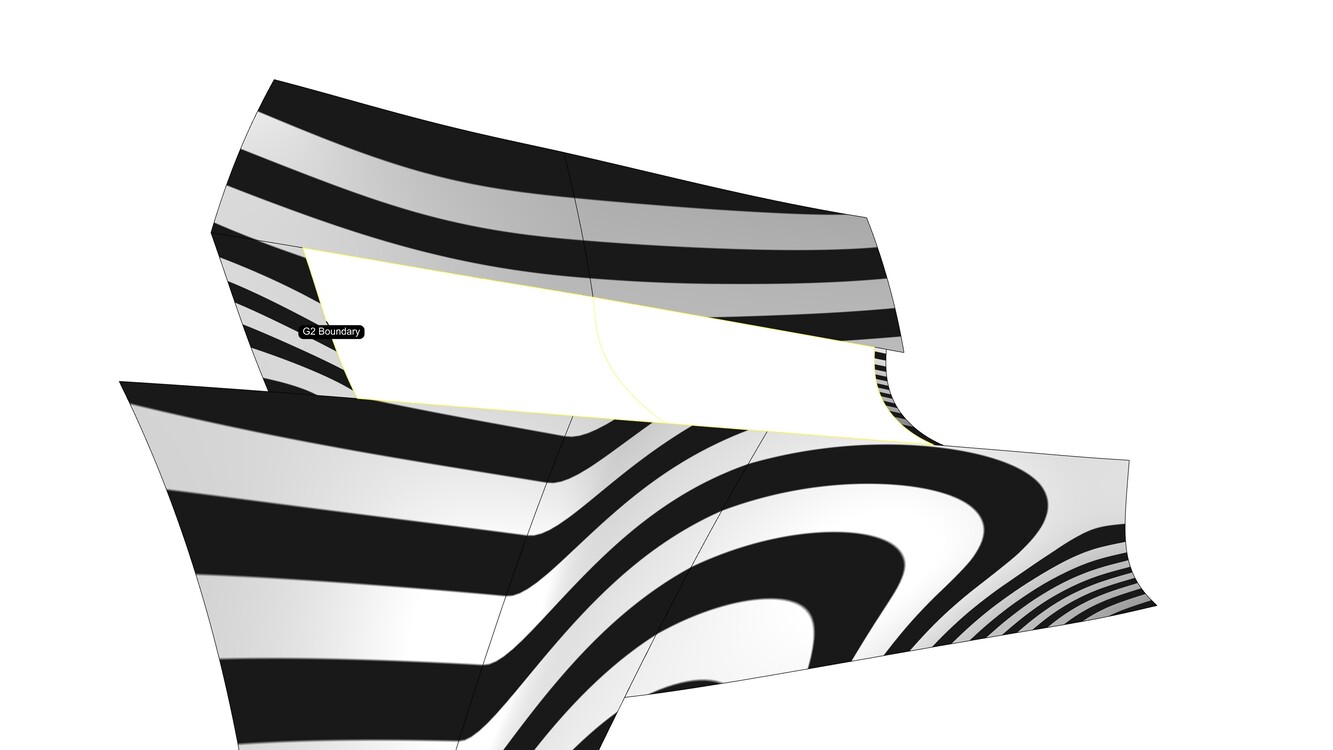
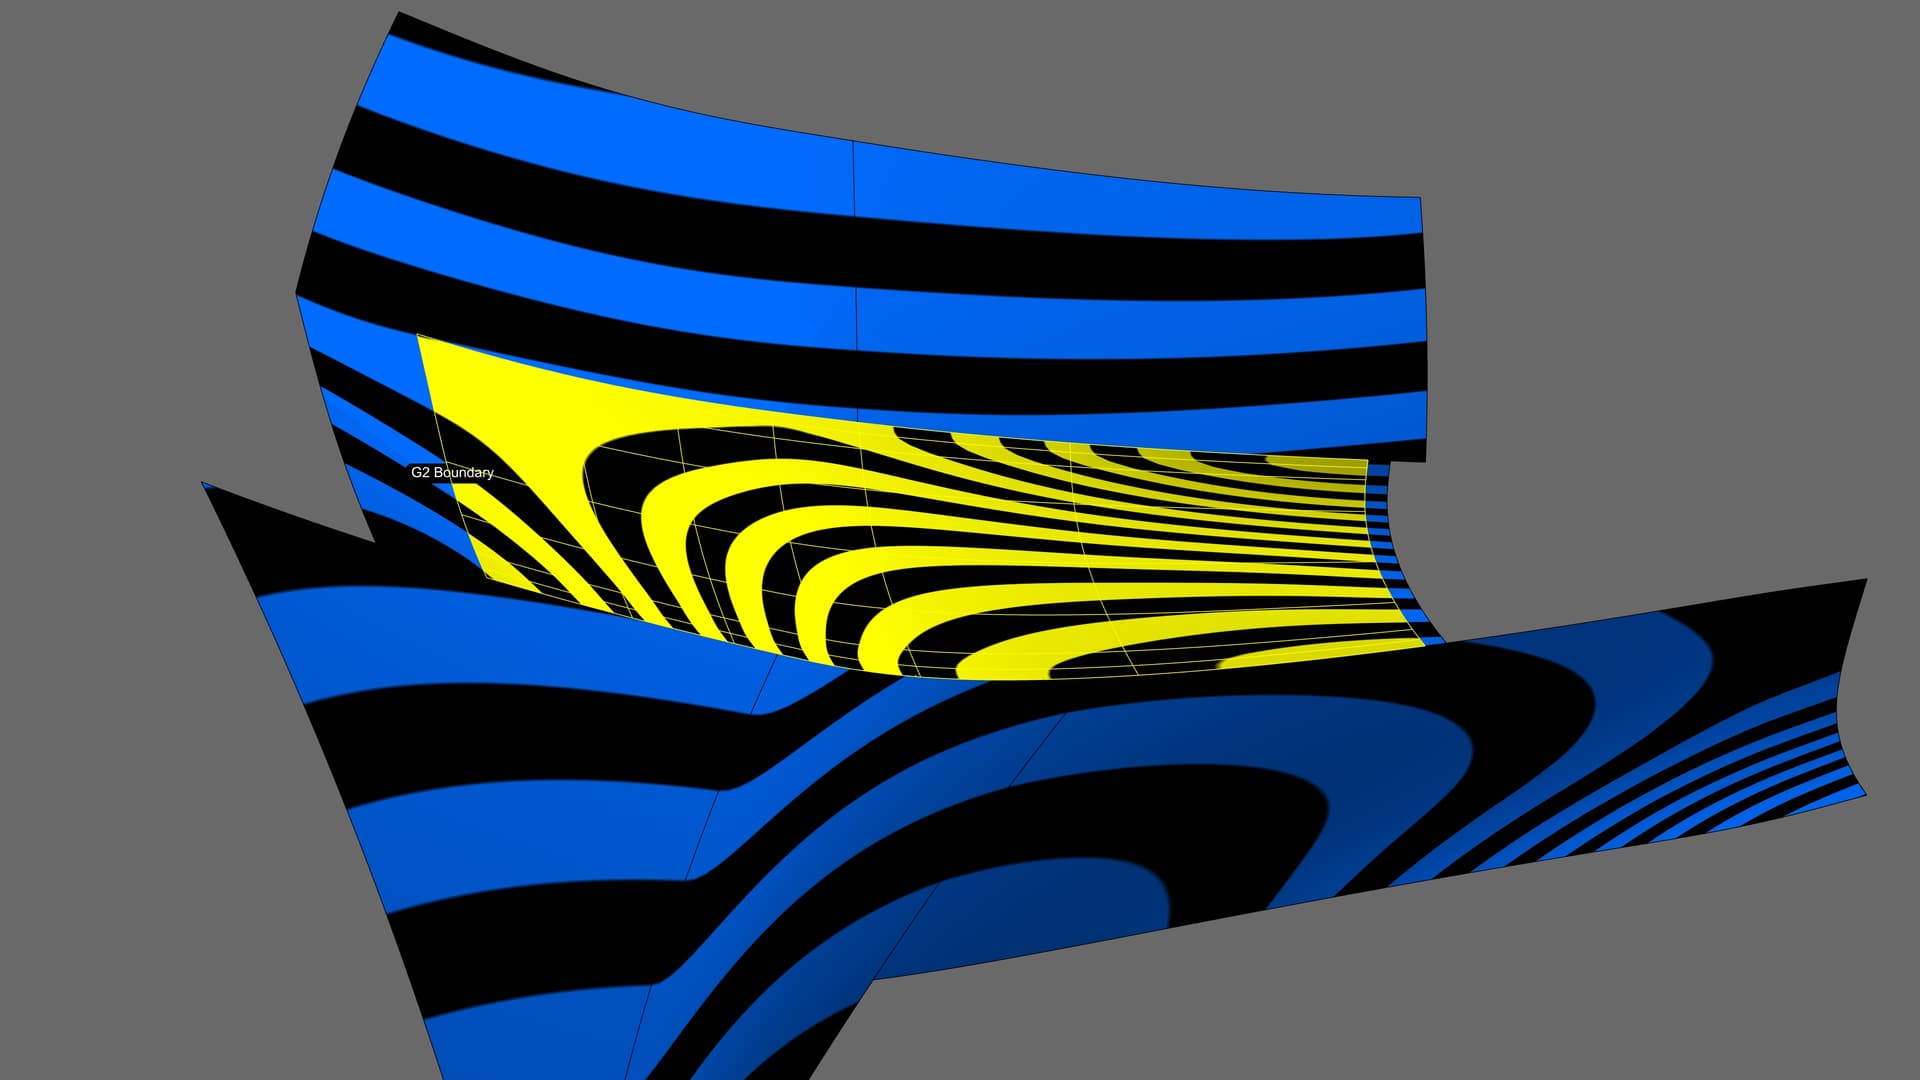
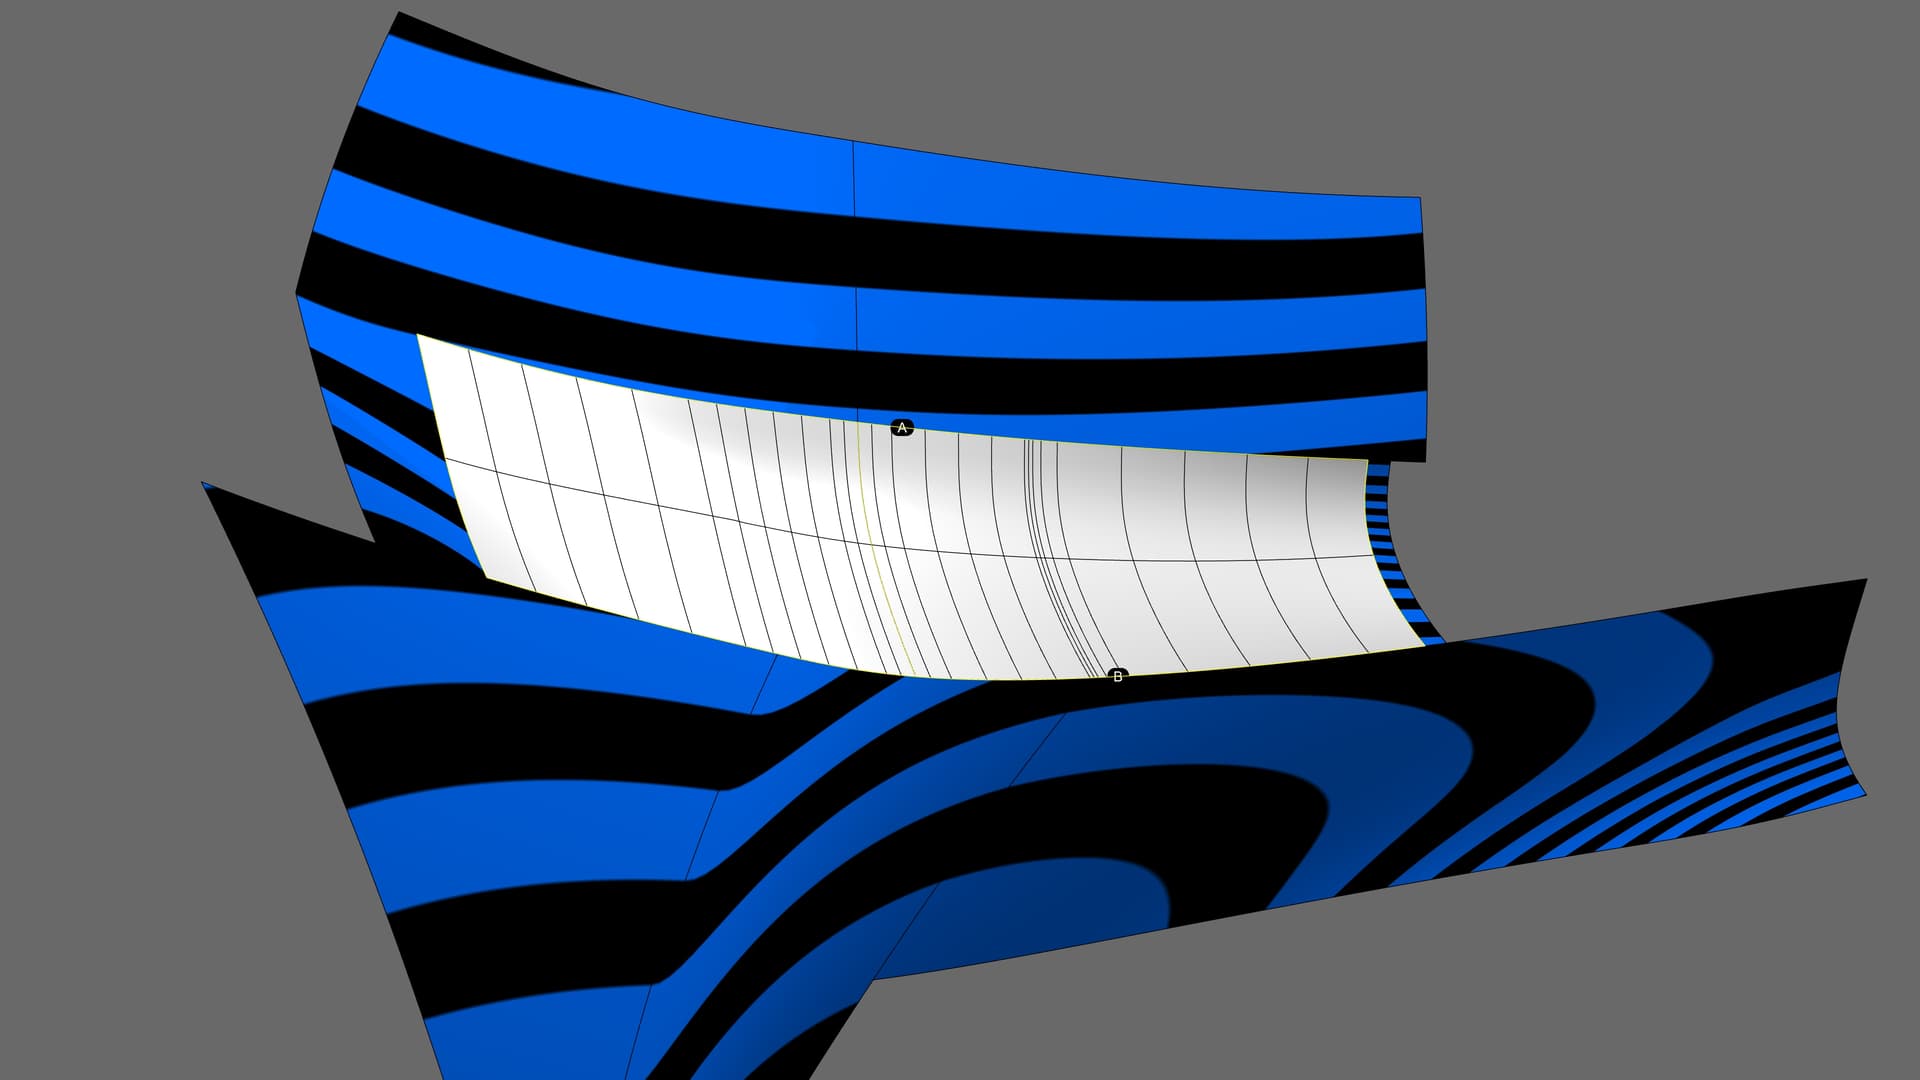
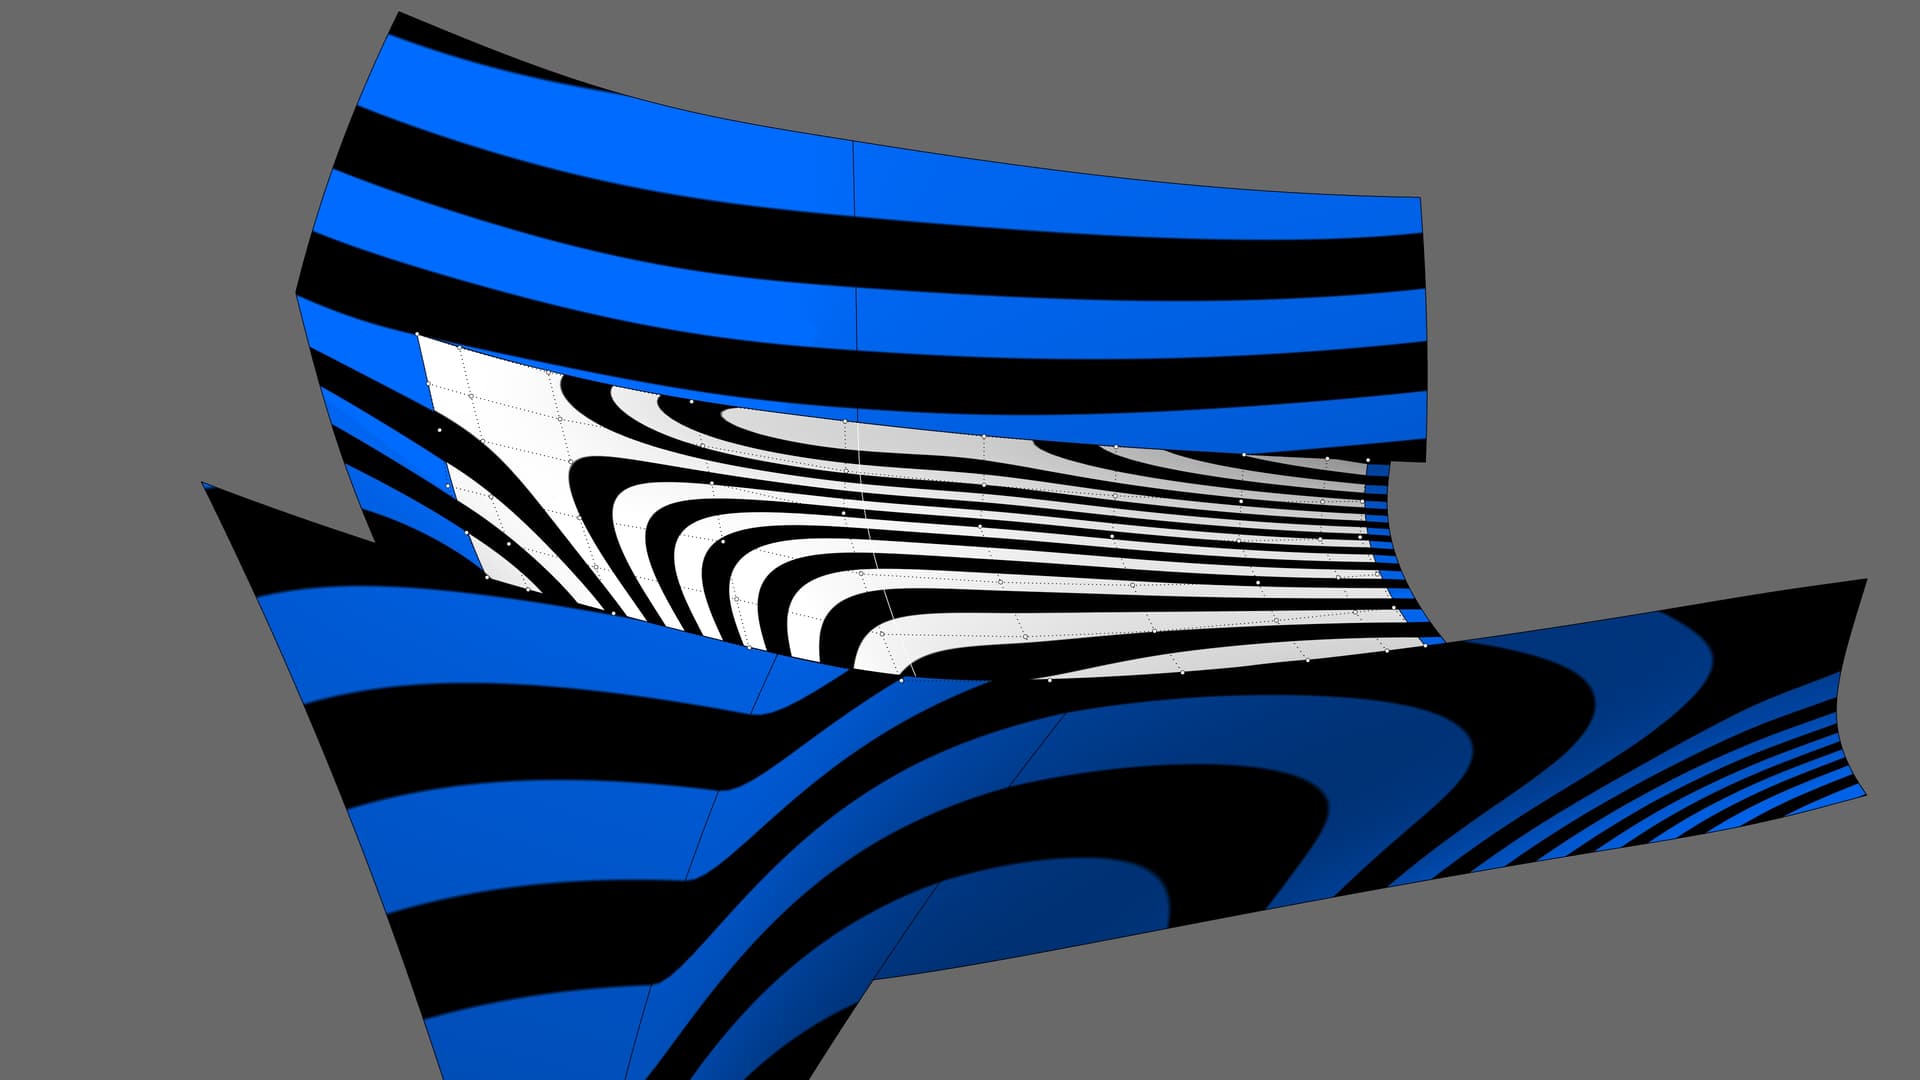
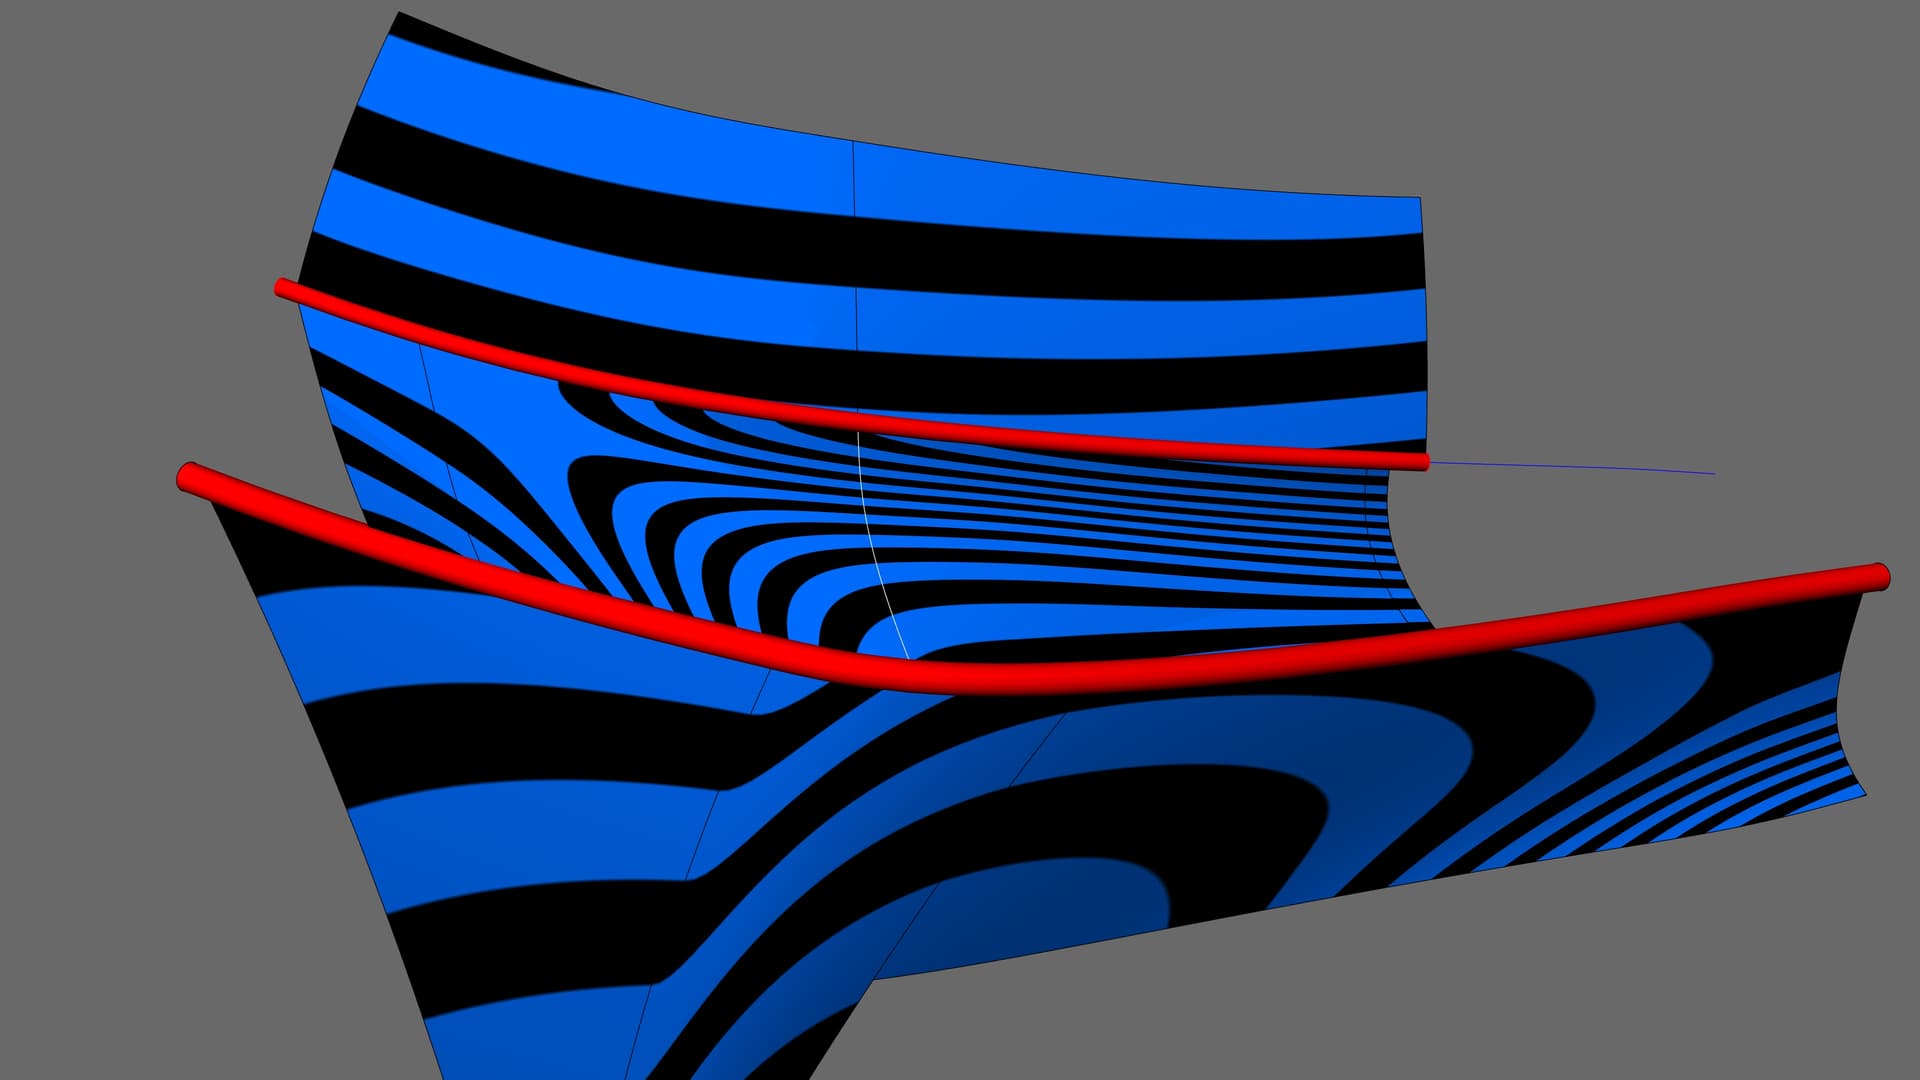
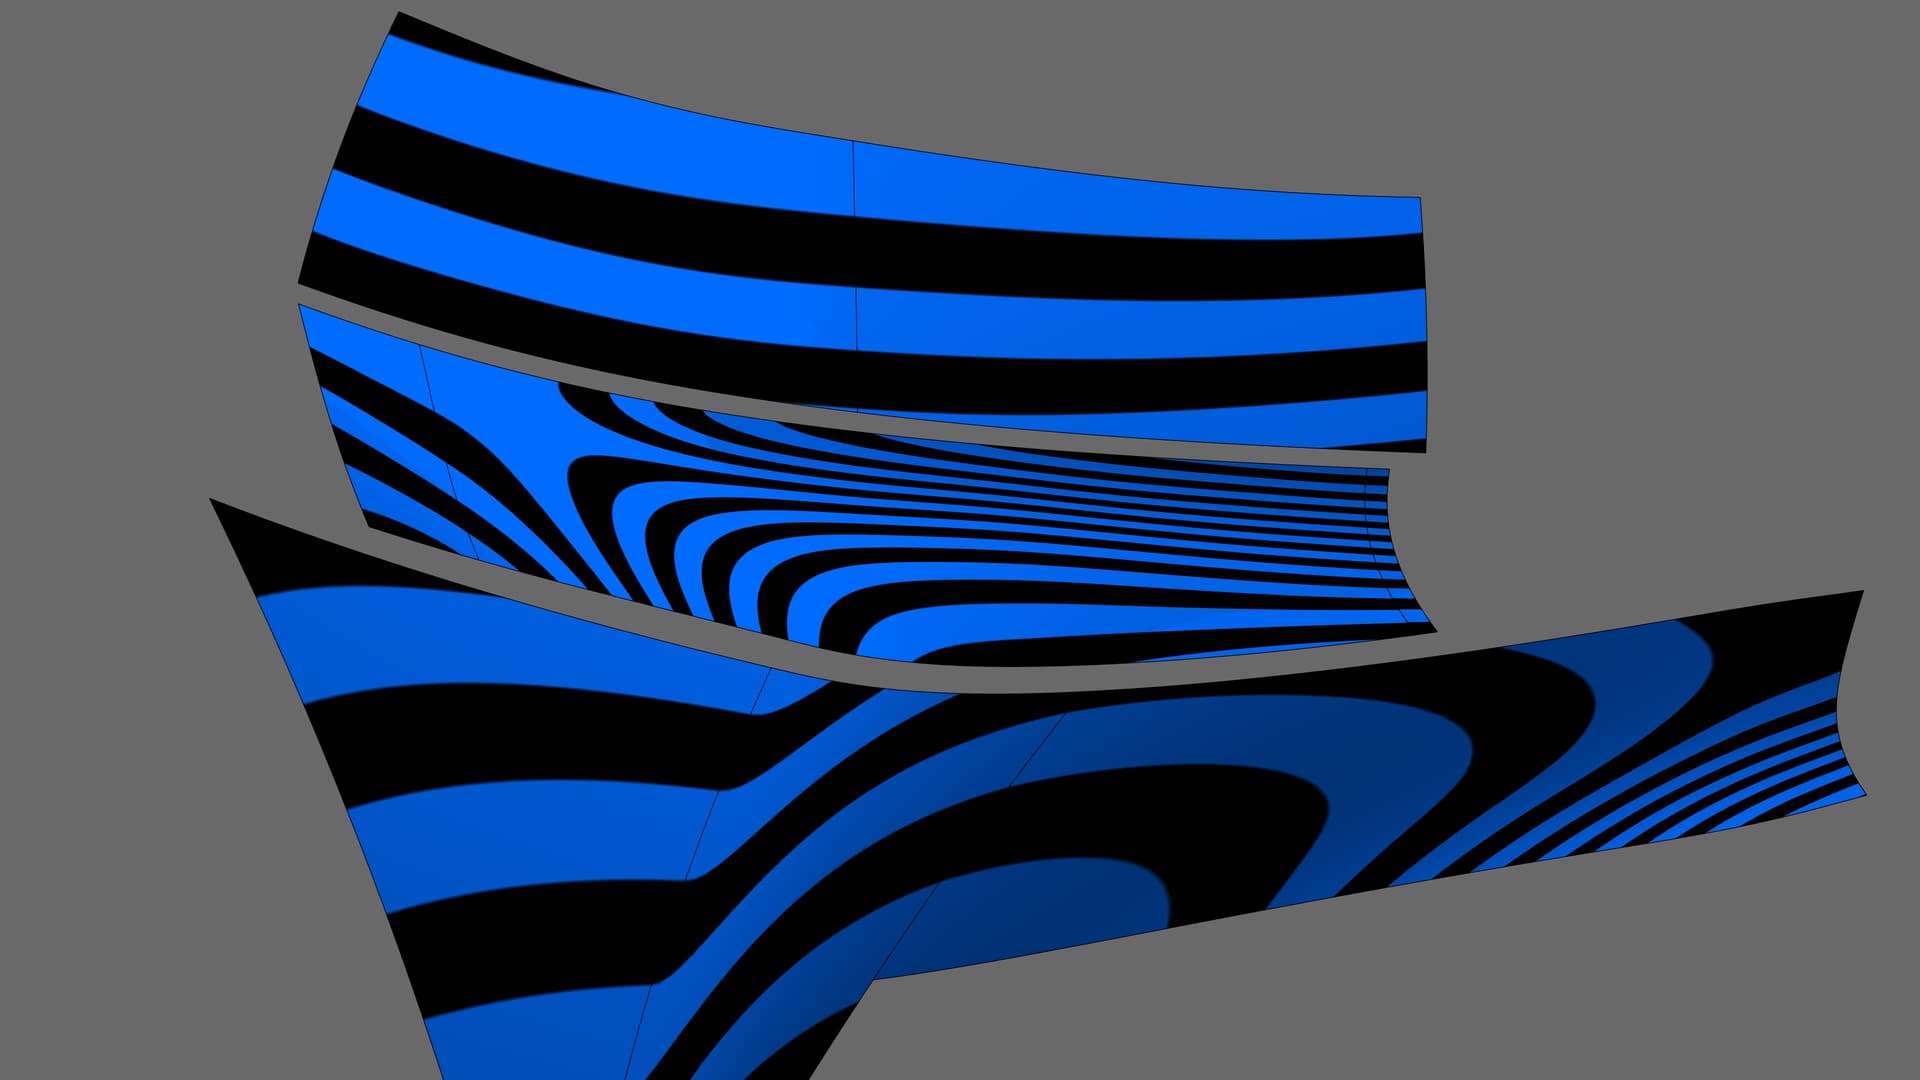
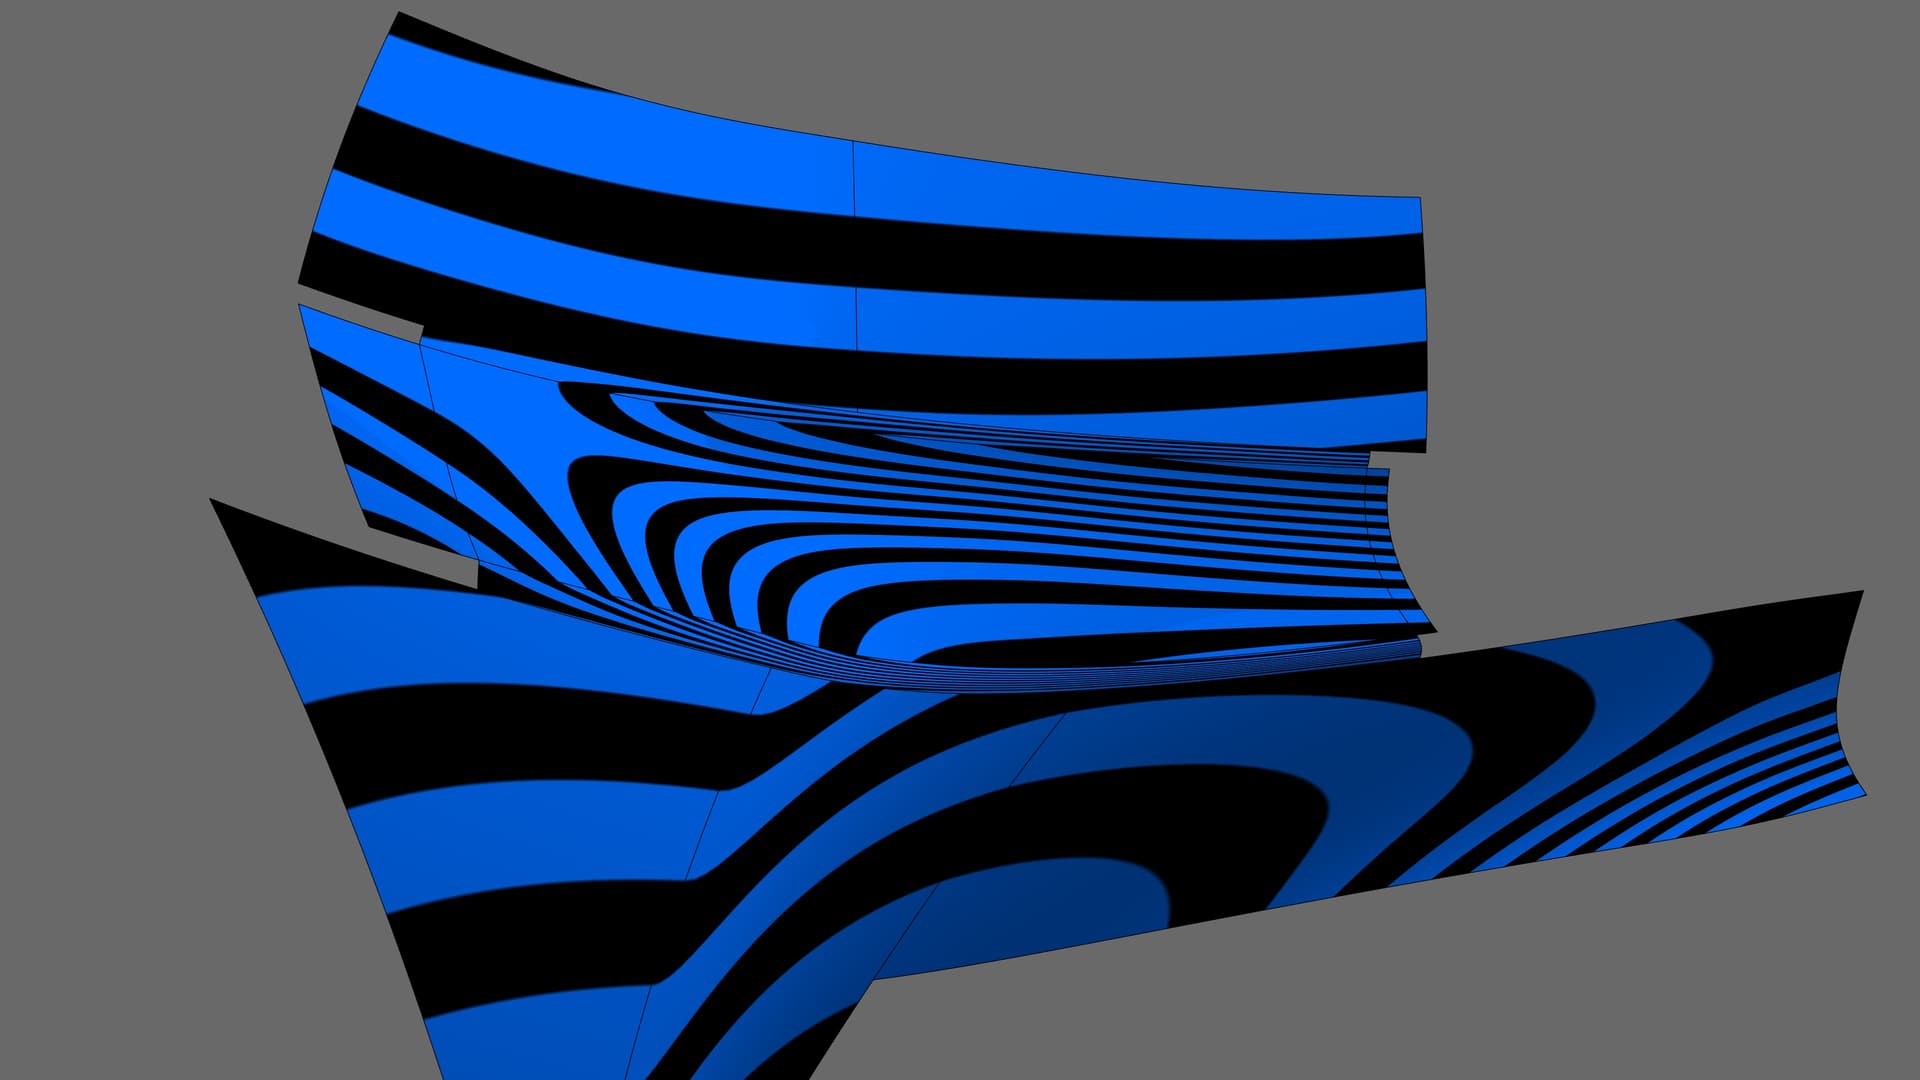
I downloaded the trial version of xNURBS and after a day of usage I have to say that it’s a relatively good patch tool, but it’s capabilities are far from perfect. It produces wavy surfaces even on 4-sided cases with the “Optimized for quad-sided surface” option and all the other settings for quality and precision used properly and tried in every possible combination. I think that it would be far better for this developer to be slightly more fair regarding Rhino and its excellent tools that sometimes perform much better than xNURBS. xNURBS is basically what the “Patch surface” tool in Rhino should have been in the first hand.

Don’t get me wrong, my intention is not to tell bad things about the developer. I just express my honest opinion about his intentional bashing of Rhino’s tools to make xNURBS appear the definitive choice in comparison.

10 Likes

Set-up video showcasing with bad input geometry is all nice and shiny, but lets see how xNURBS handles a real project consisting fairly quality input geometry. Basically in every comparison I did, Rhino 7’s “Sweep 2 rails” clearly won over xNURBS, especially if used together with the “Match surface” tool. These are all best-case scenarios with carefully optimized settings for xNURBS, but still, the output geometry has some obvious unevenness and deviation that put it far from the desired optical quality.
I have to admit that my “Sweep 2 rails” surfaces eventually edited with the “MoveUVN” tool also have some small imperfections, but they create fairly smoother flow along the entire bumper in direct comparison with xNURBS’ “optimized” quad patches.

Looking at a more extreme angle make reveal wavy shape in the middle of the surface:

This particular angle also reveals some minor imperfections in my surface, too:

Since the xNURBS patch uses more dense surface fillets as input geometry at the top and bottom, naturally it has a more dense array of control points. Still performs relatively good around the edges, despite the wavy middle portion:

The “Sweep 2 rails” surface was additionally simplified via the “Rebuild surface UV” command, this is why it’s much smoother. However, it’s also optimized with the “MoveUVN” tool to better control the highlights:

xNURBS was incapable to solve that simple 4-sided transition, despite using G2 continuity on all edges:

“Sweep 2 rails” in a combination with “Match surface” is the clear winner here:

Another extreme angle that reveals the unevenness of the “optimized” 4-sided surface patch created by xNURBS:

“Sweep 2 rails” also showed some minor unevenness at the middle, but it was still much smoother:

:slight_smile:

Lets use the original, untrimmed surfaces to build a 4-sided surface with xNURBS. Zebra analysis is used and control points are shown to check the surface topology:

With hidden control points:

xNURBS fails to build an optimized 4-sided surface IF the non-boundary curve in the middle (note: the curve appears “invisible” due to the while background) is being selected, despite that it’s snapped to the upper and lower surface edges. No matter which settings combinations is used, it fails. Upper and lower edges were set to G0, while the left and right edges were set to G2. Setting every edge to G0 also didn’t help:

However, turning off the “Optimized for quad-sided surface” option allowed to build some surface reminiscent of the Alps mountain system, despite the fairly predictable and simple input geometry:

An interesting shape, but not one that could work on this model:

xNURBS refused to build a 4-sided optimized surface, no matter what settings I tried.

I was forced to NOT use the profile curve at the middle, in order for xNURBS to at least build an optimized 4-sided surface. As seen in the picture, it was unable to follow the design intent since the curve remains unused:

“Sweep 2 rails” in action:

The Zebra analysis reveals the unevenness of the resulting surface. No problem at all, since Rhino has two magical tools called “Remove multi knots” and “Rebuild surface UV”:

Using “Remove multi knots”:

Using “Rebuild surface UV” set to rebuild the surface with 10 control points horizontally:

“Match surface” on the left surface edge with G1 along with some adjustment of the 3rd vertical row of control points with the “MoveUVN” tool to make the transition appear like G1,5 (better than G1, but not as strong as G2 to keep the changes minimal):

“Match surface” on the right surface edge with G2:

“Match surface” on the top and bottom surface edges with G0:

Some optimization of the control points in the middle with the “MoveUVN” tool:

This is how the surface looks when using the same material like the rest of the model:

Now lets use 10 mm diameter pipes to split the surfaces:

Nice even space between the surfaces ready for surface blends with G2 continuity:

“Blend surface” in action:

Joining the surfaces together:

The model seen with its material with no Zebra stripes:

11 Likes

Very deep analisys of the two options, thanks it shows very well both capabilities.
You are a very experienced designer and you have strong understanding of Nurbs modeling so you can achieve the best result combining different Rhino tools.
For me the point is that xnurbs is a powerful patch tool able to speed up the solution of certain situation.
I’m working on product design and if I should achieve the surface qualify you’re used to I will be out of the market because it would requires too much time and so cost.
If you’re working on concept design a fairly enough solution (like xnurbs) could let you to satisfy the client, being on time and a competitive costs.
Xnurbs isn’t perfect like they may pretend… But this is marketing, c’mon it’s ok.

Of course a positive discussion could let us (users) to benefit of the improvements and understand better what to choose.

Riccardo

2 Likes

did i already mention that i would wish an improved patch for Rhino? :smiley: McNeel has a couple of very smart people, if they would rip apart that pitiful patch just for a couple of weeks Rhino would be Master of Surfaces soon™ i bravely assume. SubD is a good amendment but Nurbs will not cease, and need some love either.

2 Likes

Sharing just zebra stripe pictures makes it difficult to judge I think. While XNurbs has relatively few settings, I found that it still is difficult at times to find the right positions of the sliders to get a good result. Just like you mentioned with sweep2 where you hardly can use the defaults and click ok, it’s the same with Xnurbs.
I do agree that it’s not so that it will outperform Rhino surfacing all the time. It’s just another tool that can be used as companion.
Also I found that XNurbs helps you to understand the ‘natural behavior’ of surfaces. If the result in XNurbs is getting complex it often means adjustments are needed to the boundary conditions. With history enabled one can make the adjustments to the boundaries while the XNurbs changes real-time. And eventually you can go back into the settings of the XNurbs surface after it has been created to fine tune the result.
Unfortunately the 4 sided surface option in XNurbs hasn’t the ability to add additional interior curves.
If you can share a model where you think XNurbs can’t create a good result I would be interested have a look at it.

1 Like

I can not share a portion of that bumper model, because I do it for a customer. However, if I have time to do something else for fun in the coming weeks after completion of the bumper, I will post it here for everyone to try and observe. :slight_smile:

The manual optimization of the “Sweep 2 rails” surface took me less than a minute, even though the modeling workflow may sound too complicated due to the high amount of screen-shots explaining the process step-by-step. I spent more time to try the different options of xNURBS, in order to figure out that none of its sliders and options can achieve acceptable surface quality.

As for the conceptual design, and even final organic product design, SubD is much faster and more convenient than xNURBS. For manufacturing, however, it all depends on the case. From my experience with xNURBS so far, 9 out of 10 resulting surface fail to achieve good flow of the reflections.

If I may, XNurbs is ultimately only a better “patch” than Rhino’s. Nothing so revolutionary.
The Rhino patch is outrageous after seven releases now …
Xnurbs will not be better than some Rhino tools (sweep 2 and match) but you can immediately close a hole in continuity at least in G1, without having to resort to various adjustments and various steps.

3 Likes

While xNURBS could achieve G1 and sometimes G2 at the boundaries, it’s the internal flow of the surface which is equally important. Imagine a wavy surface that blends to the adjacent surfaces at G2 continuity, but is too inaccurate at the middle portion. :slight_smile: This is what happens most often with the xNURBS patches. It may not be THAT obvious on the official videos on YouTube, because the camera rotates all the time, but a close inspection eventually reveals the truth.

2 Likes

Try this. I agree with you, Bobi!
Rhino Surface test1.3dm|attach
ment
(15.3 MB)

2 Likes

The larger blend surface in that file has some imperfection. :slight_smile: The ! _RemoveMultiKnot tool fixes it. But still, the flat surface next to it is split improperly, thus it generates an issue with the blend surface to the wavy trim curve. It’s evident with the Curvature graph.
What’s the purpose of this particular example? :slight_smile:

I suggest to use the following settings for the analysis mesh, because the ones that come with the file you provided were too dense and heavy for my poor video card: Nvidia GTX 1660Ti.

This is a quick fix of the geometry and some basic filling of the hole, but it’s not optimized and has plenty of flaws. I can’t stand G1 models with sudden change of the zebra stripes. I much prefer smooth blends. :sweat_smile:

Rhino Surface test1.3dm (6.7 MB)

3 Likes

Another example where xNURBS for some reason fails to do its job, despite the clean geometry with G2 continuity across the input surfaces and curves. Before the video, I tried picking the curves and surfaces in any combination, but no matter which way, it always refused to build a patch surface at the moment I changed the tangency for the input edges from G0 to G1 or G2.

2 Likes

@XNurbs I modeled a similar surface that Bobi is showing in his video, see attached. How would you recommend building the tip in XNurbs? I tried to make it work but got similar results as the ones you see in Bobi’s video. Also the top blendsurface that connects the two sides, can’t be exactly built with XNurbs, the transition becomes more abrupt:

lofted_tip.3dm (2.3 MB)

2 Likes

@Gijs , Thanks for your model.

We did not reply “Bobi Rhino_Bulgaria” because we think he/she may be a troll: When we added xNURBS to Food4Rhino, someone immediately used a fake ID to give 1-star rating on Food4Rhino. After the troll was identified and 1-star rating was removed, “Rhino_Bulgaria” came into our sight. We have no idea how many 1-star ratings “Bobi Rhino_Bulgaria” contributed to xNURBS on Food4Rhino (anonymously or using fake IDs).

Quote from the xNURBS manual: “When selecting the Optimize for Quad-Sided Surface option, no internal constraints is allowed.”

The manual clearly explains why. If “Bobi Rhino_Bulgaria” did read the manual, then I would say “Rhino_Bulgaria” intentionally did this.

It makes it very difficult to understand what “Rhino_Bulgaria” did. We figured out what’s going on from the following picture. Why didn’t “Rhino_Bulgaria” change to the 100% white color?
image

The car side mirror demonstration only shows a quick rebuild. The curves are quickly extracted from an existing model by a designer and then projected to a plane so that they are on a plane. This may be the reason why the curve quality is not ideal. We did not even check the curves. So how could anyone intentionally “create” the curves? During the speed design, no one want to spend time to carefully design or modify the curves. For the final production design, designers generally cannot modify the existing geometries. For a student design, you can easily ask ideal “input”, but for anyone who worked on complex products, e.g., automotive model or airplanes, it may not be the case.

Again, the car side mirror demonstration only shows a quick rebuild or speed design. If you really want to see the model created by professional designers, please see this model.
image
The model is designed using xNURBS in Rhino 7. Click here for the video . As said in the video, “When surface reflections don’t line up or produce unwanted artifacts, I use xNURBS to rebuild those smaller sections until I achieve the surface quality I’m looking for.”

@Gijs The following GIF shows how to generate the blending surface you want - add two curves to precisely control the shape.
Blending

The following GIF shows how to do the “lofting”.
Lofting

Quote from the manual: “If Show preview does not show the correct trimmed surface, then it means that XNurbs cannot deduce the correct surface from the input constraints … Simply adding some (boundary or internal) constraints will provide XNurbs with additional information to deduce the correct surface.”

For this model, to generate class-a surfaces, you need to split the patch into smaller patches.

This video explains the idea.

@Gijs, There is one mistake in your model:

This is called a singular point, where the surface normal disappears. Singular points cause many troubles, e.g., the screenshot below, and software developers and professional designers try their best to avoid such a design. I am sure you are a professional designer and won’t present such a design to your customers.

@Gijs If you wish to discuss more, please start a new thread and don’t use this thread.

Oh boys
Calling Bobi a troll is the insult of highest order showing you didn’t do a basic check.
He is one of the most respected members of this community, mentor and teacher.
Whatever you write as an answer is loosing credibility afterwards.

8 Likes

well that entire topic title is a little hostile i would say not to forget, bobi seems a bit pissed off why ever, i can see why xnurbs would think so, but you are right i would not categorize bobi as a troll ever and i hope not that he is a double spy acting in complex matters :smiley:

xnurbs is hooked tight on believing to be haunted by jealous trolls from the competition or similar whatever that means.

back to the topic. @xnurbs please make your plugin for mac available finally.

:pray: Please, both sides, rage is not helpfull here, pull the handbrake, no accusations and back to the pragmatic discussion.

5 Likes

I’m sorry, but your false assumptions about who is a troll are completely wrong. That must be another person on Food 4 Rhino, not me. I would never rate someone’s work or software with 1 star, even if I’m not satisfied by the results. :slight_smile: I much prefer to invest some time to explain the pros and cons of some product rather than voting with 1 star. I started this topic, because xNURBS is advertised with huge amount of hype and overpromising, but in practice in many cases it clearly underdelivers.

I recommend you to focus on improving xNURBS and advertise it in a more honest way, which also includes proper comparison with Rhino’s own tools. In your videos you (or someone related to you) often tend to use purposely bad geometry (split edges with tiny jaggies, curves overloaded with unnecessary amount of random control points etc), in order to make Rhino’s tools perform badly and make xNURBS shine in comparison in those wrong situations.
Also, as I mentioned in my original post, you always use the very basic default settings of “Sweep 2 rails”, “Blend surface” or any other Rhino tool and don’t invest time to try their other options, because that’s another easy way for you to make them perform less effective in comparison, unlike the time you devote to optimize the settings to build a surface with xNURBS. It’s like driving a sports car like Ferrari on a rough off-road terrain and then claiming that it performs poorly. Of course it will, because you purposely drive it in a wrong way. This is why the topic is called Unfair and set-up comparisons by xNURBS. :slight_smile:

Looks like either your Rhino is rendering this area badly, or my Rhino does it nicely, because the model uploaded by @Gijs looks like this in my Rhino 7.

1 Like

bobi, you are extremely confrontative and i dont see many reasons why you would do that, other than being a double spy for real :wink:

many of his user cases are generic, not specifically done purposely to show how bad rhino performs. seriously calm down.

1 Like

Why would you use the word “professional” while you write about that particular 3d car model? Send it to me and I will easily point at least few dozen areas with bad surfacing on it. Many of them are easy to spot even in the YouTube video, but I can show you all the wavy areas and lack of good continuity using Rhino’s analysis tools, in case that you wonder how professionally made is this particular model.

As for the curves on your mirror model that were overly populated with random control points in uneven distances, a simple use of one of the several tool in Rhino to simplify and rebuild the curves witinh the desired tolerances will give you much nicer input curves to build better quality surfaces with xNURBS or any surfacing tool in Rhino. It just takes a few seconds to press the proper icon in Rhino to fix those improper curves. The surfaces made with xNURBS on that mirror have several wavy areas and inconsistent flow.

I watched the video several times, but I’m unable to see a single xNURBS surface that’s able to achieve even G1 tangent continuity in some areas. Every single surface in the video tested with the Zebra analysis has a certain amount of waviness and inconsistent flow, as well as noticeable lack of smooth transition between the surfaces. Don’t get me wrong, I’m not trying to say anything about the professional designer who created that model, I only comment on your bold claims about the quality, because the Zebra analysis clearly reveals deviations that are in contrast with the promise. If you try Rhino 7’s Edge continuity tool to examine that particular model, it will conveniently show you where the greatest deviations are located.

4 Likes