Room With Hidden Graphic Easter Eggs (WIP)

Hi,

I am not sure how to do this, as the Gallery is broken, and always grabs the first image–instead of letting the user chose one. So, if you comment on it, your comments may be out of context, if I change this to the final. Anyway…

I have an idea for a inspirational poster to encourage people to stop smoking.

[To get personal, my right lung has collapsed 4 times, and they say it’s going to keep happening. Many of the people who have spontaneous pnumothoraxes are tall-wasted. Smoking adds to the risk. Having a lung collapse hurts; having a chest tube hurts more; having a Pleurodesis hurts than a sex-change operation. They inject chemicals like talc and water between your lung and chest wall–hoping that the alkaline solution will scar the two together. Some people say it burns like acid, but really, it burns more like lye. So, I am going to show off my scars from all the chest-tubes and especially the one they took my lung out through to trim the top and staple it. Please stop smoking, now.]

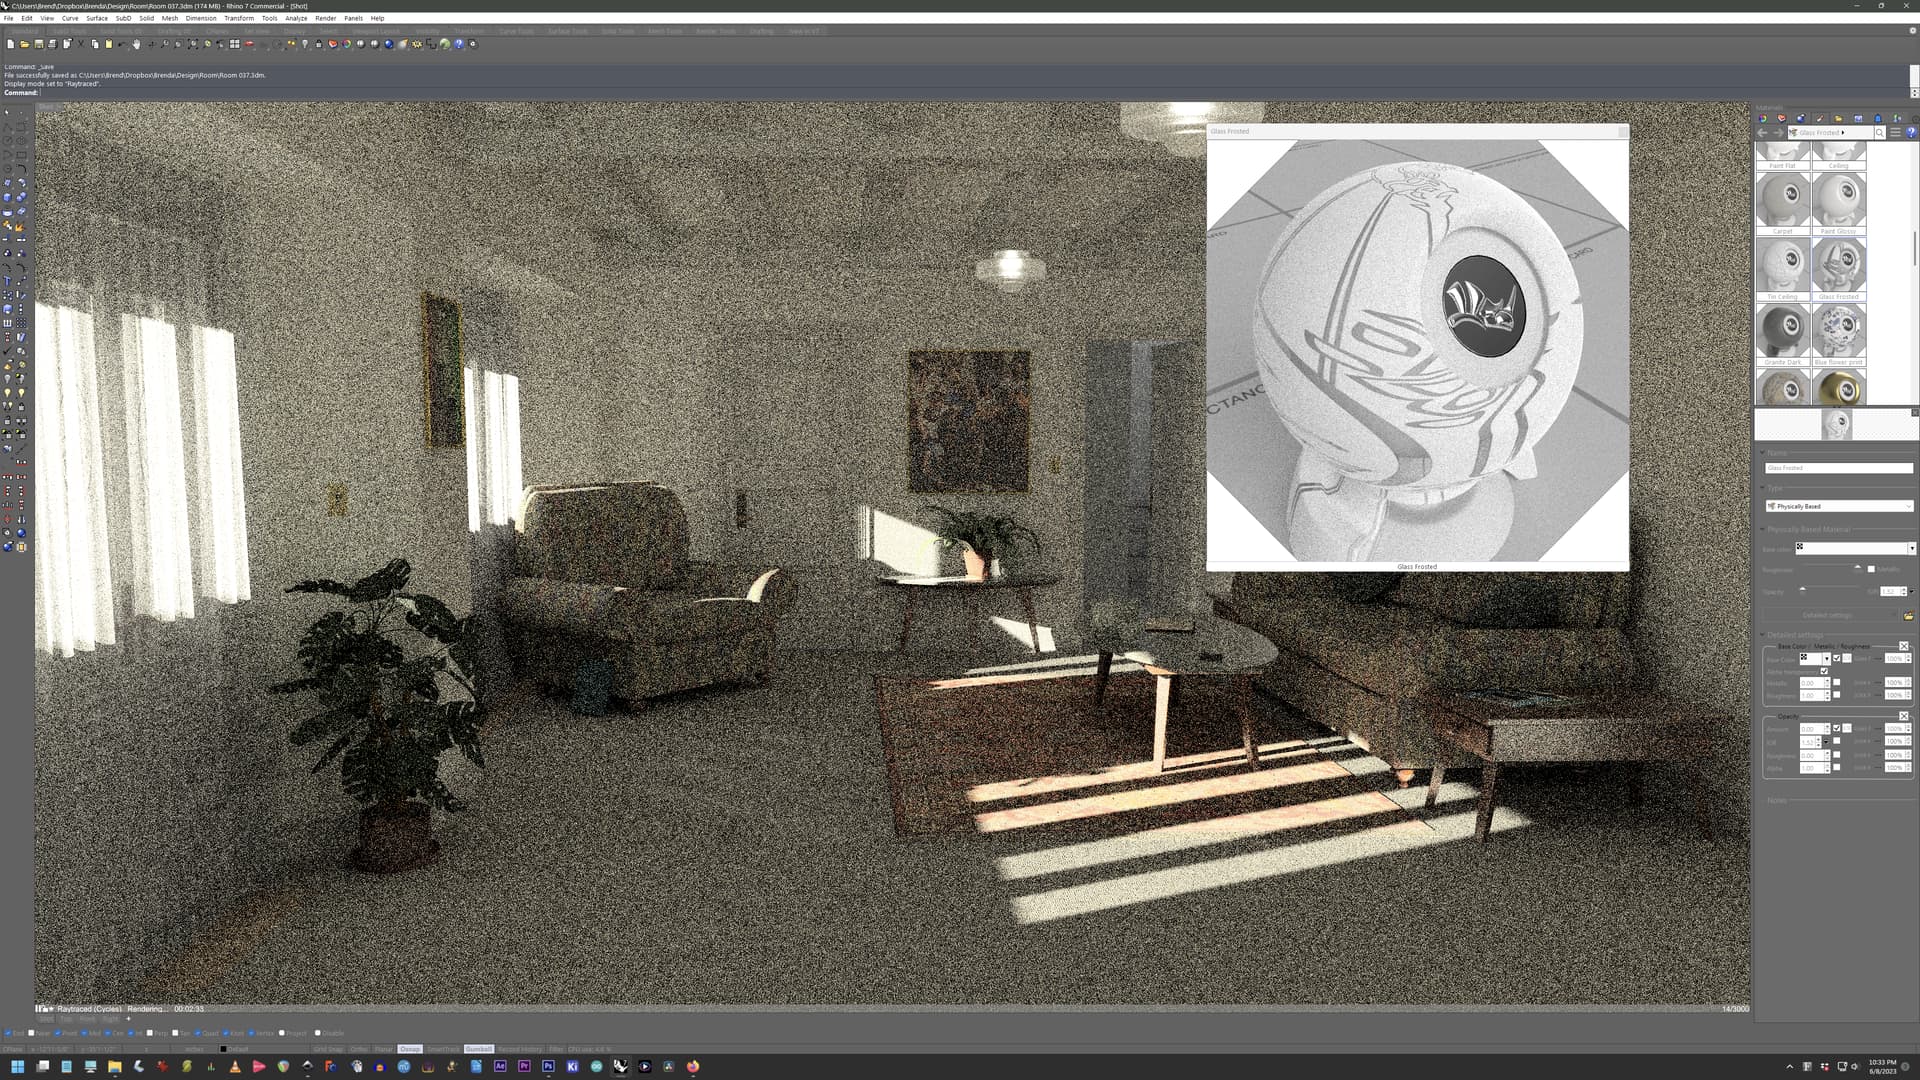
The problem is: I don’t have a good room to shoot it in. I’ve been working on a room background.

The room design was based from a photo, but it’s quite different, now. Noting that I didn’t make the plants or the Standford bunny, the latter of which was originally scanned anyway.

The fun thing is, I’ve hidden 4 graphic Easter Eggs!

  1. Cornell Box: Painting on left (Rhino Cycles Cornell Box)
  2. Utah Teapot: On coffee table
  3. Stanford Bunny (downloaded and inserted) on far table.
  4. Painting of Euclid: Far center

It needs a little more work. It still needs: Something near chair, and something on near table. Because the sun is so bright, now I have lost the frosted windows on the French Doors. The drapes now need to be more transparent to once-again let the French Doors to be see, but then, more sun will come it, and that will have to be lowered.

Also noting: the painting on the right is a Thomas Cole, which no one could afford.

Technically, this temp image was rendered with 9000 passes–and smoothed with Denoiser, which will only denoise bmps, because it throws errors.

The sun is set over 100,000 intensity to give this effect. I had problems making the lamp bright enough, so for now, I put a point light in it, which I hate because the light has no penumbra. The surface lighting on the lamp bulb is over 50,000, which might be out of integer space–unless it’s a long variable.

Sorry, but Image Copyright (C) 2023 by Brenda Make. Image may not be use for training AI. Sarah Conner is coming for you! : )

Take Care,
Brenda

9 Likes

I fixed the drape transparency. I don’t like to use transparency because the renderer darkens light transparencies. I might try the PBR mode.

The sun going though a transparent PNG doesn’t seem to work, but the Environment lighting going through a transparent PNG does. In other words, the windows have a white patterned frosted effect, which with other lighting become projected in the room, but not with the sun.

Drape Transparency is up to 97%
So Sun brightness is down to 50000.0
Without a point light, Lamp Bulb Surface Emission bulb is an astounding: 900000000.00, hope it’s a long or a float!

1 Like

Is this a V8 WIP question?
You did not categorize your topic so I assigned it to the general Rhino category.

1 Like

I am not sure. I am sorry; I really meant to put it in a category, perhaps Gallery.

Moved to Gallery

1 Like

Added book by the chair.

Added Magazines on they table. Made with a “Magazine Cover Creator.” The magazines were placed in editing 4x4x4 cage (cagedit) and then bent for gravity. It needed something. Fortunately, they are illegible at a distance, because the month is the same but…


: )

Lightened the wall paint intensity all the way, whilst still keeping any color.

Rendering, now… Let’s see 1000/9000 passes in 3h 2 min. 27 hours for 9000 passes?
Dreaming of an RTX 4090 : )

BTW, this is Doug Engelbert, describing in the 1950s, the computing situation we have, today.

Margret Hamilton, the woman who saved the space race.

1 Like

hi Brenda, not sure if it is your intention to make it look like this, but I find that the image can be significantly improved with some curves adjustments:

5 Likes

Yes, that looks good!

I do want to be careful with crushing the mids. Since this render was made, I made the materials with a bit more contrast, so when it gets to the end the result should even be better. The paint is a bit lighter with more cyan in it because I had been putting a bit in as post. The couch is a bit darker now. I’m still trying to use surface lighting for the table lamp, but the Emission is over a million. LOL!

I am considering replacing the sun with another light source–because it doesn’t understand the alpha-blended material on the French Door windows, which is partially frosted glass.

Are you using Rhino custom material, or Physically Based material for the frosted glass?

1 Like

I am pretty sure I tried both.
When I get back, I will do a test, making a completely new material.

When most lighting goes through a material, it projects the stenciled alpha image on whatever surface it hits, as long as there is enough light and resolution. The sun doesn’t seem to notice that the material has an alpha-map.

PBR material with 2d checker texture in base color slot, opacity set to 0.

PBR material with 2d checker texture in alpha channel, opacity set to 1.

Both have sun as light going through the window (plane with one of the two PBR materials).

1 Like

Hi Nathan, To make sure I am doing the right thing, could you put a screenshot of the material setting. Thank you.

This is the current color-corrected draft image. I also used a nVidia’s denoiser on it, though there is 3000 passes, which is about 1/4th of what I run my finals on. I’ve seen noise to 12,000 in some high-contrast images. So, 12,000 might be the placebo line.

The plants need subsurface scattering.

I like how the bumpmapped woodgrain came out. The carpet is really a Rhino material of cloth. The schoolhouse lights were from the bank building, and they were very difficult materials to develop. The table lamp, with it’s small surface area is just apparent–at astronomical emission values. Paintings are a bit red. The wall gradients, which are not easy, come out excellent. The teapot gloss and couch diffuse/albedo shows a nice range of surfaces. We see a bit of radiant splash from the couch on the right wall, carved out from the lamp’s light. We see cooler lighting through the doorway from the environment map and lack of warm sun. In the 4K image, we can see the brushmark bumpmap on the glossy trim.

Noting: Near ceiling light is off because I had accidentally applied a wood-grain texture to it. LOL!. The beam going across had flat finish, which is fixed, now.

I need a faster way to render this stuff. : )

(Image is Copyright (c) 2023 by Brenda Make)

1 Like

Nathen, sorry, I think that the frosted texture may be part of the problem. I am going to have to vectorize it, then turn it back into a bitmap for the noise effect. Let’s see…

I redid the texture, it works somewhat.

Preliminary on “Custom” and not PBR is: Adjusting the transparency from 0% to any other value turns the transparency on/off in a 1-bit binary way. The same thing seems to happen by varying the texture transparency in PhotoShop. If I lower the transparency to 90% in PhotoShop, the stenciling effect is completely gone.

This is disappointing. What I want is the clear to be clear and the rest to be say 75% transparent.

Showing 100% Opaque alpha texture:

So far, the PBR also thinks that the 90% opaque material is totally transparent, BUT, get this, not in the preview.

Showing 90% Opaque alpha texture:

So, it looks that the rendered material preview works right–but the render only understand on/off opacity.

The preview understand 50% opacity, too.

The issue exists both in the PBR and the Rhino transitional/legacy materials.

This is a sample texture. It should be 50% transparent at its most opaque areas, and totally transparent in the others, as PhotoShop understand it.

Which means that light coming through it would be more bright than not, but still have some modulation from the image.

I zipped it so the board doesn’t mess with it.
Glass Fronted Test.zip (748.9 KB)

Thank you for looking into this.
–Brenda

I wouldn’t use a transparent image for transparency, but just a grayscale image. Does the attached help?
opacity.3dm (837.8 KB)

1 Like

Well, in real life, the glass pattern is clear, and the rest is sandblasted or acid etched.

It seems that transparency .png thing doesn’t work right; perhaps it’s acting strange because the sun is so bright. It’s like as soon as you make it a little transparent, it’s all the way transparent.

I think I have it working. What I did: I made the transparency into a Rhino surfaces. Then, I could adjust the transparency and color for the sheet.

Also, added frames, enlarged Stanford Bunny, changed door hand material to match, turned on closer light, turned book, applied glossy material to beam.

I want to do the final at 8k render at either 6,000 passes desnoised or 12,000 passes. That will take either 3 days or 6 days on my machine. Sigh. The RTX 4070 and 4080 sirens are calling me toward their expensive, rocky, credit-card debt shores.

Before the final, I have to make sure that placing a human in the scene, in post, works.

(Sorry, Image is Copyright (C) 2023 by Brenda Make)

2 Likes

this is a lovely project,

placing a human in this scene will be the heaviest lift IMO, do it right and the image will sing, do it wrong and it’ll go flying off into the uncanny valley never to return.

Can’t wait to see how it comes out! Thanks for sharing the process.

1 Like