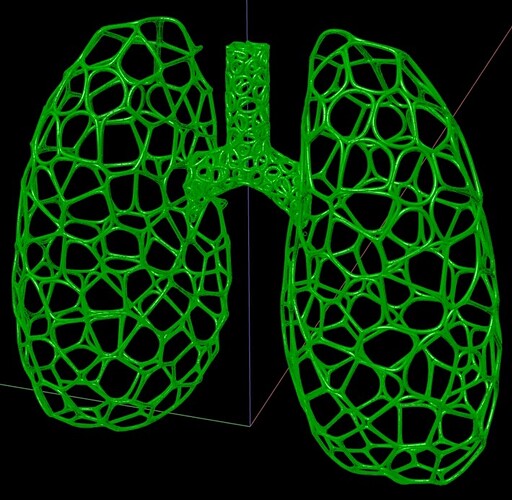
Hi, I should preface by saying I’ve only been using grasshopper for about a month so if my question seems too simple or missing the point I apologies. I’m trying to create a pair of voronoi lungs and have been going okay until it came to creating the bridge between them. I originally used the same voronoi sequence as I did for the lungs but this has made a mess with lots of clipping and some really unusual cells generated. I don’t know whether this is just an inherent issue with trying to create cells of a certain size on this king of shape but any help would be greatly appreciated. Also, any advice on general best practices or any mistakes you notice would also be amazing as I’m learning as I go.
Lung_round_question.gh (33.4 KB)
Lung.3dm (10.1 MB)
Except for the fact that I once had pneumonia in the lower lobe of my left lung, lungs are way out of my league. But I took a stab (pun intended) at your files and came up with this:
The attached GH file makes some assumptions:
- The 3 pieces of geometry in the 3dm file can be internalized in the GH file
- Left & right lungs are symmetric
- Round pipe connections are OK
- The center “connector” does not have to actually connect to either lung
What I did is a very simple tweak to your original work and is not 100% correct: there should be a test before the MultiPipe component that eliminates short Nurbs curves. And there should be some fancy selection method that adds one of the Nurbs curves from each lung to the set of curves for the center piece. That way there would be a proper connection between the center piece and each lung.
Lung_round_question-bb1.gh (1.1 MB)
Another option might be to turn the lung sacs into SubDs, extend the extremities of the trachea (or whatever the bridge piece is called) so they fully intersect the sacs, then you unify the whole thing as a solid:
Lung_round_question.gh (3.4 MB)
I internalized the solid geometry into the grasshopper file, which might make it a bit slower - you can always bake the solids back into Rhino and reference them again in grasshopper.
Another option is to join all the meshes, remesh using Triremesh then use the dual
triremesh lung.gh (750.2 KB)
I think this seems like its most likely to give the final look i wanted since i want it to look as ‘cellular’ as possible. I tried to use the same point attractor and loft as before however Im getting an error on the loft 1. “Solution exception:Index was out of range. Must be non-negative and less than the size of the collection. Parameter name: index”. I’ve tried looking for null points but i couldn’t find anything. I did notice some line like curves tho I don’t know if that would cause this error.
Lung_round_question_response_2.gh (3.4 MB)
If you want a bigger cell size on less curved part use MeshMachine
MeshMachine is somewhere on this forum or grasshopper3d.com
MeshMachine update - Grasshopper
triremesh lung.gh (769 KB)
A version using one of my tool to transition dual mesh. It will be added to Nautilus plugin
I bet what @laurent_delrieu already appeals.
Meanwhile you can use ‘clean tree’ sometimes to bust naughty entities:
Lung_round_question_response_2.gh (3.4 MB)
NOTE:
Your extrusions might still yield some inadequate results given the direction you’re specifying. However I am not 100% clear on what your goal is for the thickening of the piece(s).
It might be convenient to:
(1) join all as one polysurface, mesh it cleanly, then thicken it using weaverbird or something, otherwise it might be cumbersome to make a solid unified thickened object if that’s what you’re after.
OR
(2) use Laurent’s method


