It’s easy to flatten surface without an image mapped to it. It’s when I want the image to morph along with the surface…that’s the problem. Make sense?

You’re experiencing two separate issues as I understand it:
-
Ugly squished surfaces. Are you able to reproduce my method to get a symmetrical and usable flat surface?
-
Baking the texture. Looks like you have surface type mapping applied to the still-curved gores. I am able to reproduce Pascal’s method if I use Spherical type mapping to start with.

I am not concerned about the ugly “squished” surface. I can always clean up the intersections at the top and bottom.
I am struggling with getting the image to morph along with the surface. I don’t know how you got yours so clean…nicely done. How did you do it? I tried following your sequence:
- Make a new sphere - got it - then split up the gores? Don’t map the image to the sphere yet?
- Delete all but one for the gore? Not sure what you mean here.
- I don’t know how you got all the the gores to have the image in them with the polar array
I’m sure I’m missing something simple…just can’t figure it out.
- Make a sphere
- Split into 6 equal pieces? Is this where I’m having a problem? I am using “trim” to get my 6 gores. Should I not be using trim?. ShrinkTrimmedSrf does not yield any result. It’s the same gore. Not sure what is happening here.
- I can trim out one gore and then do a polar array but then the image maps to each gore itself.

The missing step above is applying spherical mapping to all of the arrayed slices at once before baking the material.
If you split the sphere with a polar array of lines in Top, then the mapping on each piece should stay put and you can bake from there. But if you array a single slice, or have a gore that is not split out from the sphere in position, so to speak, the you’ll need to apply the spherical mapping.
-Pascal
Hi @sthode66,
I will try to put in order everything that has been said here, so you can get to the solution.
-
Make an sphere. You can type 0 as the center in order to facilitate things later on.
-
In order to trim the sphere in 6 pieces. In top View draw a line at the center of the sphere (you can activate Center Osnap to make sure that it is precisely at the center). Select the line and run _ArrayPolar, Select the same center as before, 6 items and 360 degrees.
-
In top view again, run _Trim select two of the lines previously generated previously as cutting objects and press enter. When asked to pick the object to trim click on the sphere, outside of the area defined by the cutting lines. Now you should have one gore.
-
Select the gore and turn on Control Points. You can do that by going to Edit menu> Control Points> Control Points On. Now you will see lots of controls points out of the gore. This happens because when you trim a surface in Rhino, actually what you are doing is the same thing as a clipping mask in Illustrator, you are just showing part of your surface but all the info is still there.

-
Now we need to eliminate all those extra control points. In order to do that run _ShrinkTrimmedSrf and select the gore. Now when you show the control points for that gore you will see this.

-
Select the gore and run _PolarArray in order to get our " full orange". Pick one of the vertexs of the gore as the center, 6 as the value and 360 as rotation.
-
Create a new material and load your texture in the color channel as you already learnt.
-
Select all six gores and go to properties panel> texturing mapping and apply spherical mapping, in the dialog box press enter to accept bounding box as the center of the sphere.
-
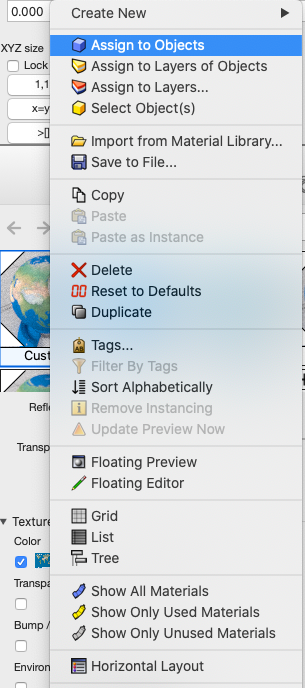
With all your gores still selected go to materials panel and apply your already created material to all the gores at the same time. To do that you can right click on top of your materials and choose Assign to Objects
-
Now you should have something like this.

So in order to get our texture flatten, first we need to bake our materials. We will need to repeat the next process six times, one time for every gore. -
Select one of your gores and run _Bake. In the dialog box call the texture Gore01, and choose .PNG as the format and for the resolution 2048x2048, so you can have the highest resolution you can. This will create a new material called Gore01 that applies automatically to your gore.
-
With your already baked gore selected run _UnrollSrfUV. This will create a flattened version of your Gore01 at coordinates 0,0.
-
Now select your new flattened gore and apply GOre01 material to it. You should get something like this.
-
Repeat 11-13 until you get all your gores. Then you can orientate them until you get something like this.


The next steps will focus on getting the output out of Rhino. There are several ways of achieving this, one could be @ryan.odom method:
In my case I used a different method using layouts, but I don’t want to overcomplicate things, so if you are interested you can take a look at my file and ask me anything you need. I’ve also attached an Illustrator file with both the outlines and the texture in it.
Gores.3dm (4.7 MB)
Gores.ai (2.0 MB)
4 Likes

Success! All of you have been an enormous help. This is a wonderful group! Thanks so much!
1 Like
