This planter is about 5 feet tall and appears to be made from some sort of cast resin. I thought it would make a good basis for some 3D printed parts, but I can’t figure out how to get the same surface curvatures.
I tried SDiffing a variable radius pipe, but that didn’t work well. I tried making a Loft from a series of varying radius circles, but that didn’t look right either. Plus, depending on difference between the large and small circles, SDiff sometimes just failed to work.
Please note that for the next week I’m in a place with extremely slow Internet, so if you decide to reply don’t include any large files. Thanks in advance for any thoughts about how to define this.
I would probably construct the wobbly contour lines, then mesh loft them, and finally use them as anchors for nearest vertices of the mesh in a Kangaroo shrink wrap or mesh relaxation simulation to get the final effect.
This is definitely not a Solid workflow. It is more of a surfacing exercise and in this case, Grasshopper is more suitable if you are looking for iterations.
Also if you like sculpting, Subd will be your most efficient workflow,
Thanks for all the ideas. To me it looked like a simple barrel shape from which was subtracted a wavy coil/helix followed by some sort of corner/edge smoothing process.
Diff-arch: interesting idea about constructing the outer edge first and then filling it in. But as someone who used to work in an aerospace Loft dept. I have no idea what a mesh Loft is. . I do get your point about final smoothing though - I quickly became aware of the need for that.
Martin: don’t have a scanner and in a week I’ll be thousands of miles away from this.
Tay: this is a GH only project. Truth is I don’t use Rhino for anything other than exporting STL files. Did my post end up in the Rhino group?
But the image you posted looks like a good start. Is it a spiral though? At first I thought the real planter was a series rings, but then I went to a different one and was able see it’s really a spiral.
and probably you could also range+graph also the domain of the Z random movement of the circle points in such a way to drive it better (expecially set it to zero for the base -which should be flat)
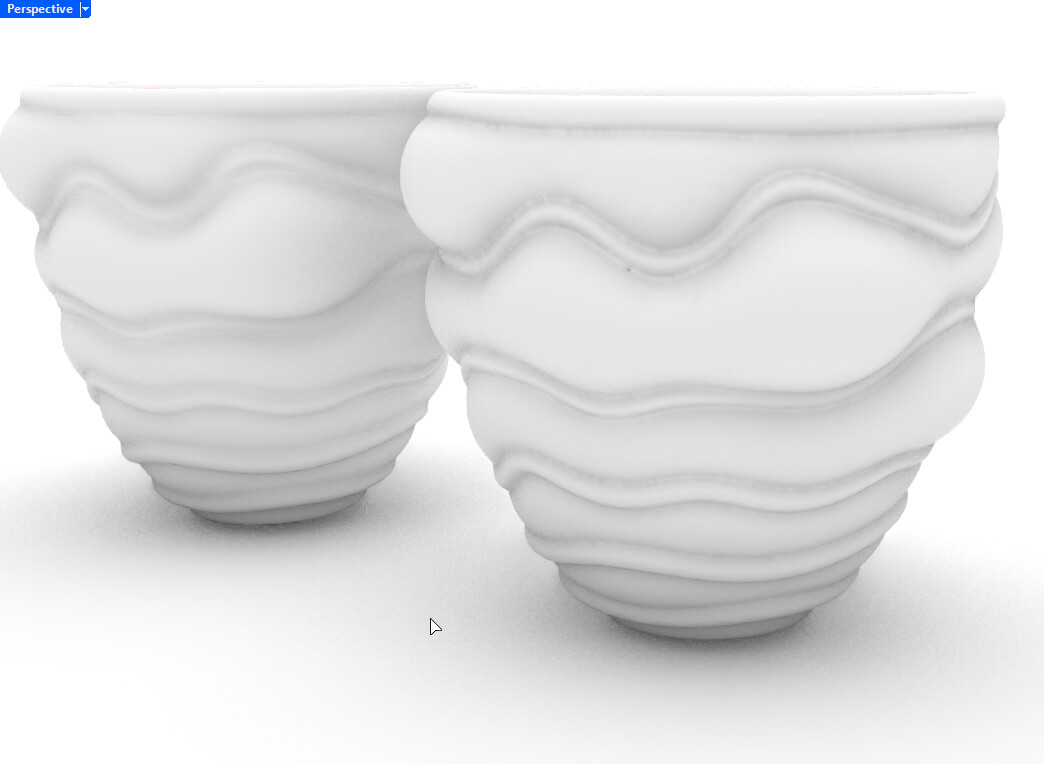
I realized I needed to make some serious changes to your GH file when I discovered that I could not find a way to make a single Closed Brep from your final result. This is probably because you used several GH component I’ve never used before (Relative Item, Unflatten), and also because I share David’s disdain for GraphMappers, even though I have used them before. My GH file is a huge mess right now, but here’s the final geometry shown above if you want to take a closer look at it. ClosedBrep.gh (114.7 KB)
I tried a 5-pointed star shape instead of a circle for the basic cross section, but this just looked weird, so the circle is it for now. I’ll be back at my home base next week so I hope to be able to make some more progress then. Thanks again for your help with this.
Hey inno - just wanted to let you know I finally figured it out. 2 spirals tweaked by your method and then lofted. I need to make sure the result will slice OK, but I’m quite sure I’ll find settings that do that. Thanks again for your help.