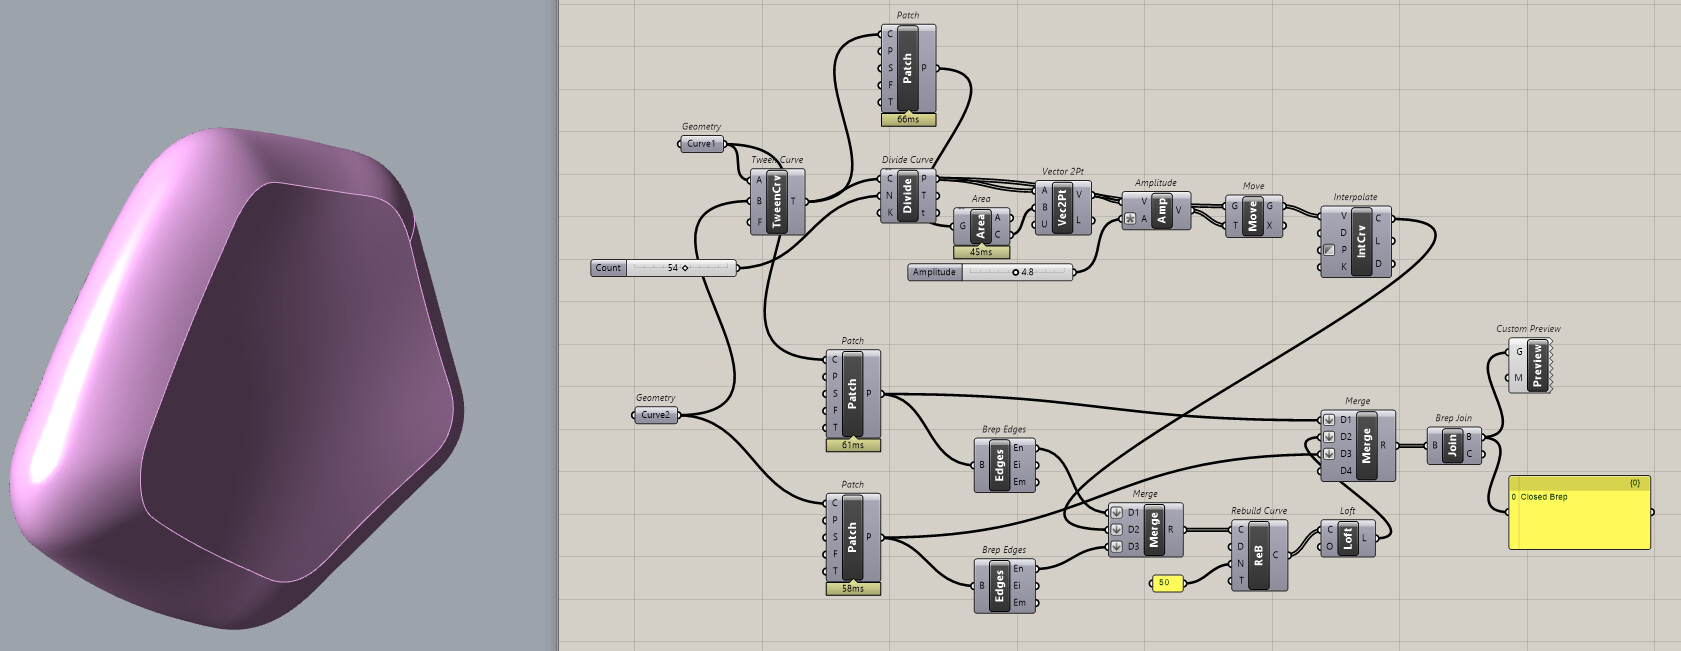
Here is a shape I’m calling a biscuit:
I made it from 2 non-planar closed curves that generate 2 patch surfaces, and a Tween curve that is the basis for a series of arcs that make the Loft surface that is the curved outer edge.
The problem is the resulting biscuit is not a Brep. I need it to be a Brep because there will be a bunch of these used to SDiff depressions on the outside of a vase shape. I’ve tried the following with no help:
Using one arc to do a Sweep2 or Sweep1
Meshing the biscuit
Baking the biscuit and doing Rhino’s Solid/Union command
Upping the DivideCurve point count to 200 & 1100
Making Patch surfaces from the edges of the Loft surface
Making the biscuit with a flat edge (a Ruled surface between the Loft edges) woks fine; all these biscuits are nice closed Breps. But I need the biscuit edges to be curved. This doesn’t seem to be such a difficult issue, but it’s got me stumped.
this might be a way using sweep2, the trick is to retrieve the boundary curve of the Patch and apply on that the division, instead of using the original curve
(but the sweep2 produces some pinches here and there…)
Well that’s spectacular Inno - many thanks. It does make me wonder what Merge does internally. It’s not obvious (to me at least) that it does anything different from just connecting multiple objects to a single GH component, but I guess there is something going on there.
I did try setting Rebuild in the Loft options, but that didn’t help. Maybe that rebuild is not the same as the GH Rebuild component. Or maybe I had some other problem going on.
It will take me a day or 2 to get your method incorporated into my real file, but I’ll post some pics after I do. Thanks again for your nifty solution.
I’d like to suggest another method. One of the patches can be projected to a plane and on this plane you can create an extrusion, which can be filleted.
In a second step, this flat biscuit can be sporhedd back from the planar projected version of the patch to the patch.
Gosh Martin, I’d have to say your method is not exactly obvious or intuitive - at least for me. It does work nicely though, and I appreciate you showing it. Interestingly enough I did try FilletEdge, but it was on the simple biscuit version using 2 patch surfaces and a Ruled surface between their edges. That failed for a couple of reasons: the curvature of the edges made it impossible to use a fillet sufficiently large, and the Ruled/Patch combination never had a perfect fit at the edges.
Well…I’ve never used the OffsetLoose object in GH because I thought it only did a “loose” fit for a planar curve. But now I see what it really does and how it yields a very straightforward solution. I expect your method will also use a lot less CPU time which will be a major benefit for me since I will be SDiff-ing something like 50 biscuits. Thanks for enlightening me.
I do have a question though: in your solution the Nurbs object creates 10 arcs that you pass to SWP2. I thought the Sweep objects could use only one curve as the shape to sweep. Up to now I just never noticed that it’s tool tip said “Sections (S) as list”, so they can obviously handle a list of sweeper curves. But what do they do with them all? Average the sweeps from all of them? Use each curve to make the sweep between it and the next one? This seems pretty mysterious to me.
I don’t know the exact scenario of your objects, how you create them… Editing simple representations of complex objects in the world coordinate system and then transforming / morphing geometry is often easier than trying to work curves derivede from complex freeform shapes. In fact your patch could probably be simplified to a much simpler surface which then leads to less definition and less problems down stream.
The surface have different curvature in every point on the edge, using more sections will decrease inflating in some points, and in the script there is a scale option for the same reason.
Finally…
For reasons having to do with my limited understanding of GH components & Rhino quirks it has taken me quite some time to come up with a fully implemented solution to my original post. Most of the credit goes to all the above contributors who help me reach this solution. My GH script that makes the biscuits is fairly ugly, so I put it all inside a cluster. The attached GH file is just the cluster, and I’m sure it can be cleaned up a fair amount, but it does work - albeit with some caveats I’ll discuss below.
Here are some screenshots that show what I came up with:
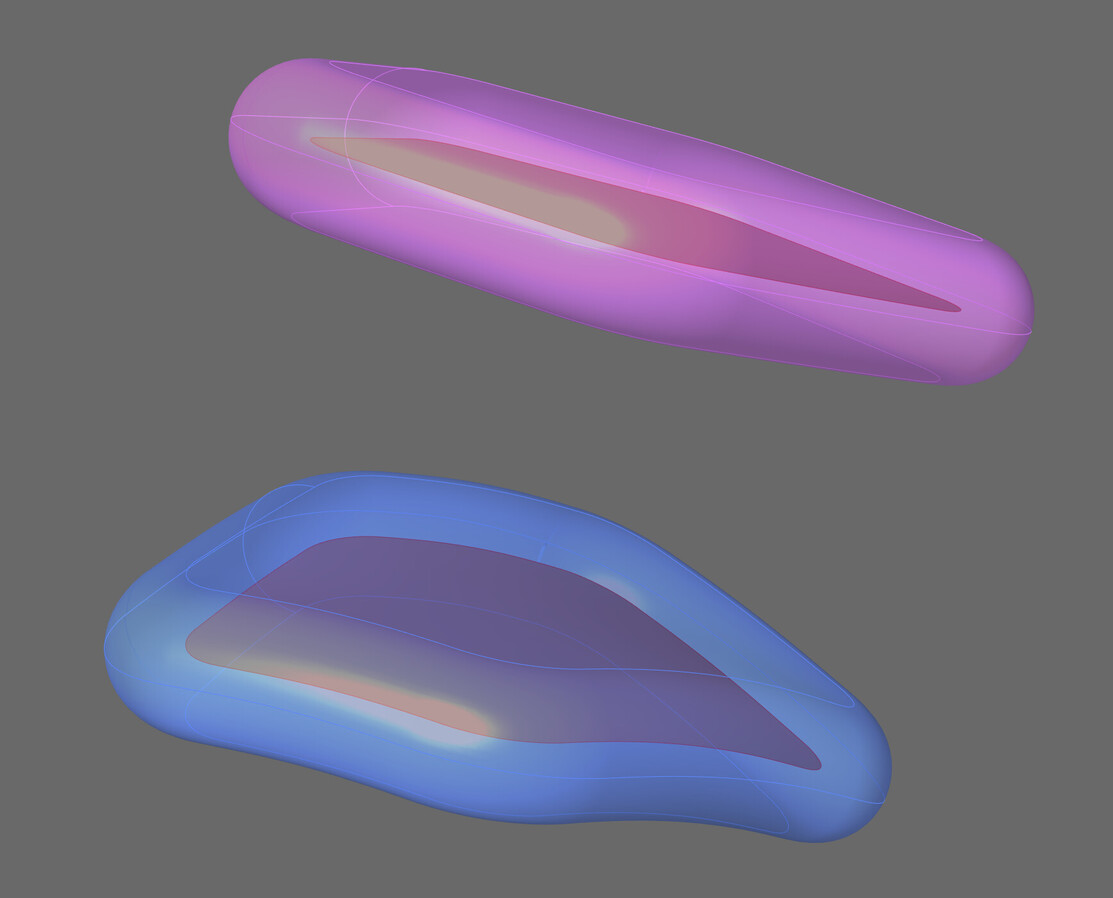
This is a closeup of my printer’s toolpath in the middle of the part that shows the curvature of the biscuit’s edge shape:
The Biscuit cluster has a couple of input parameters that are critical for achieving Closed Brep status for all biscuits. Specifically, depending on the curvature of the base shape, the values for Seed and # Cells/Biscruits will determine whether or not all the biscuits will be Closed Breps. Higher curvature in the base geometry requires more/smaller biscuits, but sometimes just changing the Seed value will change the biscuit shapes enough to switch from Trimmed Surfaces to Closed Breps. I call situations like this a quirk.
Finally I’d like to again than everyone who helped with this situation. As usual I got a much better understanding of how all this stuff works. I’m sure I’ll be back again.
Similar to my approach above, you can create the voronoi pattern in 2D and morph the biscuits onto the vase. Sporph and boolean difference with the fillets takes some time in my definition but it works. One of the challenges is the offset and short segments on the original voronoi / surface intersection curves.
I’d probably disable sporph, fillet and the boolean difference for form finding and only do the fillets on a final version…
Wowee! What blew me away was the first part of your solution - the part that created the flat Voronoi biscuits that mapped onto the surface with no visible seam. I had used that same basic method before, but without your fancy adjustment, and it produced an unappealing seam in the final result:
It arrived just in time actually as I was about to start printing this using the cluster I included in my first post here. That one took a lot of parameter tweaking in order to get a printable result. Needless to say your method is much easier to deal with. So many thanks for sharing it.
The attached file shows what I did to incorporate your method in my real GH script. I added a different SDiff option that someone here (was it you?) showed me some time ago. It is an minor improvement over the stock SDiff:
I probably should have disabled the SDiff’s before saving - so be sure to Lock Solver before you open this file. I’m going to have to study the method you used to fix the seam problem - at first glance it doesn’t seem to be “intuitively obvious” - but I’ll have plenty of time to do that since this print will take something like 18 hours or so.
Thanks again for your help with this - it seems like GH is a never-ending universe of things to learn.
I’m on my 3rd delta printer now. It is a well modified FLSun SuperRacer that works very well and was relatively inexpensive ($450 as I recall.)
FLSun is about to release a new model called the S400 that has a number of improvements over the base SuperRacer. They tout it as being able to print @ 400 mm/sec. The price is yet to be announced and it is hard to estimate because the S400 has lots of updates - both hardware and software.