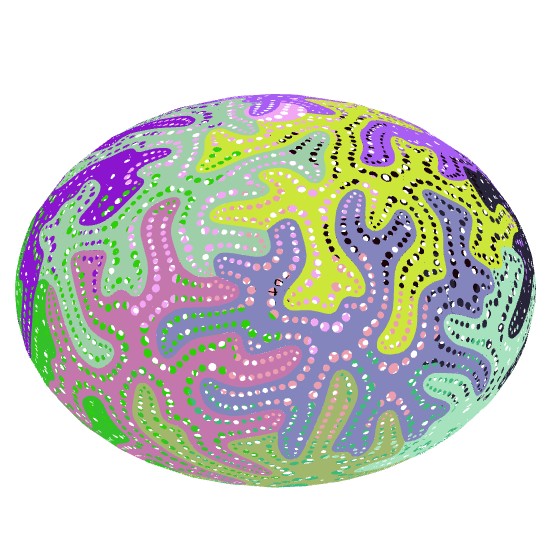
First virtual light for my new lamp design, some (many!) inspirations from @nervous.system with their Puzzle Cell Lamp but the generation of parts is made with my mesh clustering tool and the holes are done using my Fern Spores generator. Also I don’t know if I will make it in metal and/or wood. Here in France metal is quite the same price as birch plywood.
The components of Ammonite Plugin, I have to learn to make Icons. @DanielPiker I used one of your script, as my plugin is not on the wild, I keep it. If I publish this plugin I’ll ask you if you allow me to publish it.
I didn’t find that in a paper. I did it by myself. I named it “Fern Spores” as it is quite similar, could be named “string of pearls” …
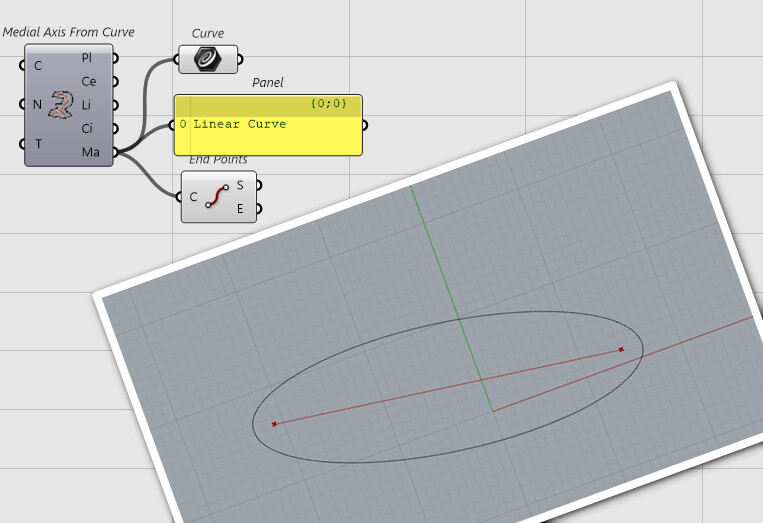
The base was the medial axis tool. I made a component to find an approximate of the Medial Axis. It is very classical and works with Voronoi but it outputs more curves.
The medial Axis made with Polylines that joins at the node
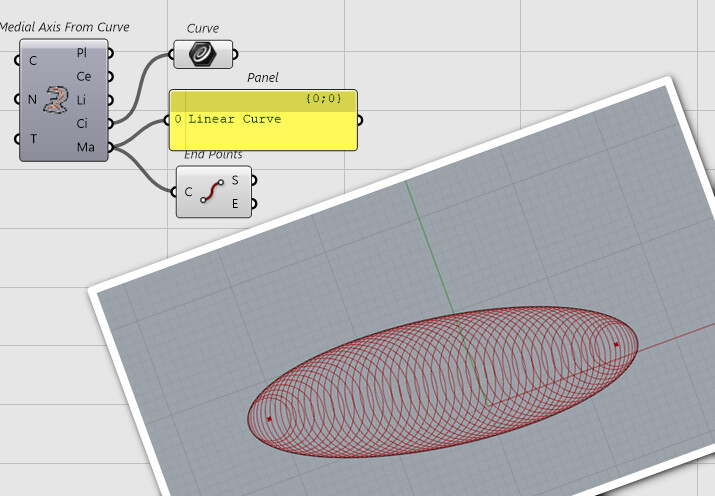
This “tween” curve is used to place circles with a radius proportional to the length of the ribs.
Here circles on “tween 0.5” and “0.5 radius” with no gap. As it is an iterative process, precision could be augmented using the “N”
Let say you have 2 meshes the 3d one and the 2d one. For each face i have a transform object ChangeBasis. Then for each face i make the boolean with contour , face edge and holes. Then i use a rhincommon Mesh.createfromtessellation( points lines) i then suppress all faces that are on holes. Then transform to 3d using Transform.
Yes It is 2 topologically similar mesh, and don’t forget that the face 3D and flattened have the same edge lengths. So the Transform is just rotation and translation with no scale …
Each part of a non closed general surface object is made with one contour and with holes. I tried to make a tool that rely on that. it is also one of the logic on Clipper. If you gave that
You have 2 objects
In my problem I could have that
Red my contour (could be outside the mesh also but at he moment I didn’t implement this)
Black the holes
Green the mesh flattened.
First prototype of my Fern Lamp, here using variational cutting for the main cuts with tool from @DanielPiker.
I used 2 thickness of plywood to test, 1 mm and 1.5 mm. I also used to type of nylon fastener, rivet and canoe clip. It is half a success/half failure. I must think of some improvements.
The lamp holder is quite good also need some improvements. An elastic or spring is used to push the 4 arms in the circular hole of the lamp. It is a 5 pieces
Hi Laurent,
Very nice and the shadows are beautiful!
I’d like to know more about you experiments, how the different thicknesses worked out, details about you fastening hardware.
Thanks!
I am very happy with the global design. I have another one with more sinuous shape (my own tool to cluster mesh).
With the size I made, Height = 400 mm, Diameter = 560 mm, the thickness of 1.5 mm surely the limit. But it is not the biggest problem. My main problem is that I was over confident that it will work looking at Nervous System work. It is a one layer assembly but as the pieces are not exactly on the original ellipsoid and as I choose the placement of each piece randomly and wood only bend, it was impossible to align all the rivets holes. This could work but not on an hyper static shape like an ellipsoid.
For my previous works with 2 layers I had more success but I also optimize more the shapes. It was a two steps process, rough shape than optimization to take into account the fact that parts are from flat material.
I think for one layer object I must use other way of assembly or less rigid material (metal plastic). For wood I could add laces, or links under the skin …
I used Snap Rivets from Nyfast and Aliexpress. White and Black.
They are nice but difficult to use when it is difficult to align holes.
Drive fastener are more easy to use here but as my holes were a bit to small (3.1 mm instead of 3.2 mm) I needed quite a great force to insert them so it could break the wood. But I wanted to be able to test the 2. But they are just in black.
Happy to have further discussion via webcam if you want.
Very useful information, thanks Laurent.
Wood can be bent, even more so when steamed, but cannot be stretched. I see the problem.
As for other materials, it would be easier if you had a base ellipsoid, let’s say machined from a solid piece of wood, onto which you could shape the individual pieces.