Hello everyone, i have an assignment where i have to design a speaker with parametric features as the speaker’s holes.
I decided to design a donut shaped speaker and modeled the donut form and split the surface for where ı want the holes to be.
I watched various tutorial videos from youtube and tried 2 different versions; voronoi and cull pattern.
I’ve attached the files below, please tell me what im doing wrong,
Thank you so much
try2.3dm (398.0 KB)
try2.gh (10.6 KB)
TRY1.gh (8.9 KB) TRY1.3dm (782.9 KB)
at try2, even though i’ve selected the upper part of the donut as my surface, the patterns projected at all parts of the donut, i don’t know what should i do
Hi @melisaozcan,
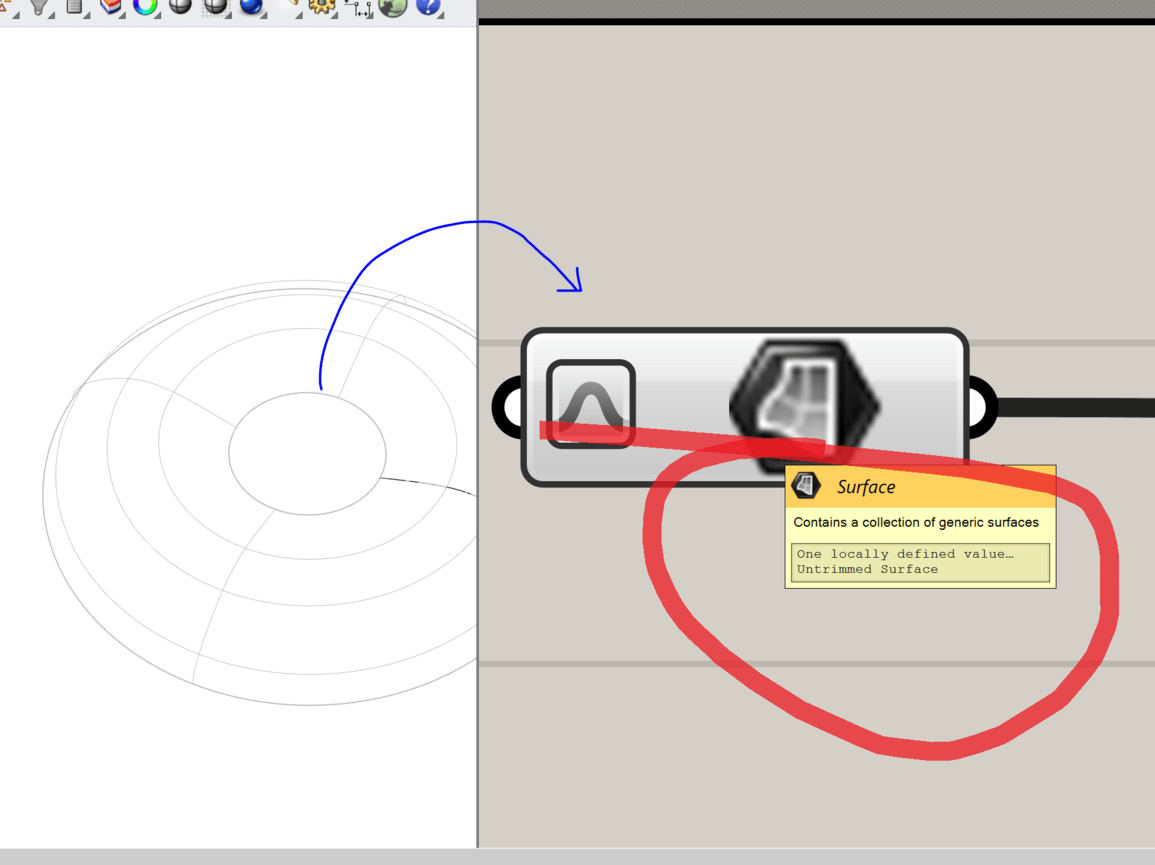
One option is to keep the original (untrimmed) surface, do all your mapping stuff clean, then take care of culling.
Check this example:
try2_b.gh (23.0 KB)

Best
hi, thank you so much for reply and the time you spent on this, im new to grasshopper so i don’t really know what those new commands you’ve added mean, why are they there, i have to learn them and develop my grasshopper knowledge,
but what should i do to create holes from that texture you’ve projected on the donut, when i add extrude command they just indiviually extrude (the one on the gorund), i also couldn’t bake it (i’ve selected everything and then baked it but everything went different)
sorry to make you explain it this much, im having a really hard time understanding grasshopper,
thank you so much again
no problem - ignore for now
got you
here’s a more practical way for learning purposes, though there are other ways as well;
first, re-create that ‘same’ surface but ‘untrimmed’, meaning it’s four-sided and not split - here’s one using the _revolve command:

use that (untrimmed) surface instead in grasshopper:
get its ‘dimensions’ with this command, use the dimensions (UV) to guide extents (XY):

the rest is what you already had…
once you map the scaled curves, also map the original curves:

then loft them straight (see grasshopper file) - NOTE: It can get SLOW - be ready to wait - also beware the result might leave you with an open seam
an alternative, also SLOW ![]() - pull mapped curves to surface using ‘pull curve’ command:
- pull mapped curves to surface using ‘pull curve’ command:

then you can split the surface with those pulled curves - be ready to wait even more!
…another method would involve extruding like you were trying, then trimming, but it would be equally slow or worse
files attached
try2_c.3dm (409.2 KB)
try2_c.gh (30.4 KB)
hi, you are such a good person
ı’ve reread what you have wrote and tried to the first option but after applying scale, the program froze for about 30 minutes and ıt got so slow and i coulnd’t do anything so i had to shut it down
i 've attached the file if you want to look at it 
i 've tried to do it from the beginning a couple of times and spent hours yet i still can’t do it and im only doing what i see from your file, i don’t understand what im doing wrong
thank you so much again
burdan devam.3dm (379.6 KB) burdan devam.gh (14.3 KB)
you skipped ‘union box’ for the ‘bounding box’ parameter, resulting in one bounding box per point instead of one bounding box for all points.
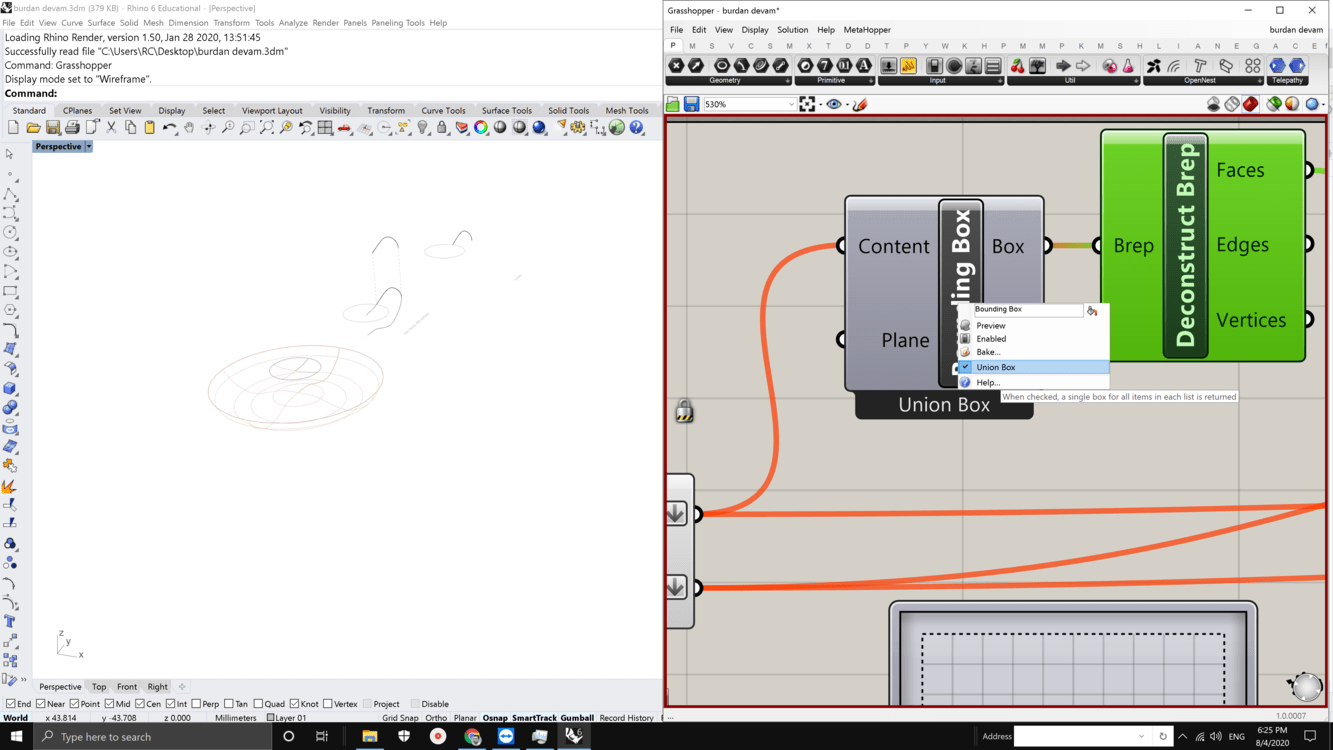
next time you have an issue like this you can open grasshopper, go to ‘solution’, find ‘disable solver’, AND THEN open your grasshopper file to make corrections or disable suspicious stuff - then enable the solver again.
Here’s the corrected file:
burdan devam.gh (16.7 KB)
i don’t know how to thank you
you are a life saver!
thank you so much for your time and patience
i didn’t want to do something easier for my assignement and i also wanted to learn this, didn’t want to leave unsolved problems in my mind, now that i understand better, i feel a lot better other than the assignment,
thank you again!
best 
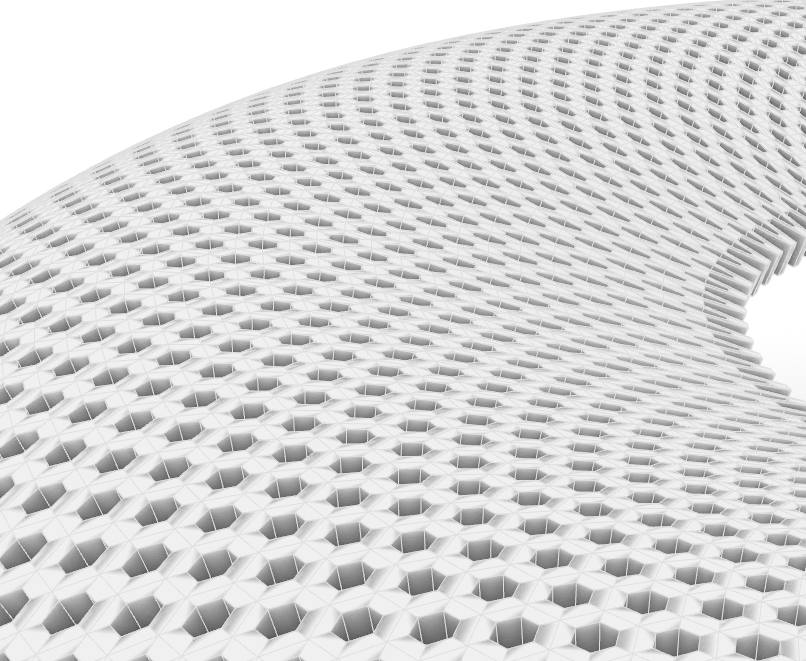
finish it! then post a pic ![]()
Best!
when i exported into keyshot, i realized that it didnt have a thickness so i connected an extrude panel to the loft panel
but now all the polysurfaces are apart from eachother
i don’t know how to join them
what should i do?
thank you
well…knowing that from the start is a good thing!
makes sense! now you’ve learned ![]()
With what you have, and if it’s for rendering purposes only, I believe your best quick-and-easy bet might be to just mesh the whole polysurface you already have (without extruding) then attempt mesh-thickening with the weaverbird plug-in.
Otherwise, you’d need this logic:
- offset the original surface both inward and outward - ignore original in-between surface
- perform same hex pattern operation on both of these - same you’ve done before with the original surface
- loft/connect the naked (exterior) borders of both (interior and exterior) polysurfaces
- join it all - you get a closed polysurface
Good luck - if you have trouble post a file/image
I guess you don’t need to do that, you could also just thicken inward or outward depending on how you want to show it - not crucial if it’s for rendering
Hi again ![]()
i tried to add the extrude panel to various panels but it freezes and i can’t do anything
i just want the hexagonal patterned surface to be one body
i don’t understand how can i thicken it without extruding it, i also tried the offset surface but it wouldn’t work
later on i also have to create 2 more different parametrc designs using the same file, so i don’t want them to be seperate

thanks again
ehemehem base.3dm (430.0 KB)
ehem ehem base.gh (14.3 KB)
yeah, too many polysurfaces trying to get extruded while at the same time getting exploded - ABORT mission
They’re different things: extruding is cool when stuff is flat and simple or single surfaces - thickening or shelling can be more suitable for shapes like what you have.
blah blah
I opened your latest file - instead of joining all lofts, then you can just go straight to meshing then thickening with weaverbird.

notice the ‘thickness’ value is negative (for thickness to go inwards) - make it positive if you wish to thicken outwards…
Once you bake it it should look somewhat like this - just choose your thickness value
NOTE:
If you haven’t downloaded weaverbird yet, once you do, make sure you open a BLANK rhino/grasshopper, drag the weaverbird file into it, accept, then close everything, then open your stuff or the file attached:
ehem ehem base_B.gh (24.9 KB)
THANK YOU SO MUCH AGAIN,
thanks to you i definitely understand the program better and even started to like it 
i will post the finished version so that you can see 
thank you again!
have a great day


