Over the past few months, I have built a hyperboloid planted with living trees. Now it’s time for documentation. We hired a photographer with a drone. To share thoughts with the photographer, I decided to create a video composed of photos and simple animations:
I just couldn’t be bothered to buy Bongo or to learn Blender. Thus, I decided to see how far I can get with Grasshopper and without plugins. Find the project files below (minus two blocks which are just too big to upload here):
2025-06-17+02_animations.3dm (198.4 KB)
2025-06-17+02_animations.gh (30.0 KB)
These are the main components, packed into clusters:
-
Camera:
The screenshot is from the second animation, flying out of the hyperboloid while spinning. The camera path in this case is simply a vertical line. The target is the origin. And I added camera roll.
The main part of this cluster is a few lines of Python code. I was inspired to take this approach by the video ViewCamera: No overload for method. Only the code from the video is not compatible with Rhino version 8. With the help of the community and in particular @Jakob_v_Schirmeister, I got it work: ViewCamera: No overload for method, How to rotate viewport to absolute angle?
-
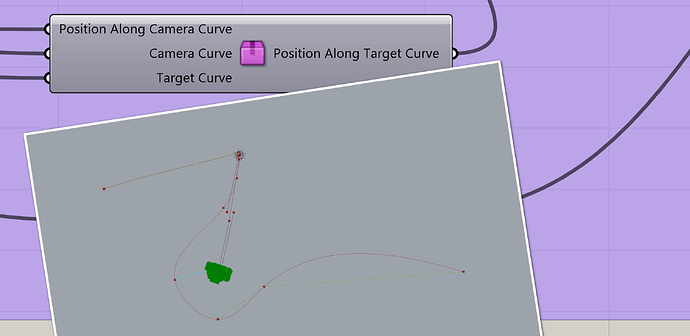
Key frame alignment:
The screenshot is from the third animation, flying through the hyperboloid towards the tree. I defined a target curve, which is a polyline, and a camera path, which is an interpolated curve. The two curves have the same number of control points. While the camera moves along the camera curve, the target moves along the target curve. This component outputs a position along the target curve so that the camera and the target reach each point at the same time. The points act as key frames.
In the screenshot, the red curve is the interpolated camera curve. The purple curve is the target curve. The cyan line shows the direction the camera is looking.
Note, I made little changes inside the cluster. Therefore, animations rendered might look slightly different than in the video above.
Again, thanks to @Jakob_v_Schirmeister for showing how to make this work: Parameterize two curves to match at control points
-
Pacing:
The screenshot is from the fourth animation, showing the mountains. It is a substitute for the graph mapper Grasshopper component, which I found a bit too primitive to give precise control over pacing through time. In the end, this component is comparable to a velocity envelope you find in some video editing programs.
It could be interesting to upload these paths into a drone, probably by means of waypoints. But first I’ll see what the photographer comes up with. I don’t want to interfere with his creative freedom. My video is just to communicate aspects of the hyperboloid to pay attention to.


