I’d like to achieve this geometry to later perform the CNC milling.
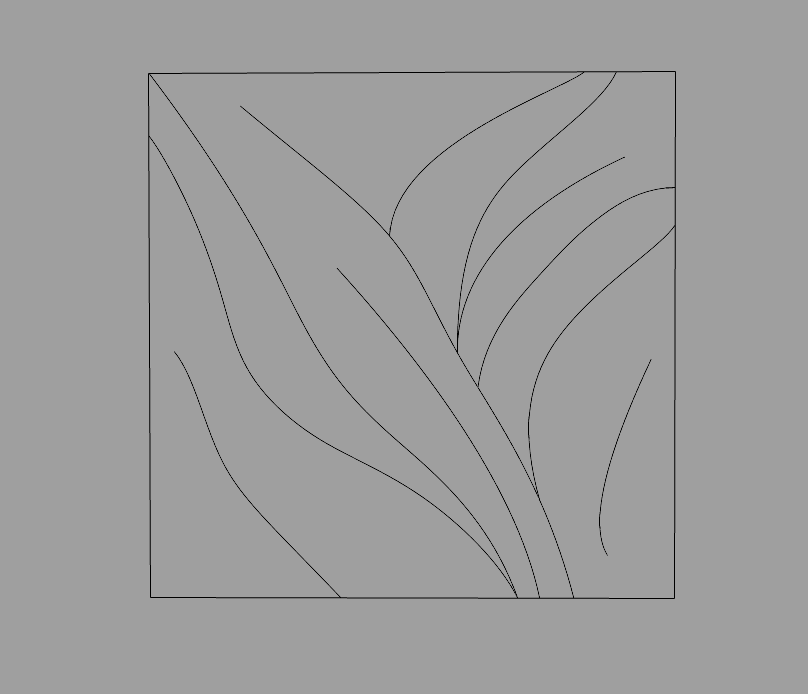
I only have the following curves drawn in a 50x50cm box.
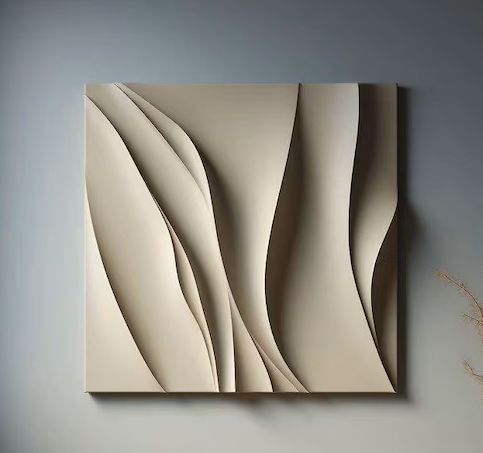
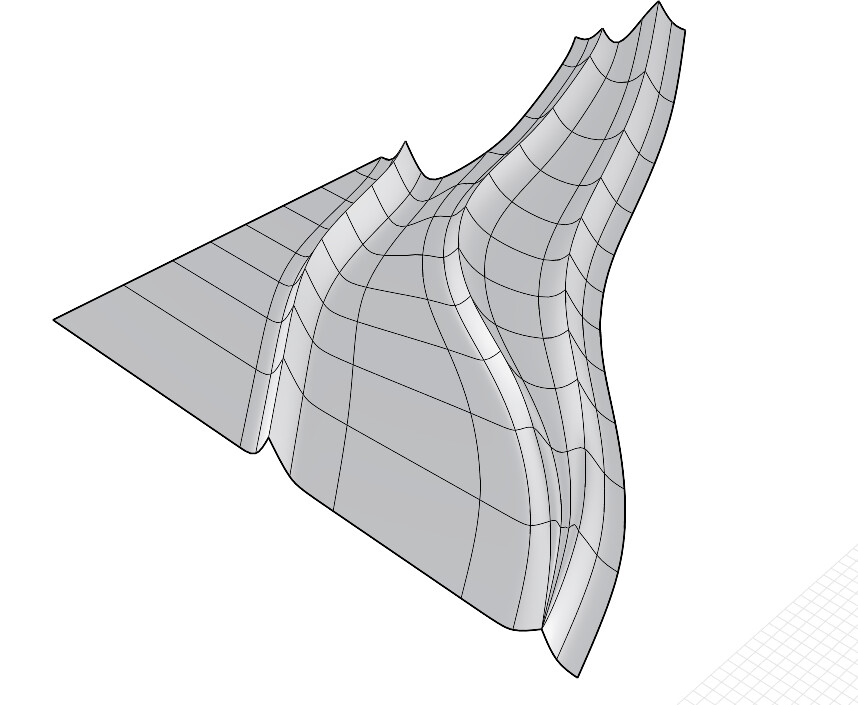
I would like to reach a result like this:
I’d like to achieve this geometry to later perform the CNC milling.
I only have the following curves drawn in a 50x50cm box.
I would like to reach a result like this:
You could play with the Align command, using option “to curve”.
I learned this long ago here.
In addition to it, I’d select the area via the SelBrush command, then deselect the attracting curve, running align and then (optionally) smooth afterwards:
For grasshopper, you can find numerous sculpt/deform examples.
See some here:
subd all day.
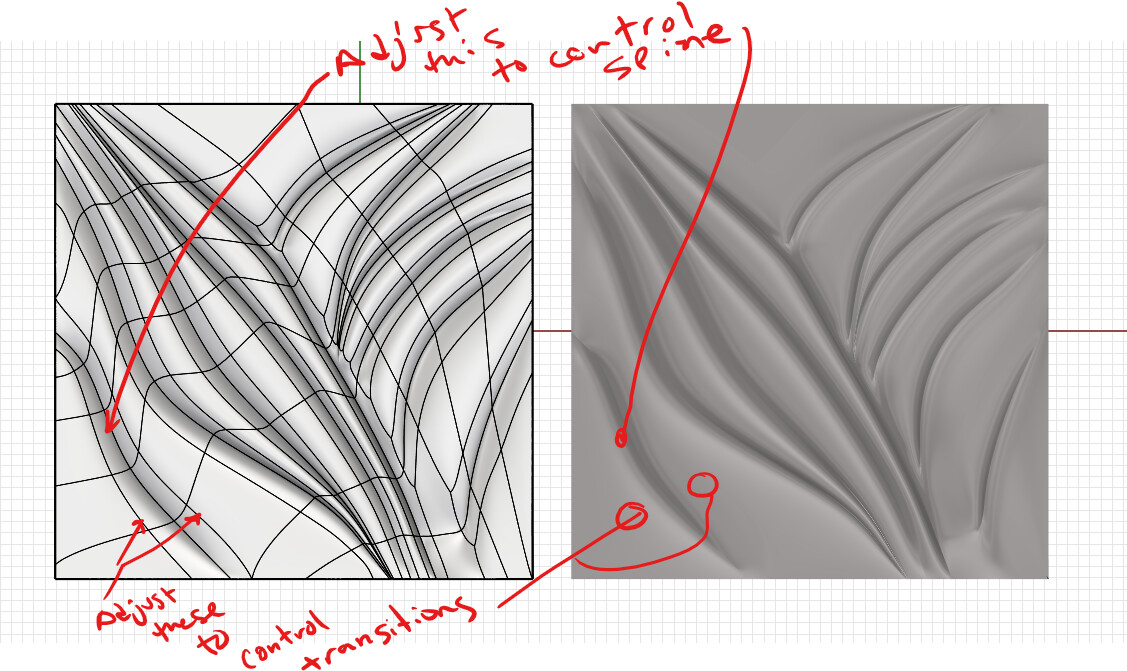
your curves are creases, then add edges as per rule of three to get your transitions.
see this video if you do not know rule of three.

see below- and attached file for a quick and dirty example, feel free to steal and make your own adjustments and refinements.
Hi, I still haven’t been able to achieve that result.
How did you manage to trace the curve in the SubD? I see that all the curves I had are exactly as shown in the SubD in the image. I can’t get it right.
I’m still a bit new to modeling in Rhino.
Thank you very much.
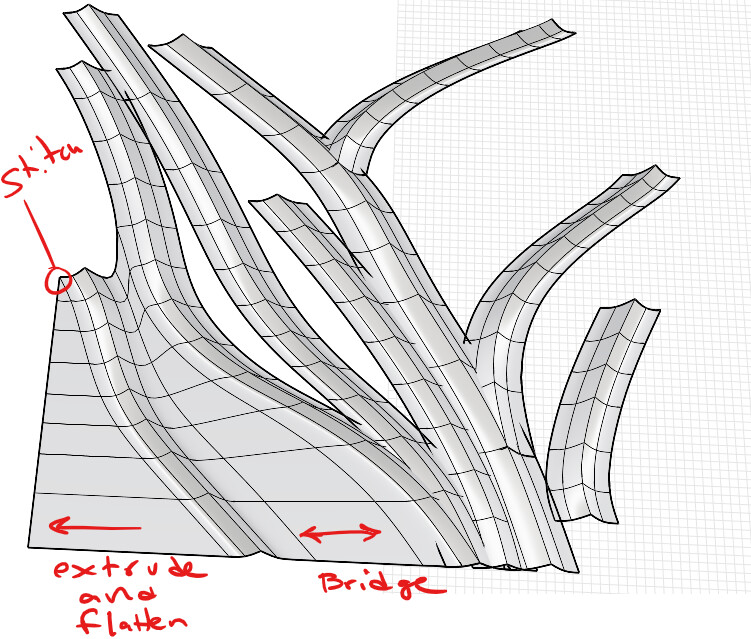
couple of ways, make subd friendly curves and extrude them in both directions to get your basic shapes, then stitch the verts together or bridge edges to connect them, bridge or stitch to fill in the blank spots.
or, you can do what I did and start with a single face, and then simply drag the points to match your shapes,
this tutorial may help-

Would it be possible for me to show you the step-by-step of how I’m doing it? Because I keep trying and it’s not working well. If it’s possible, I’d really appreciate your help, please.
I just want to get to the model you sent me.
fwiw- you are welcome to just take my model and run with it.. ![]()
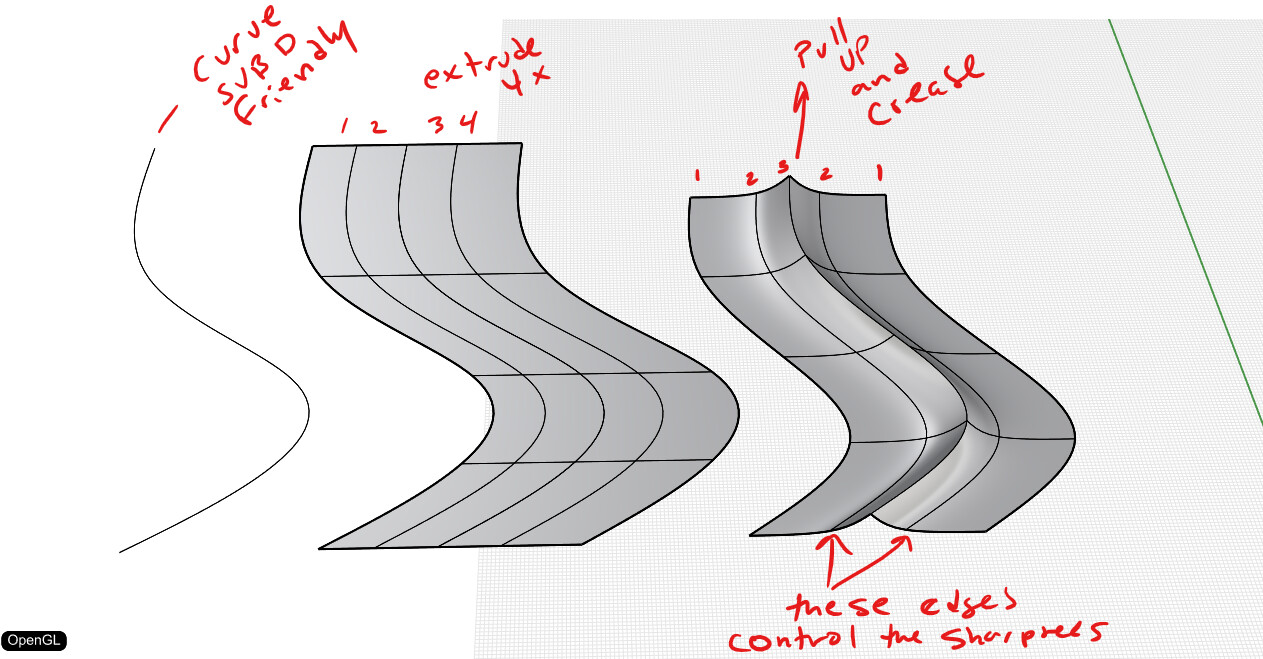
this is the basic structure you are working with-
one curve, (subd friendly) extruded 4x,
pull up the center most curve and crease it.
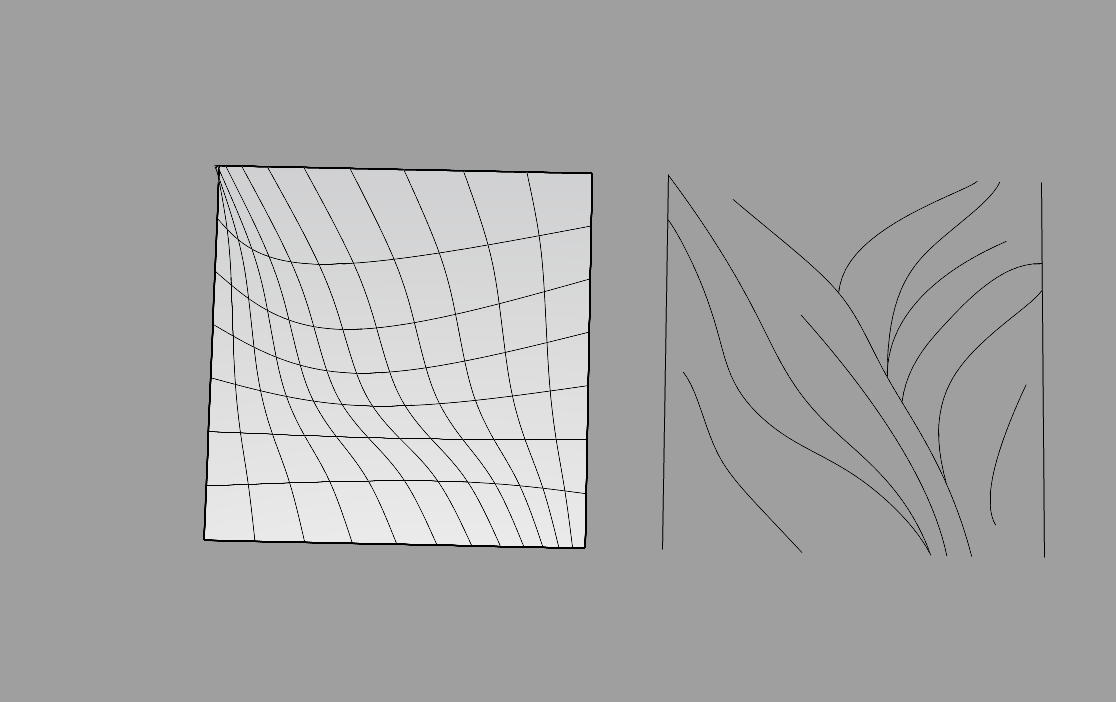
For example, on the left I have the curves I want to work with — just like you did very nicely in the model — and on the right I have some SubD guide curves to trace the original ones. What would be the next step?
start with extrude all those curves individually 2x from the center (4x total) even if they overlap.
pull up the center edge and crease to make all your “spines”
you’ll be left with a bunch of individual parts that you need to connect.
you can stitch edges together, or bridge between the pieces, or delete faces and stitch the remaining ones to others.
post your file as you progress and I’ll help out anywhere I can be useful.
I have this: I duplicated each curve twice and created a SubD for each one.
prueba - copia.3dm (248.1 KB)
your next move now is to start connecting everything up-
remember model in box mode, adjust and refine in smooth mode. It’ll keep you more organized and the model will be easier to control.
just knit up the post it notes… delete edges when you have too many, add some when you need an extra.
Bridge needs the same number of edges, so you can do it a bit at a time and sort out your edge count as you go.
I don’t know how to join the overlapping faces and make them look correct like yours, and I’m also not sure how to connect the faces to the main base shape
prueba - copia.3dm (334.8 KB)
take a peek at this.
you have to delete the overlapping stuff then bridge and stitch stuff.. it takes a bit of back and forth to get it right.
prueba - copia_k fix.3dm (231.0 KB)
I’m sorry, I haven’t been able to do it. The bridge doesn’t work for me — it says the result is invalid. I’ve tried but I just can’t get it to work. Do you know of any video where they apply this same process? It’s really difficult for me and I’m not getting the results. ![]()
bridge requires a matching number of edges.
so lets say you have a mistmatched edge count. Bridge what you can then extrude and stitch what’s left over.