best would be to post a part of your geometry that people can use it trying to figure out the best approach, images only help so much in helping you.
i guess you could try ProjectToCPlane with the polysurface, duplicate the image below and use the polysurface boundary to trim the part off that you dont need, now use the flattened polysurface as a base surface and use FlowAlongSrf to bring it up to the initial one. but again i am just guessing now, if that does not work post a portion of that file, at least the polysurface and the image.
Thank you very much for your time and, above all, for the full and complete information, truly.
I will try to apply the suggestions you have so kindly provided.
I will be sure to let you know the results.
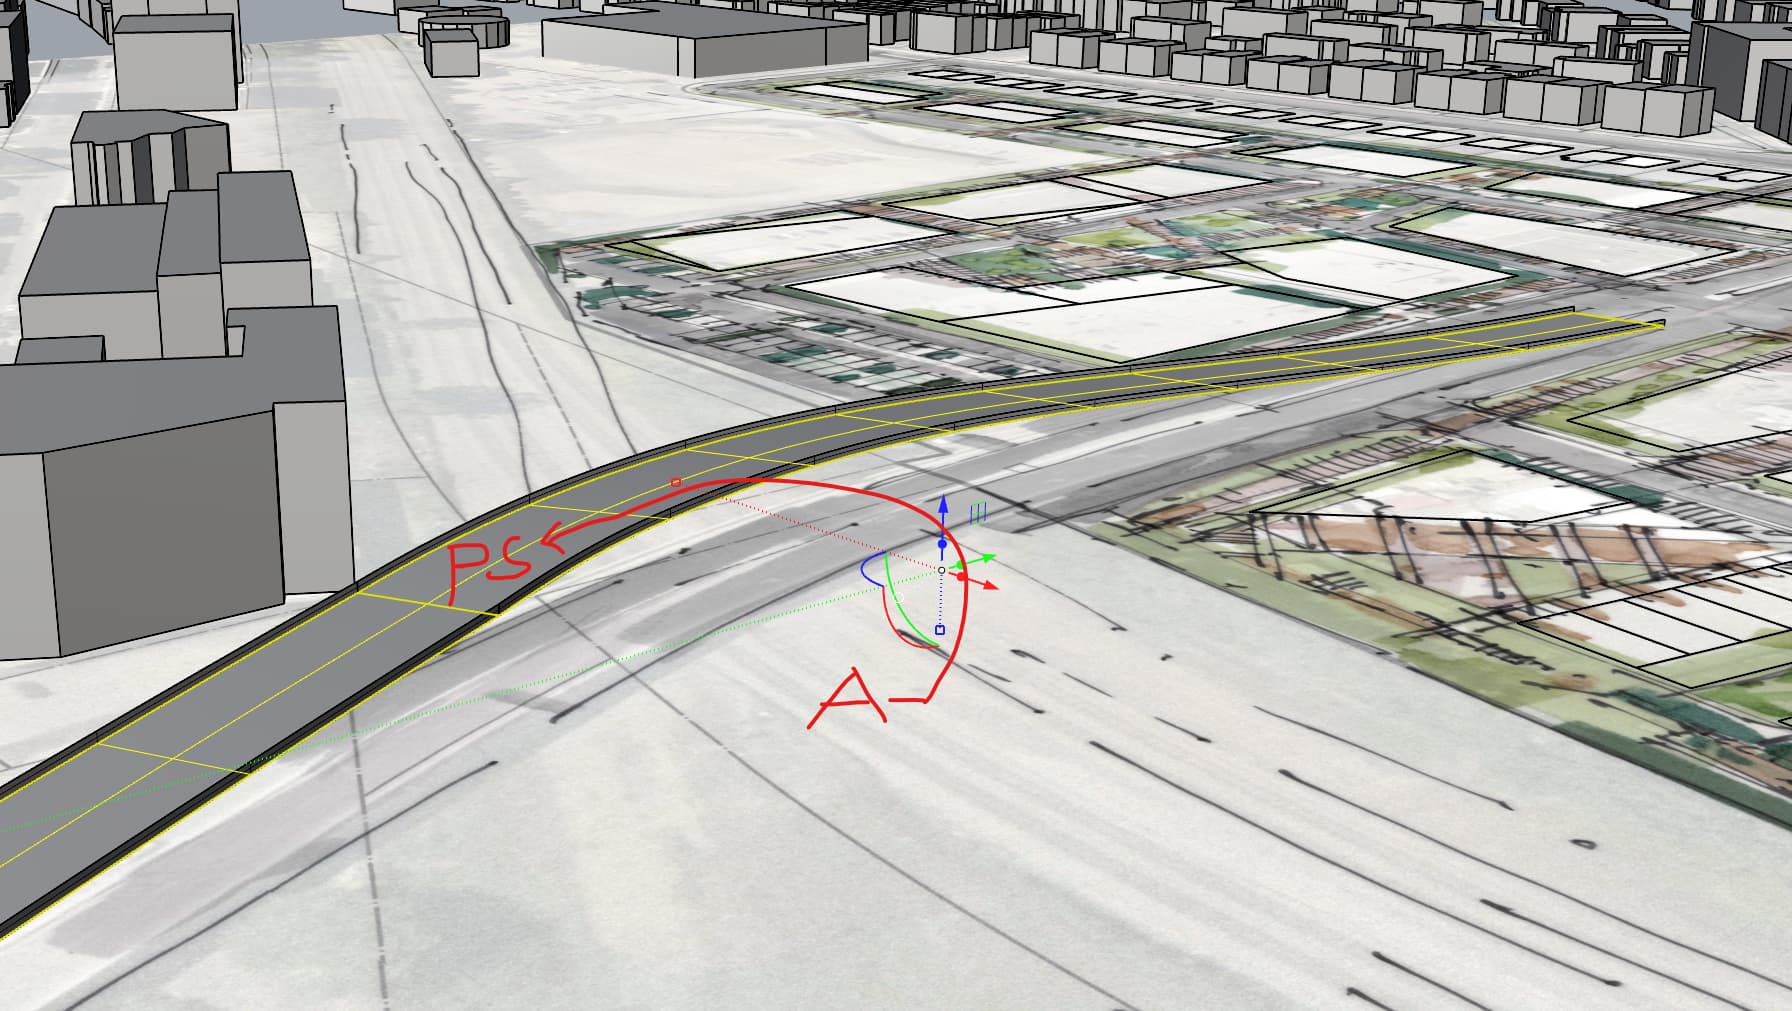
In the meantime, I am sending you a file with the situation regarding the issue.
I have been using Sketchup, where I think a similar procedure is very simple. Hence my uncertainty about the approach in Rhino, where I am just starting out.
The image is also below.
PS
I do not know if Rhino allows a similar approach to Sketchup for projecting images/textures onto selected objects.
Based on your suggestions, it seems more complicated.
Especially, for example, in the case of projecting Google Earth textures onto a large number of buildings as roofs.
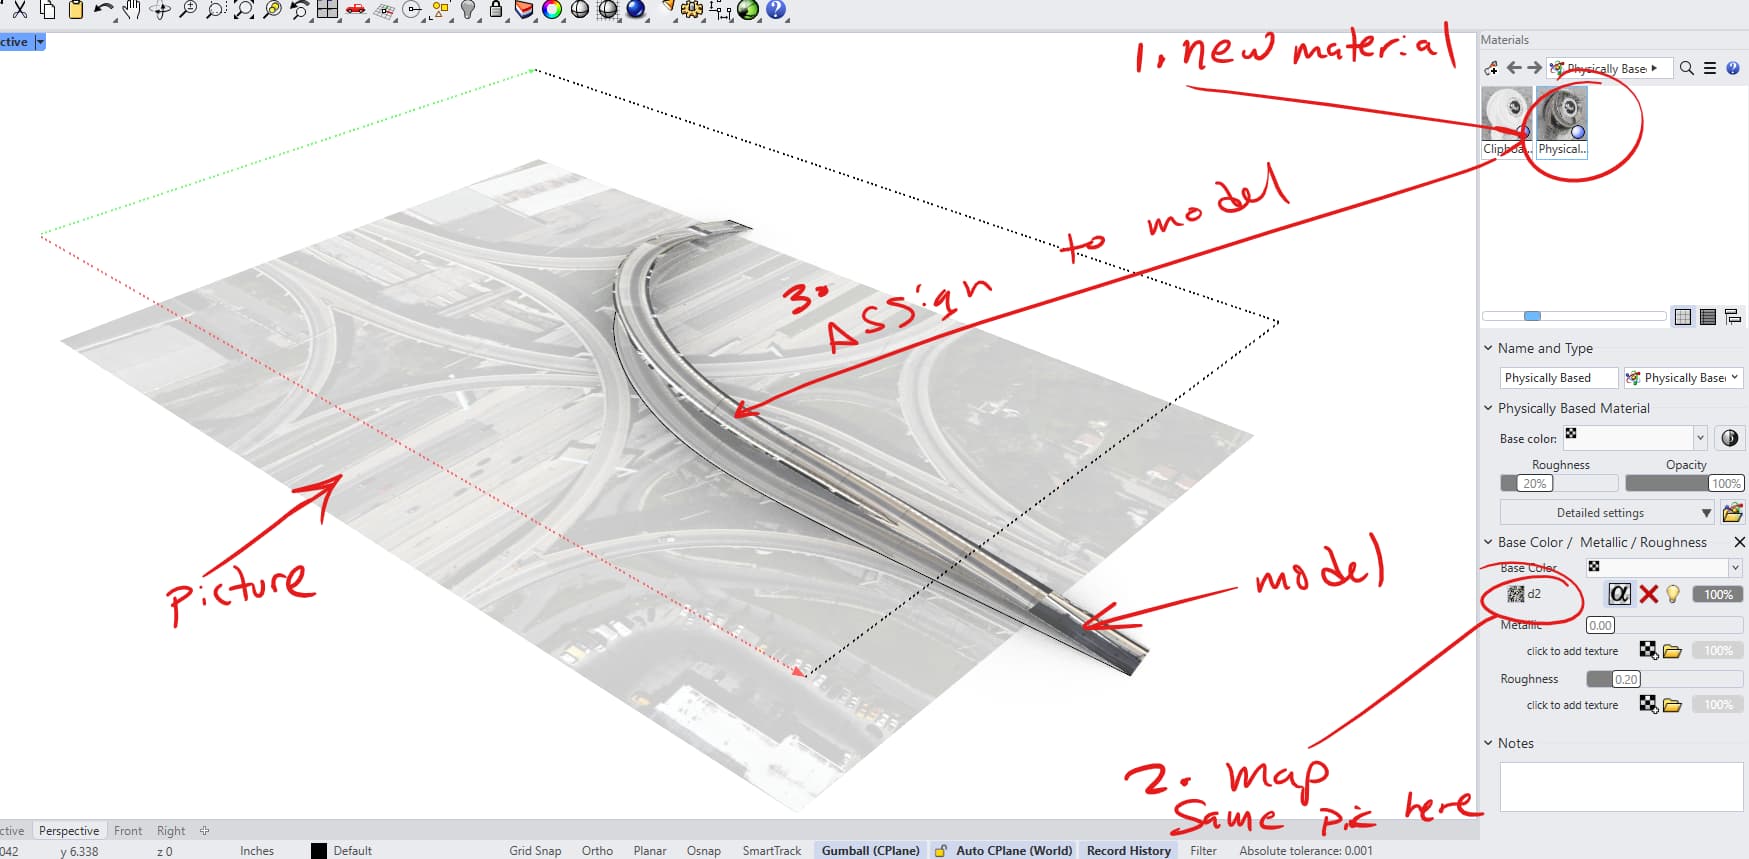
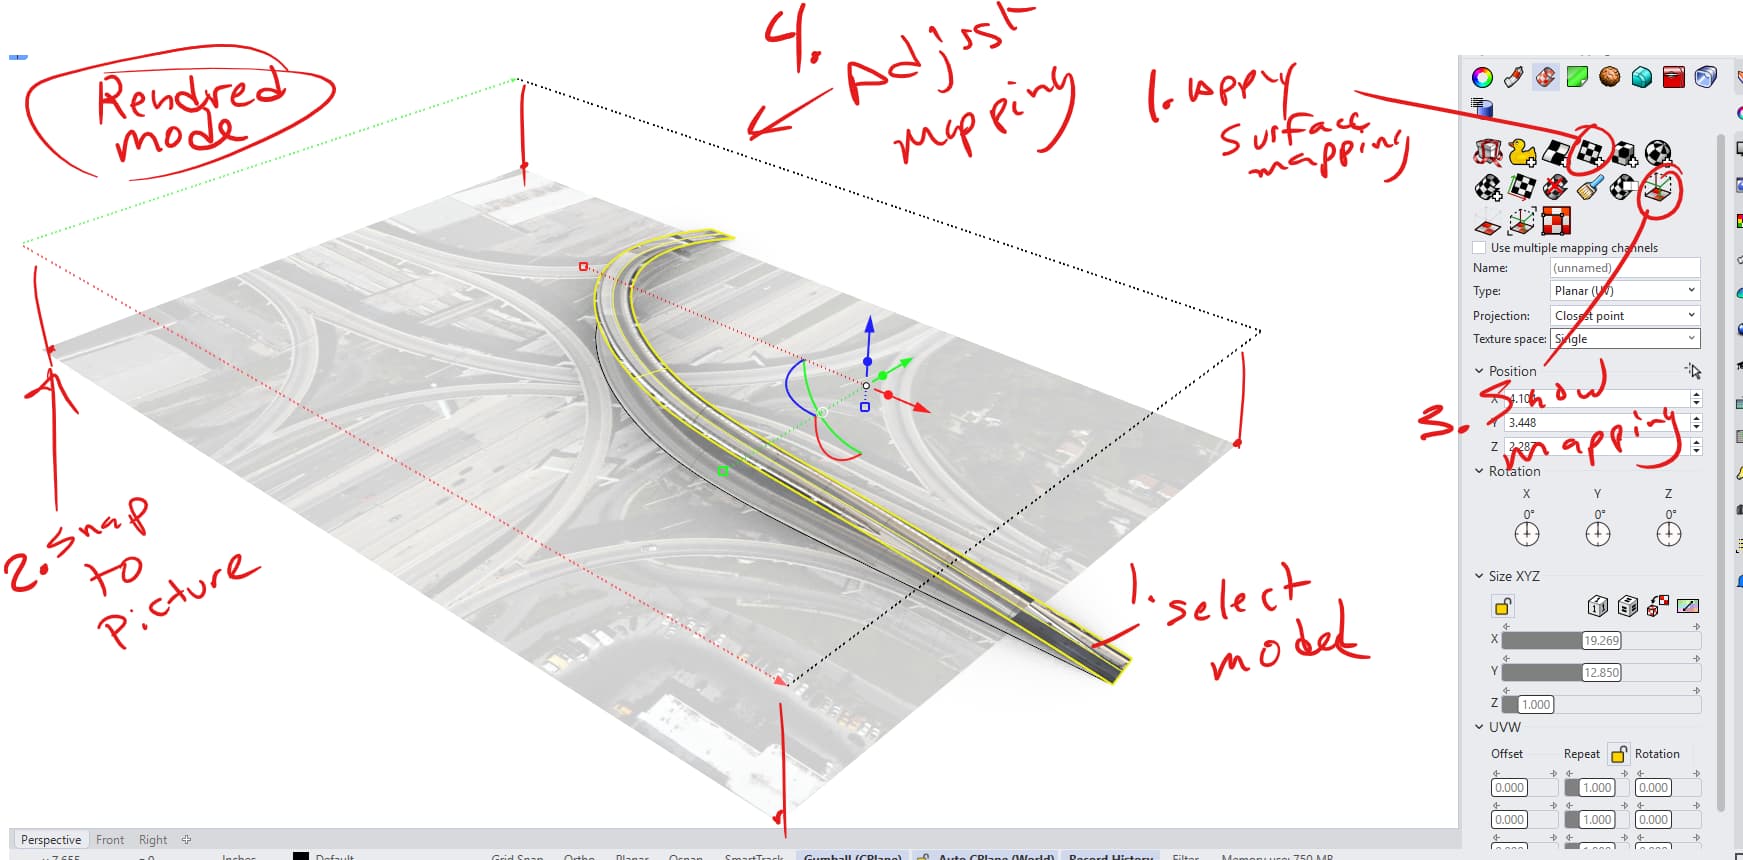
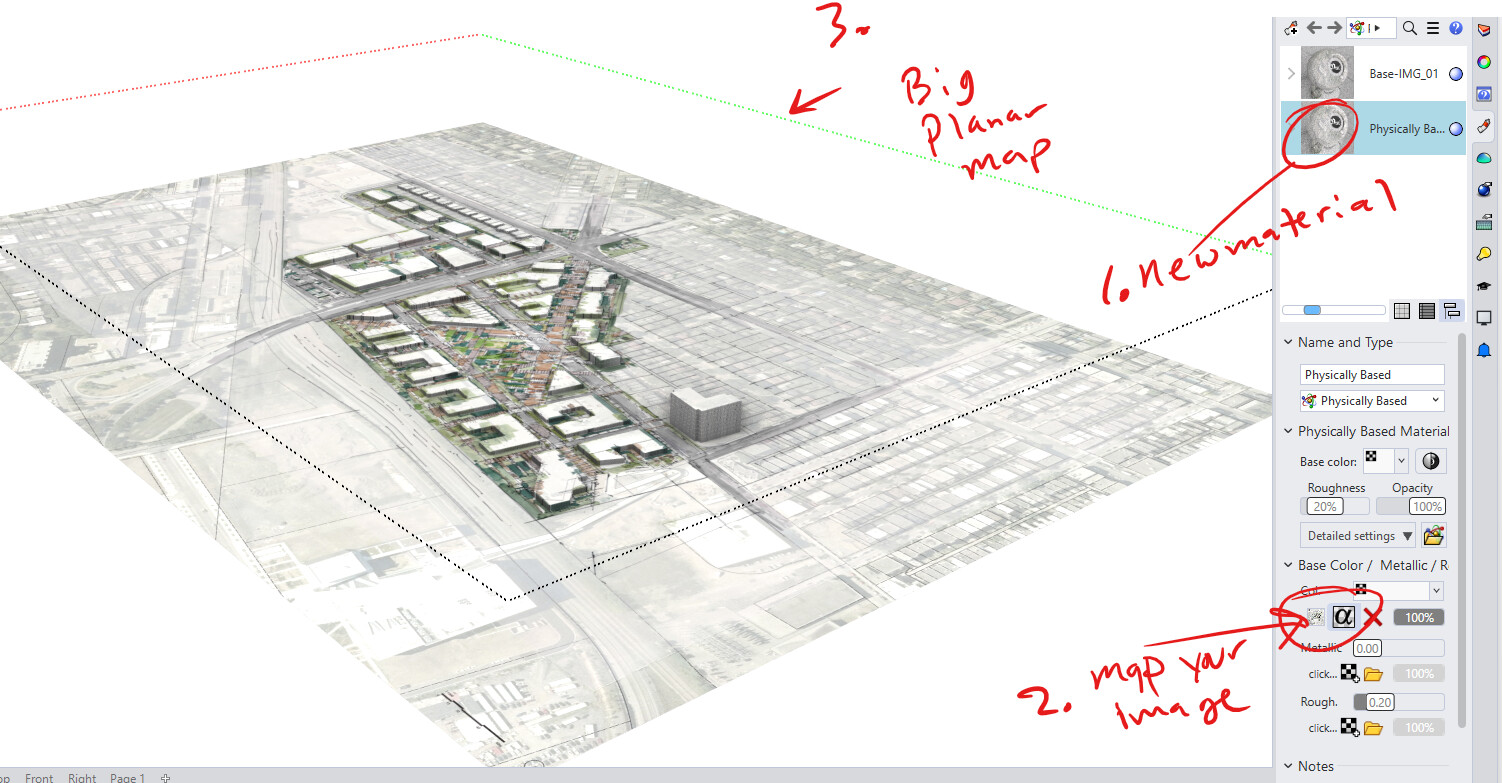
It does not use a similar workflow to Sketchup. Rhino’s approach to texture mapping is very technical and fiddly in a way that I don’t particularly enjoy doing, but you do eventually get used to.
There is basically no abstraction, you are directly placing and manipulating surface UVs onto a texture. In addition to the workflow shown by Kyle, getting acquainted with the UVEditor will make things easier.
wow… your image is 269 mb… does it need to be that big? that is a a LOT of overhead to be carrying around in this file…
it’s 40 inches wide at 600 dpi… that seems like madness for this model unless you plan on doing massive renders at full print quality… screen can only display 96 dpi… anything more than that is a waste for on screen stuff…