Problem is, I’d like to restrain the blend to the maximum height of the planter. But, instead, it creates a surface on top of the planter, which create an issue with the height of the planter as it has to be max 600mm :
Hi David - BlendSrfs are always going to come off the edge that you pick. What you can do is BlendEdge on either the inner or outer edge, set to half the tickness, then BlendSrf from that to fill in.
Can you post a file with the object?
I think that @david33 is asking for something similar to the “Full round fillet” of SolidWorks, which builds a fillet between 3 adjacent surfaces. This video shows how this great tool works in SW:
Rhino has a similar tool for curves only which is called ! _Circle _Tangent, but it works only on curve level instead of surface level.
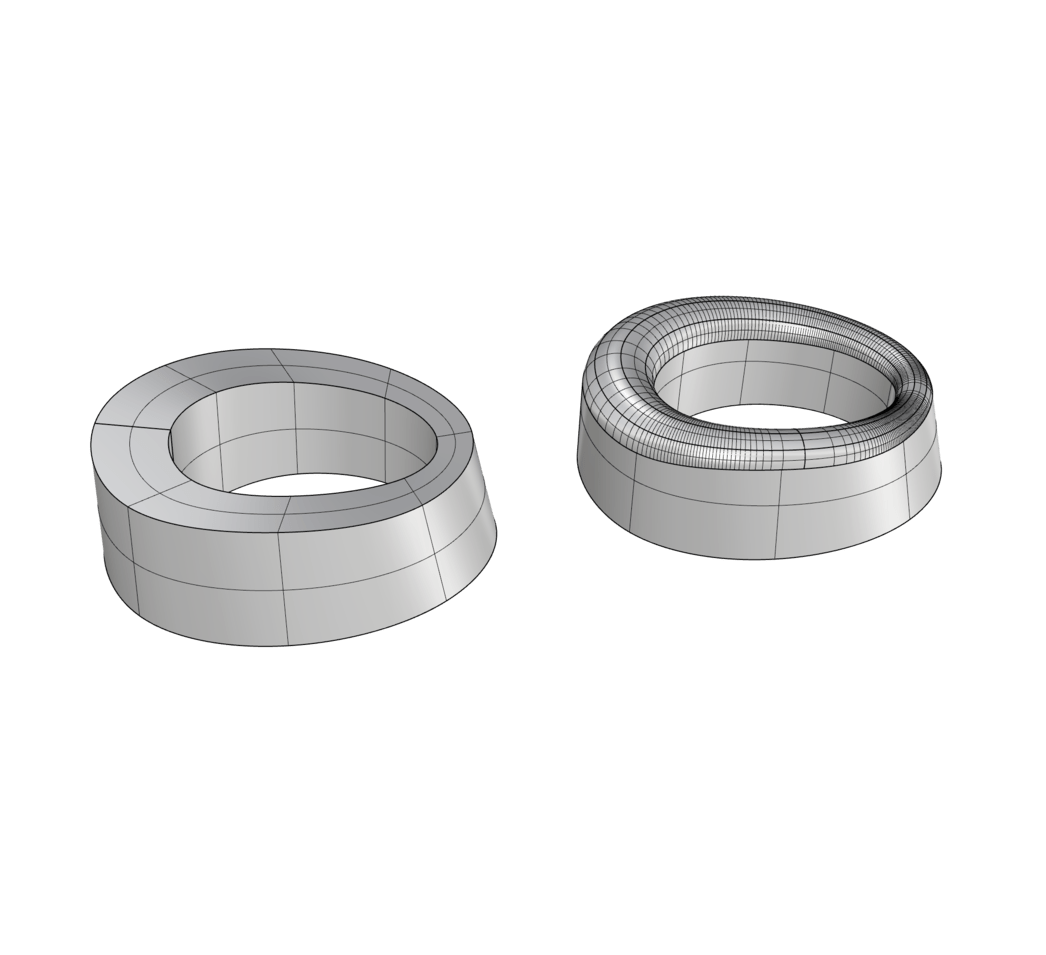
Yes, the surfaces are twisted and hard to work with. It would be a lot easier to work with simplified, optimized surfaces, because in this case the top surface could be used to extract an isocurve that’s then used as a middle profile for a “Loft surface”, whereas the two main near-vertical surfaces are shortened by the amount of approximate radius and set to tangent start and end for the loft operation. That would maintain the desired top limit for the rounded surface, though it will not be a true radius fillet.
Thanks Bobi, the last suggestion with loft worked perfectly and effectively. I just can’T seem to join the two polysurfaces for some reasons. If you have any ideas ?
Also, how can I build optimal surfaces with control points and isocuves. When I started to draw the 1st planter, it has only the necessary controlpoints. But, when using the loft, the pointed area was just ugly and I had to add some precision by adding many controlpoints. Now, it’s twisted and even when i extract to CAD for drawings it’s like to many. Is there a way to “rebuild” or a tuto about how to optimize controlpoints on surfaces or curves with polysurfaces ?
I suggest to keep the control points to their bare minimum, as well as having the same amount of control points on both profiles used for commands like “Loft”, because that would give you a cleaner, more predictive output geometry. You will notice that “Loft” has a few options in its dialog box. Try there to see if some of them will result into a better shape than the other options.
You can also explore the “Loose” option of the “Curve offset” and “surface offset” commands, because they will keep the same amount of control points at the cost of some minor deviation.
if ever a developer comes arround here to this nice topic “full round fillet” thanks @Rhino_Bulgaria
for pointing out the solidworks power … i would love to see a solution that works also for cases like this:
(top is not planar, distance between surfaces vary, surfaces are not parallel,…)
and of course, if all the option we have to draw arcs / circles would be available for filleting … this would be fantasic
one of the last projects i came across another demanding challenge: a (variable) Fillet (blue) between a given Surface (green) with a given edge (red) and tangent to an other, already existing fillet (gray).
… similar to arc, startpoint, direction, tangent…


")
")