From Grasshopper Script to Physical Drawer Cabinet

At the beginning of 2022, it became for various reasons clear to me that I needed to make my 3D printer mobile.
I decided sometime in January to build a small, yet sturdy cabinet with three drawers for tool and filament storage, where the 3D printer - an Ultimaker 3 - could sit on top. The cabinet would be placed on wheels so that it and the 3D printer could be moved when needed.

I started out with a Grasshopper definition. Although that may seem overkill for such a small and simple furniture piece, it turned out to be a great idea. I’m not a seasoned furniture builder, and quite honestly this is the most complex piece of furniture I’ve built so far from scratch.
The Grasshopper definition turned out to be a great asset in itself, because I needed to adjust the overall design numerous times, mainly because of the drawer slides.

drawer_cabinet_generator.gh (82.9 KB)

What I learned quite quickly is that - unless you design the drawer slide mechanism yourself -, you should absolutely start by choosing appropriate slides, and size your furniture piece accordingly!
I used BLUM Tandem slides with a soft-close mechanism. The slides themselves sit under the drawer and are thus invisible, in comparison to laterally mounted slides. They are really nicely designed and well worth the money.

2022-01-18 19-11-30.2022-01-18 19_13_37

Once I had all the right parameters dialled in, I baked the cabinet model to Rhino, and started laying out plans, materials and cut lists that I could later references during the build.

The Grasshopper definition has a built-in functionality to automatically unroll the planar outlines of all individual wood pieces that make up the cabinet. This is meant to make cut lists easier to generate.
You can also preview inner drawer dimensions, open and close the drawers, and otherwise have quite granular control.

In late February, I finally started to build the cabinet and I took me until the end of March to finish it completely.
I don’t have a wood shop and only very limited tools. The cabinet was built with a drill, a plunge saw - which I got for this project -, a handheld router, as well as a handheld sander.

The entire cabinet is made from birch plywood and MDF.

The drawer boxes, as well as the cabinet back are made from 15mm Multiplex.
The rest of the cabinet corpus and the drawer fronts are made from 18mm Multiplex.
The black top board is 8mm MDF and the drawer bottoms 5mm MDF.

The drawer fronts and top board were painted with three coats of matt black chalkboard paint. The rest of the cabinet was treated with three coats of wipe-on polyurethane.
There was lots of sanding involved, both before and in between the finishing stages. I sanded from 80 up to 240 grit.

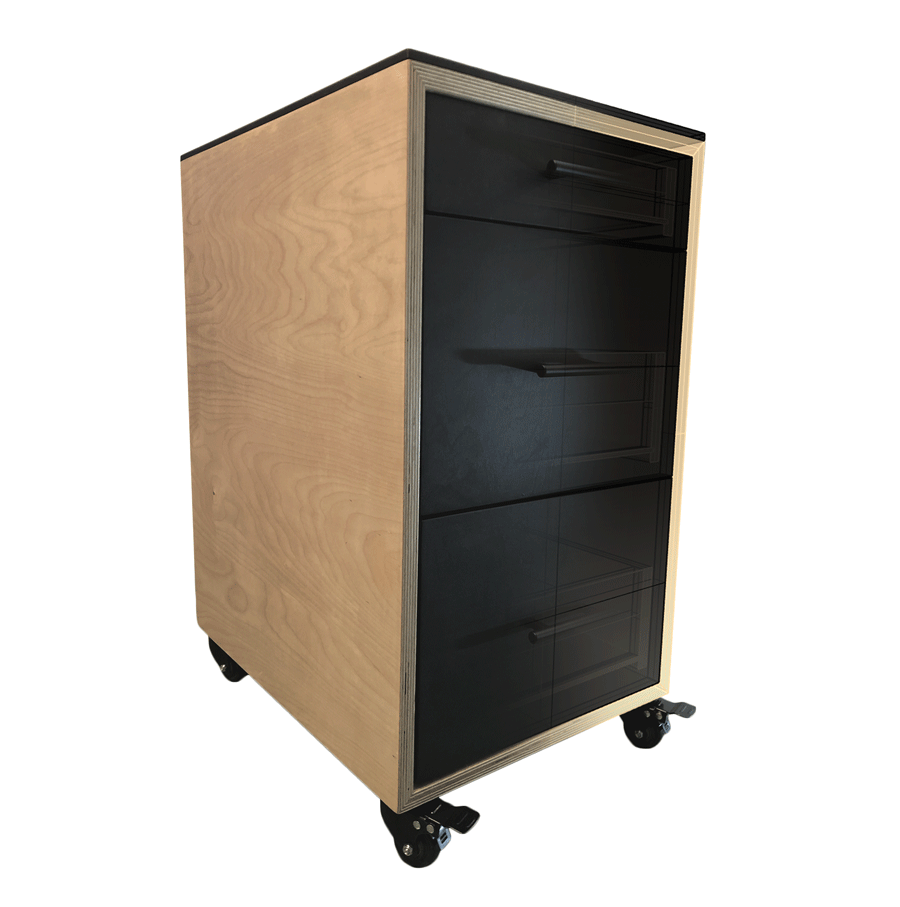
In my opinion, it turned out beautiful and super sturdy, which is neat, since it nicely absorbs the vibrations that the 3D printer produces while running.

37 Likes

Great work!

Blum also has a free online cabinet configurator which generates your 3D model or technical drawings for you. But where’s the fun in that? :wink:

5 Likes

Exactly. :slight_smile:

2 Likes

Great work!

I always do this… design it in GH because I will always want to be able to tweak it easily.
I did some kitchen cabinets and created a GH definition for the drawers so I could adjust material thickness etc. No where near as refined as your model though.

I also used BLUM Blumotion runners… these are push to open and soft close. I wish I hadn’t used push to open though… any guests inevitably open the drawers by leaning against them.

I used BLUM’s online configurator for some things and it was pretty good too.

2 Likes

No need for BLUM’s configurator when you can upload @diff-arch 's definition to ShapeDiver :wink:

Drawer Cabinet Generator

That’s what I got straight after uploading it, I did not touch the definition at all. Probably with very little work one could improve the materials and add export buttons for the cut files, and get a full online cabinet configurator .

1 Like

Thanks for crediting me on your website. Is there any way to change the display? The current x-ray view looks weird to me.

1 Like

Sure, as I mentioned I just uploaded the definition you created without adapting it. You can install the ShapeDiver plugin and use:

1 Like

Just in case… some of the swatch colors have some transparency to them. Did you try making those completely opaque?
-wim

If I remember correctly, yes, except the transparent blue boxes that indicate the available drawer space (cf. drawer animation GIF above).

I guess I’m not sure if you were wondering how to modify the backend (which Mathieu answered), or the frontend. On the frontend, removing transparency from the colors got me this:
image
-wim

2 Likes

thats a rhino render? i love how it look with that fade effect!!!

1 Like

neat!

1 Like

It’s not, well it partially is, but not in the traditional sense.

First I took a photo of the cabinet with a rather neutral background, which I then set as a background picture in perspective view in Rhino. The neutral background comes in handy later for masking everything except the cabinet.
After that the model could be positioned, rotated, and the view camera adjusted to fit the perspective of the photo and orientation of the cabinet. This step is a little finicky.
In a ghosted view, I then took a simple screenshot of the adjusted view with a white Rhino background. It’s also probably a good idea to save the view here.
Now having two images - the initial photo and screenshot - you can composite them in any image editing software. I think I used Affinity Photo for this.
First I probably applied a mask hiding the background of the photo layer, sitting on top of the ghosted view layer. Another mask with a linear, black and white gradient got applied to the photo layer which produced the horizontal fading of the photo.
I’m sure I also applied a couple of photographic layer filters (levels, saturation, etc.) to tie it all together.

Nice work , we generate some of our camper van furniture in the same way.

1 Like

Thanks.