V6 Viewport Bugs

Rendered mode (and shaded variants that show materials) doesn’t understand that glass is transparent and things need to be rendered behind it.

Cycles, doesn’t always honor self-illumination.

Cycles doesn’t honor throttling settings, so how I have to work, is set the display mode to Shaded, or whatever, move my view, and switch back, and repeat. This takes 14 seconds on GTX1080 and a 3.4ghz quad.

The fastest-single performance out there is only 30% faster than what I have. I have 16gb of memory. The PCIe Gen3 is on. Fairly current drivers. I made a custom nNidia profile to make sure everything is at or below a baseline. There’s no monitor refresh sync enabled.

I also suspect that cycles still throws shadows while self illumination is on. Objects with illumination throw shadows, and that’s not what it says on the label.

Sigh : (

[As for applying materials, the decals work great. The uvunwrap is a great addition. The spherical mapping works good. There may even be a projection in there, but I would throw out the rest of materiel/texture mapping tools, method, ideology, and widgets.

Why can’t I pick out my digits to increment or increments?

I am sure the mapping tools you have made Max people comfortable, but now with the advent of Grasshopper, all of these building opportunities open up, but the tools you have are made for working on single objects like faces and chairs.

Except for when something is so complicated that it needs to be unwrapped, applying materials should be much faster than modeling.

This program needs to think about materials in NURBS. How many repeats do you want on a face? When I twist the surface, by golly I want the mapping twisted with it, along H/V lines. Then you can tie a pipe in a knot and apply a materials to it, drag its nodes, and the mapping changes with the object.

For making buildings, we also need to have the ability pin one end of the materials to a surface or polysurface, so it can drag out: more wood, more siding, more floor files, more San Jose-style knock-down wall plaster. It’s kind of like that world thing, but you can move the entire object when you are done, without the material sliding off.]

The whole mapping channel metaphor, I don’t even want to see it. : O

What I would rather do, is have the ability to really build materials and set their properties. I want to stack up textures with drawing logic, and special properties just like Photoshop, just like game editors. If I have to write OpenGL shader code, in a text editor, so be it, as long as I have control over additive, multiply, overlay… Note: Animated materials are over 20 years old–just saying.]

And, surface lighting. Enough said. Perhaps too much.
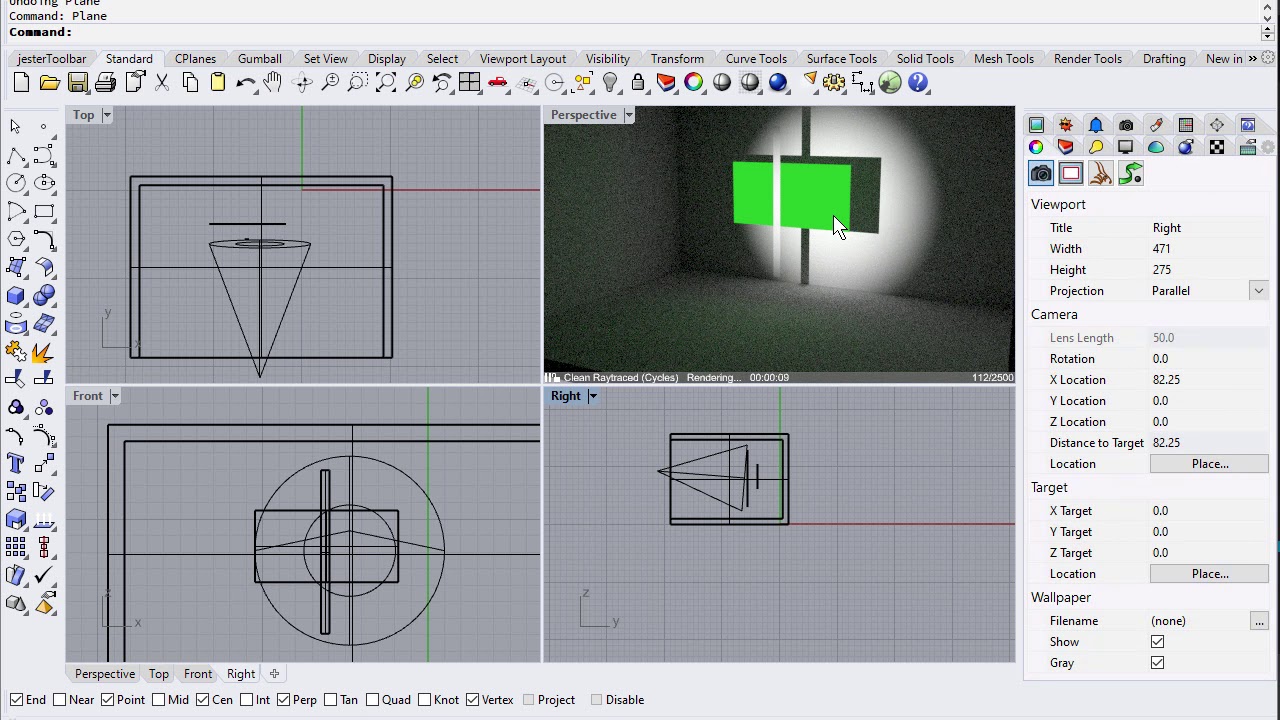
Can you please attach a material that shows this problem?

If you mean that changing settings in Tools > Options > Cycles doesn’t automatically restart viewports that have Raytraced active then that is on purpose. Toggling of the viewport is needed to have changed settings in effect.

If you meant something else, then please elaborate.

An object that has a material with self-illumination enabled still will throw itself a shadow if in a light path.

This is how it works

Thank you for relying.

I have found that in large files, the hope that Cycles uses some manor degradation to allow the user to turn or move the video–just isn’t working on large files. I try to turn the video-port; the computer hangs, and if I move it twice, Rhino locks hard, with a white screen.

In the end, I don’t care if I have a single pixel in the center of the screen to pan and move by. As a user, i don’t want Rhino to lock–just because I move the view, twice.

My desktop computer is more tolerant; antagonizing it by moving twice will lock it. My Quadro k2100, boat-anchor equipped laptop bluescreened yesterday.

~

There are times, when users will want objects to self-illuminate and not cast shadows. It’s really hard to fake any kind of lit surface such as a lamp, without this ability. It would be nice to at least be able to put a pointlight in an object set not to cast shadows.

Otherwise, how would you make a light globe?

You could put a half dozen pointlights around it, but after a while the renderer and the videoport isn’t going to like that.

~

I am going to revisit my meshing settings to see if that helps in a just-noticeable way.

If I could privately send the file , I will .zip it up and do it.

I did another post on another material bug, as well.

I test regularly on this greatly underpowered macbook pro, rendering in 2 CPU threads only. Locking up shouldn’t happen often on just viewport manipulation. I’ll do some more testing, although I don’t have a comparable setup for Windows to test with.

One thing to ensure is that drivers for the GPUs are up-to-date. For CUDA usage they sometimes are a bit sensitive to high loads.

I would make a light globe with a mesh shaped in the form you need it and a Cycles Emissive material. With the command TestShowPrivateContent you get access to it. You get essentially a ‘light’ shader with three fall-off types (0 - constant, what Rhino uses, 1 - Linear fallof, 2 - quadratic falloff). You’ll have to play a bit with the energy/strength setting, it depends on the size of your mesh. You can also uncheck the Hide box, so that your mesh is visible together with the lighting effect.

Correct, don’t do that. For Raytraced you’d add one point light with intensity set to 0 (this is a hack), then add as many meshes with emissive material on.

You can privately send to me using Rhino - Upload to Support

1 Like

Thank you for the replay.

I don’t usually keep video drivers that are older than a month.

What would be handy for putting lights in fixtures is: being able to put the light in the fixture, and we can’t do that if it casts shadows.

I went through and lowered the meshing on everything. On the file I will upload, there’s a sign with pipes in it. I lowered the meshes pretty coarse.

The noisy pixelated degradation kicks in fine on little projects, but for larger things, viewport movements are dicey.

What I am making: is not a vase. It’s not done, so I am not eager to show it, but it would be a good file to run tests on.

Thank you.

EDIT: I uploaded the file.

Wait! There’s not lights around that?

I reread your post. Can Cycles objects become light sources?!

Yes, with Raytraced you can make objects into lights. Those lights can either be invisible (the geometry), although their light shines into the scene. Or those can be visible (so both light and the object). That is what you see in the screenshot I posted. The oval ring is a Circle followed by a Pipe, then squashed a bit. The bulb-object is a Curve that I Revolved. Both have a Cycles Emissive material, making the into lights.

Since Rhino doesn’t know those are lights one needs to (for now) add a light source that has intensity set to 0 (but is otherwise enabled). Without that Rhino throws in a camera-based scene light - a bit ugly :wink:

I already downloaded it, and I’ll be investigating it closer on my work machine. But from a quick glance I’d for instance create the sign on top of your diner with one of them Cycles Emissive materials, it is great for neon signs, especially with fall-of set to 0 (i.e. no energy loss)

1 Like

Thanks Nathan!

The emissive (radiant) material type works very well in this application. To simulate about 100 incandescent interior light watts, I am about at 1000. It took about 3000 for the Neon before it really washed the sign, and when it did, it just touched the ground. The exterior lights took a lot, perhaps 30,000. They are splash lights for lens effects for the Spotlights.

The fullbright bug seems to affect this too. I had to recreate the neon materials, twice, for some reason. I still can’t see the texture on the exterior surface lights. If it were only a mapping issue, it would be darker than it is. The interior lights surface color itself might be 255,255,255, as well.

Perhaps more people will want to see their light source as default, but emissive/surface lighting solves a lot of issues, such as even lighting, simulating displays, and the like.

Generally, I like lighting numbers to match some real-world value, such as incandescent watts, foot-candles, or something. I know how to track down overbright lights, but it’s difficult to hide part of the drawing to run lighting tests, and then to unhide everything and have things change.

I will post a render. It’s for a book cover, so it will be the first rendering that I ever posted with copyright. : O

I am sure that non-surface lighting has its applications, but even a welding spark has some size.

Thanks again,
BrendaEM

The Emissive material is at the moment just a direct exposure of the internal emissive BSDF node that Cycles has. It’ll be good to have better matching numbers indeed :slight_smile:

Good luck! The file I looked into has a promising scene. I’m looking forward to seeing your final render (:

1 Like

The neon may be the only material doesn’t show fullbright. The other’s aren’t supposed to be full white.
The neon cast did touch down : )
The sky is a placeholder with too much noise. The original is noisy, not the render.

This is WIP.

That is due to the high energy your lights have (if you used the big numbers as you wrote before), and no logarithmic-based color management (like filmic in Blender). To be really able to use all colors at the fullest you’d have to save out as an EXR or HDR and then do some post-processing in a tool that understands these formats (probably even Blender compositor for the final touchup). Unfortunately it seems the render window doesn’t allow saving out the float buffers. I probably should add some way to get all that data out of Cycles into EXR files.

Pascal confirmed the repeatable fullbright bug before I started experimenting with the emission/surface lighting. Perhaps that bug and the one that caused a fail when first creating the neon material are the same bug.

That aside, In the wild we have small bright lights that have some color or texture on them. From my experimentation, the equivalent of 60-100 watts incandescent is full bright.

I am pretty stoked about the surface lighting. Thanks.

I adjusted the green interior material to accept more light, which helped bring the emissive light Srength down to 2. The tint of the fixture globe is noticeable.

Though, the sorting through transparent bug is there. I removed 2 windows. The glass has to be removed directly in front of the light for it to light.

I have to get a little work done on this tomorrow.

I also found that, at times, I cannot select the glass in the Rendered view.

Also, there is a bug that objects are not drawn in the view-port through the “glass.” I double checked the material, and it is a glass-type materials.

I understand that the surface/emissive lighting is an welcomed and experimental feature, but at some point, I need to render this thing, but the stock render, Rhino’s raytracer cannot see through glass. Cycles, actually can, but it wrongly culls the emissive lighting from happening.

These are fresh Quadra driver on a K2100. My GTX1080 desktop does the same thing in the viewport. The flooring is over a half inch thick, so I don’t think it z-fighting.

Hello - check the surface direction… (Dir command) - is it the same on all of these windows?

-Pascal

Also, for window panes it is good to add a little Thickness with the thickness modifier in object properties panel. That will take care of potential weird effects from glass material when there is only one surface…

Nathan, The windows are polysurfaces, about a half inch thick.

Pascal, I will check the direction. I will also recreate some panes to see if that makes a difference. Perhaps there is a sliver gap in the edges.

You should be fine then! :slight_smile:

You can use -ViewCaptureToFile for that. You’ll find you can tweak the number of passes for Raytraced.

I am not sure what that means. Where is the emissive light being culled?

I recreated a bank of windows, deleted the material, pulled a Rhino “Light Green Glass” up, and put it on all the windows, and still there are display problems.

Neither Rendered mode, nor my beloved Shaded Mode modified to show materials correctly renders through glass on most angles.

The curved windows work. They are extrusions, as are the rest of the windows. I also tried converting a window into polysufaces, but that didn’t help.

Nathan, thank you, and I have been using “ViewCaptureToFile” to make most of the renderings, but please don’t tell anyone at McNeel that I am. Shh.

I also have a terrible time selecting the windows.

Our little skull-and-crossbones friend reports that there aren’t any bad objects.

There is some inefficiency in the drawing, I have some overlaps in the decorative tins that the renderer will likely want to split before it renders, but those are outside the diner. I am going to work on those, but pre-splitting so that the raytracer doesn’t have to…

What I meant about Culling was, In Cycles, the surface lighting also suffers from the same problem, in that emissive light raycasting seem to be working, but if I had a guess, the visible surface itself might be handed in an additional pass, which the object sorting code, is telling it not to bother adding. The effect is, that through emission, I have a well lit room, with dark lights.

There is transparency bug.

[An official NoDraw material might save some viewport performance.

In the help, it states that the Rhino Raytracer uses a BSP tree. If that’s true, it also might be advantageous to employ detail objects that won’t cause excessive splitting, which create useless areas, and portals that just need to be merged.]