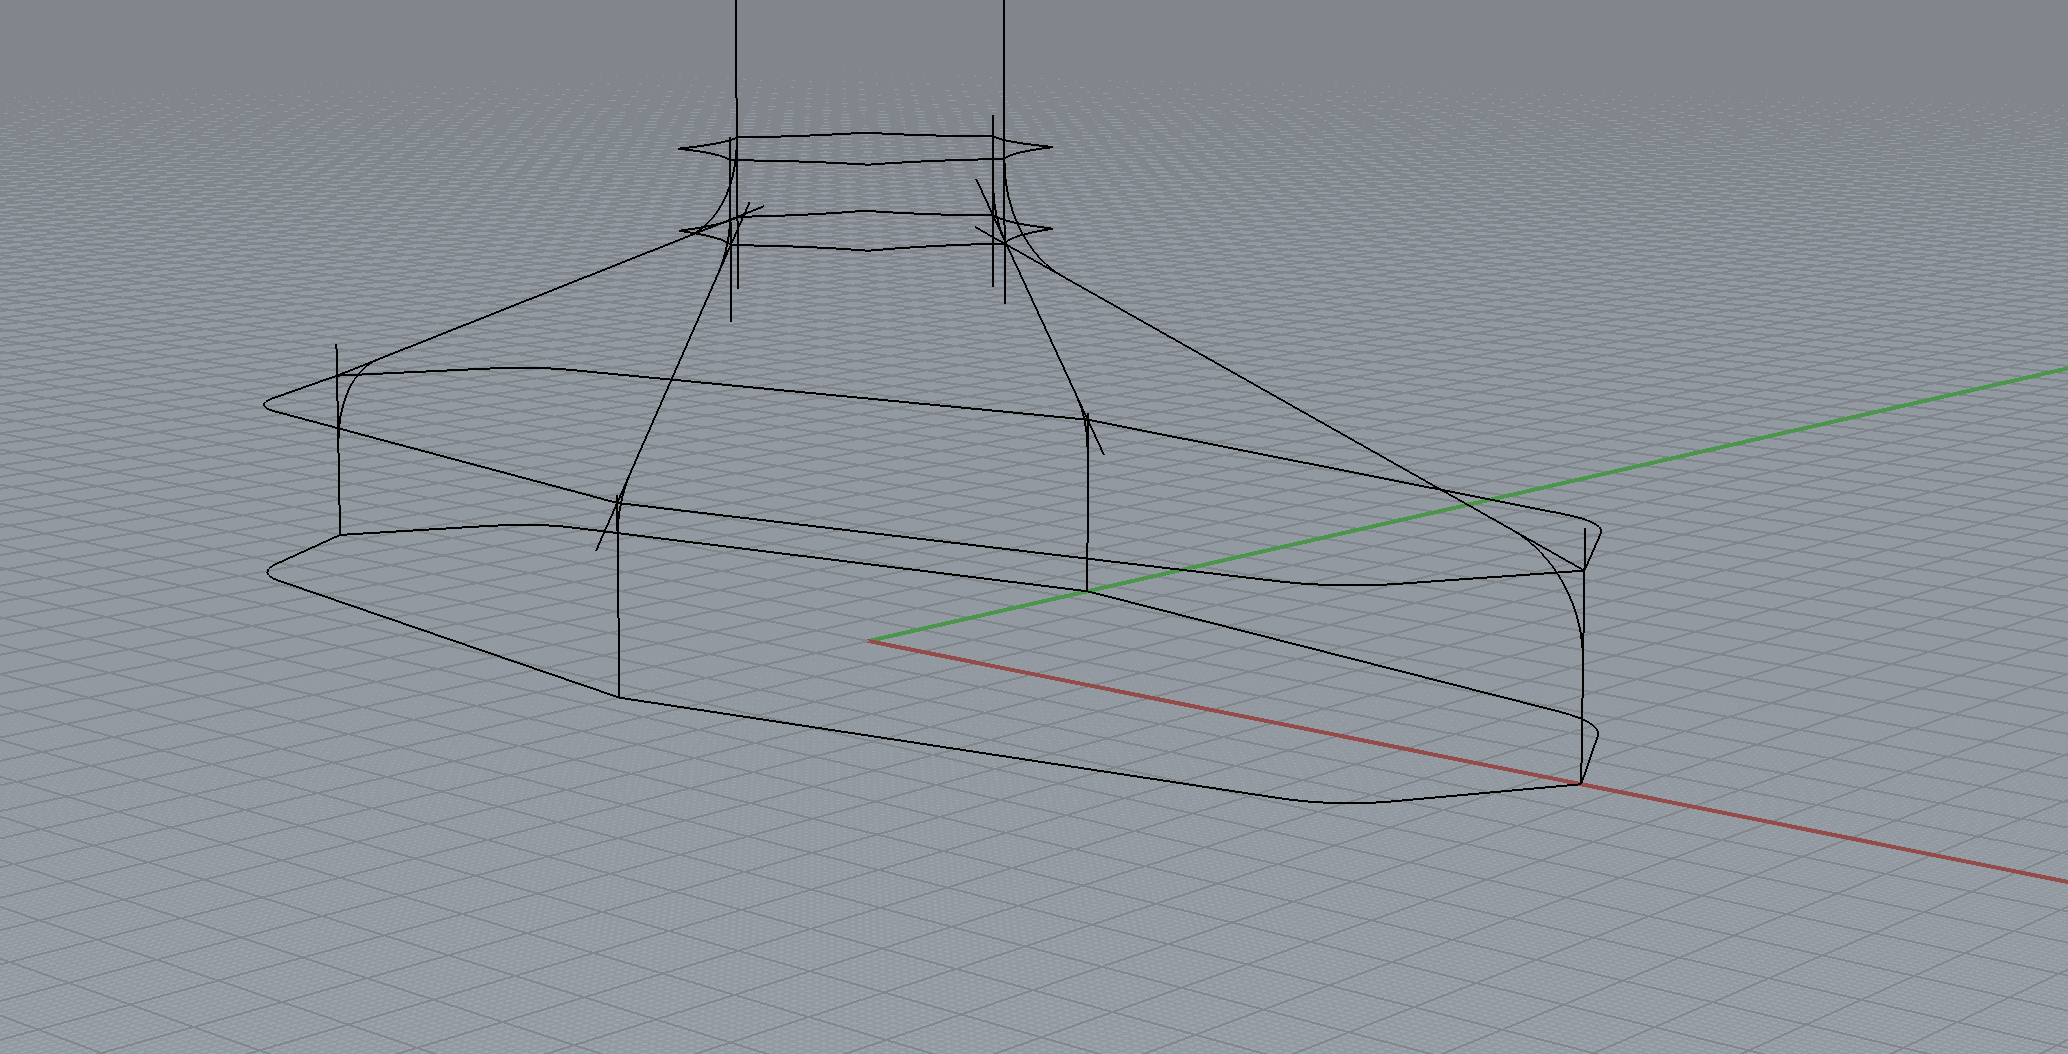
I’ve set up various curves showing the intended form. I have tried a curve network but it produces a stretched looking form. Rail revolve doesn’t do the trick either. If anyone could kindly assist I’d be very grateful!

Center part could be done by extrusion of a circle

Extrude the lower curve
Blend the 2 surfaces (blendsrf)

It is also possible to use network surface. The trick is to extrude some of the curve where you need tangency. So network surface will propose you position, tangency or curvature adjustment.
You better beginning learning the basis of modelling
Categorized.
Please assign your new messages to the appropriate category.
Thanks


Hello - if you are trying to make this form from one set of curves using NetworkSrf, that will not work - apart from that just being too much for a single surface to do cleanly, NetworkSrf cannot meet kinks in the input curves.
-Pascal
Thanks very much for your help. I have since tried the blend tool but this does not give me my desired form. The line drawing I have created is my desired form. Using the blender this can not be done, the radii are off as are straight line sections. I did try the Network Surface before writing this query and that doe snot work either, the form is broken even through trying various methods within this tool. If there is anything else you can suggest I’d be very grateful!
Many thanks
Lewis
thanks Pascal. Could you kindly suggest how I would create this form?
Hello - please post the curves and I’ll have a look.
-Pascal
I think that a big problem with the approach you’ve taken thus far is that you’re trying to model at least three different “ideas” as one single thing - many of the problems you’re having are as a result of that. This looks to me like a vacuum attachment, so for the sake of explanation I’ll call it that. You have the “nozzle” end of the attachment - with the big opening at the end. You have a “pipe” that looks to hexagonal or octagonal in shape. And finally you have a blend between these two things. Each of those is their own separate model in one sense - each of those will be made up of multiple surfaces. The pipe section is of course just an extrusion and you’ve got that already - I suggest trying to imagine what the “nozzle” section of your model looks like without the blend to the pipe. Try modeling that, and then only after you like that shape, create the blend between the two.
Thanks very much for your message. Please see renders attached. This is what I pretty much want it to look like but as mentioned I need the form true to the line drawings, further attached up the thread, I have been attempting to model it as the three separate forms. I want the lines between the hexagonal stem and the base, it gives the form a look of tension.


So since you’ll only need to make 1/4 of that and then mirror it over, you’ll want to start by making surfaces that look like this:

To get the shape you want, you need to make surfaces like that, and then you’ll be trimming those back and using BlendSrf to make the smooth transitions. You’ll want to extend the straight line portions of your guide curves so that you can find where they intersect - that’s where your surface corners should be. Once you know where all those intersections are, you can use Surface → Corner Points to make those.
Thanks very much for your help! Just trying to work through your points if you could please assist. I’ve extended my guidelines past the intersection points, found the surface corners from this, created the surfaces and now wondering how to make the surface blend from these - you mentioned trimming them back? I’m aware how the surface blend tool works but not to this point you’ve advised. Really appreciate your help with this.


The easiest/best way in this case is to use the Split command, and then use the “Isocurve” option for your split object - that way when you go and make your final blends, your edges will be seen like a natural surface edge, instead of a trimmed edge.
Sgreenawait, thank you very much for all your help so far. However, I’m struggling with this last part, would it be at all possible for you to kindly show me what you mean by building the surface in a screen capture video. I have attached the File (V6). This would be GREATLY appreciated!
V6.3dm (112.5 KB)
Sure thing! I’ll post one when I get a chance.
Thanks so much
Hi,
Hope you’re well!
I was wondering if you might have had a chance to create that video for me?
Many thanks!
Ah, apologies, got incredibly busy here! Here’s a video that I hope will help:

The general idea is that you want to trim your surfaces back by whatever method works - either by using Split, or by drawing trim curves right on your surface, or by using a trim object like a plane. After you have split your surfaces you want to fill in the gap you just created with BlendSrf. That’s the general idea at least. Hope this helps!
-Sky
TrimAndBlendTutorial_R5.3dm (2.0 MB)
Hi there!
Thanks so much for your help with this! Greatly appreciated!!