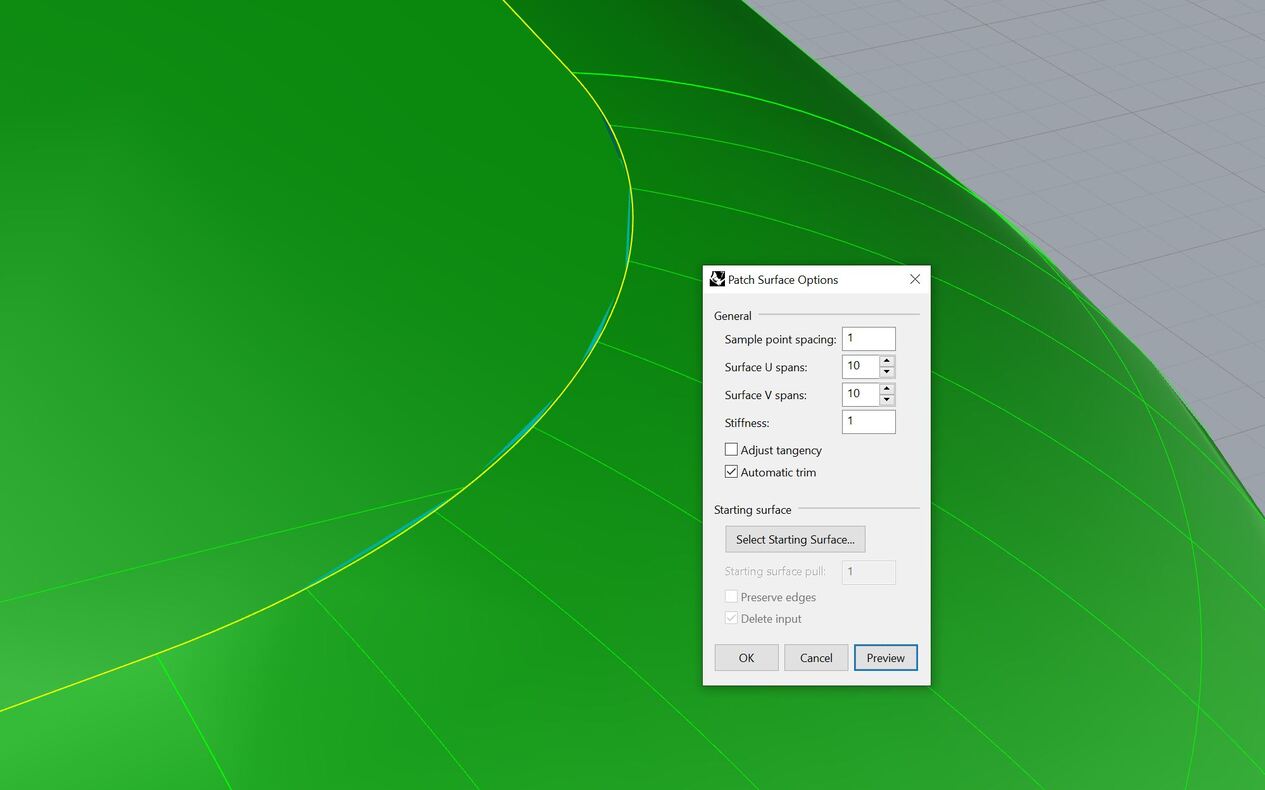
Hello, I am doing the Training Guide 2 on page 100 - Soft Corners and having some trouble to use the Patch tool.
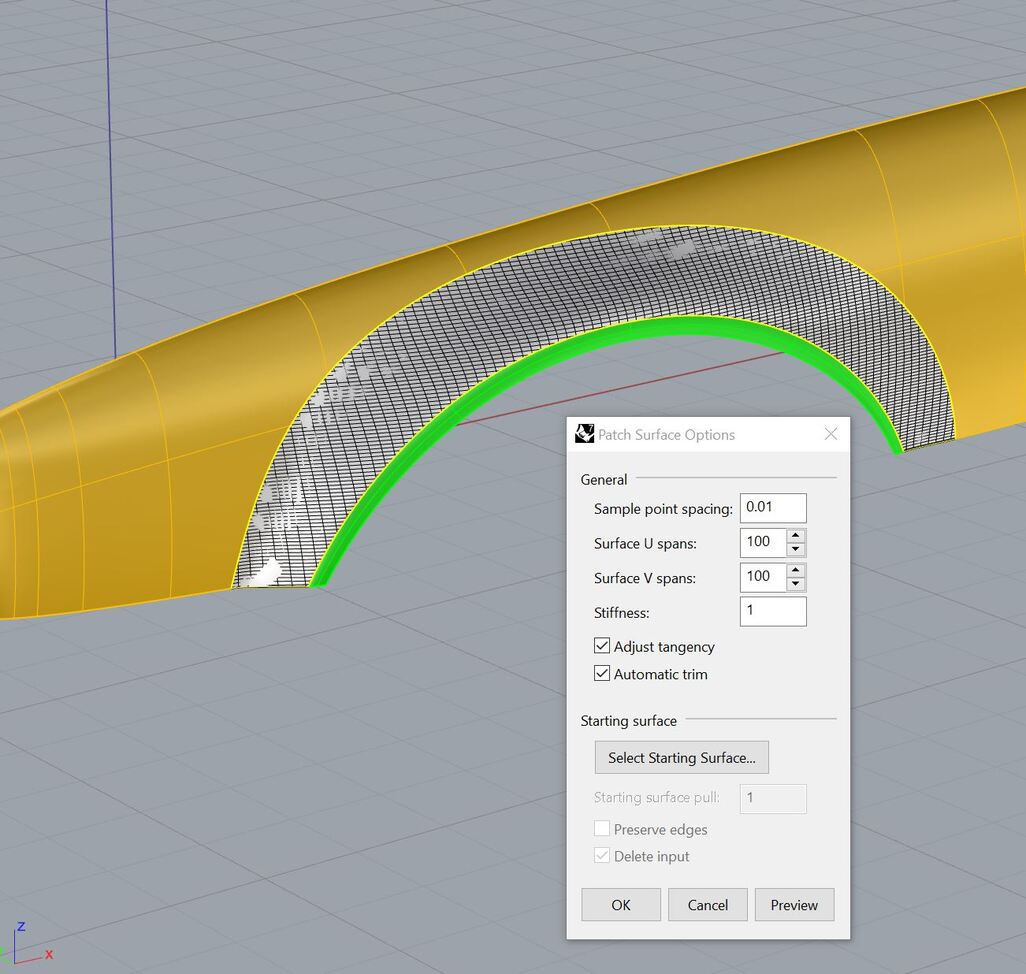
To get a closed volume with Sample point spacing and Stiffness equal to 1 I need 40 U and V spans.
Those spans seems to be too high and the Zebra doesn’t look good too. What would you suggest to get a better Patch surface? I am struggling to get good results with this tool
Also what is the meaning of “Sample point spacing”?
On the Help it says “The physical distance along the input curve between sample points. The minimum is eight points per curve.” But I am not able to get any difference on this example and any other that I tried too.
Guess I answered part of the problem checking other setups, looks like there’s a deviation on the sweep shapes that even a G0 Patch wont fit, It must be done with a single profile to be plane.
Hi Lucas - the point of that exercise, re: Zebra, is precisely that it does not look good and there is a better is more pains-taking way to get a clean shape that matches the curves and obvious design intent…
Indeed, this example is not meant to be done with Patch. Problem is that I am getting other surfaces that are not matching the edges properly and I am not sure how some parameters change the surface.
Although in this case are the profiles shape from the Sweep1 that have some deviation and end up not making a plane for even a G0 Patch, maybe this also explain a similar problem I was getting with NetworkSrf
I didn’t save the test file. One NetworkSrf problem I got was on the First Training Guide, exercise 11-8 Nerworksurf.3dm. But in this case it was about lowering the parameters to be able to Join the 3 surfaces.
Now I am trying to use Patch in it, and am not able to Join the 3 surfaces.
I did another Curve Blend and Trimmed it to use as boundary, but it won’t work… any idea why?
Patch is not the one to use here, but I am trying to understand why it fails
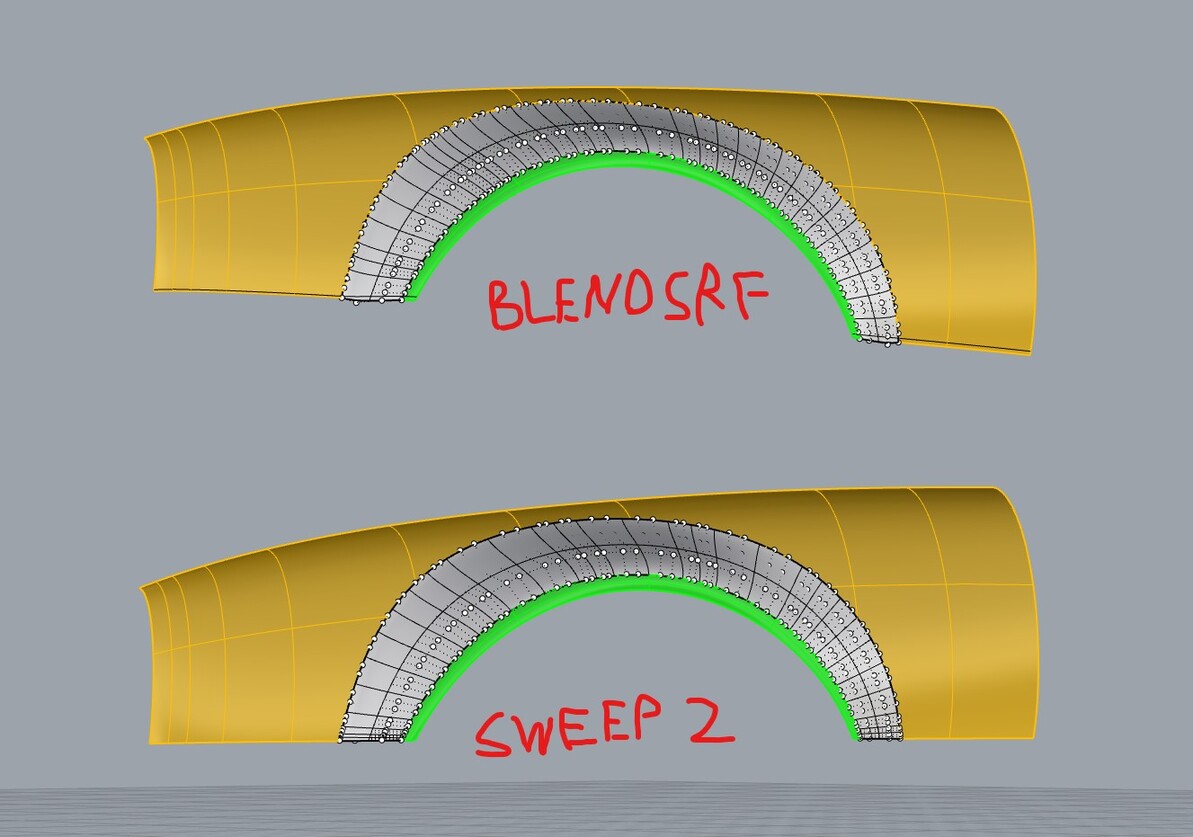
I know this is not an answer but I wouldn`t use patch and network here. I would use sweep2 or extendsrf in the bottom and next blendsrf (it would be needed to trim extended surfaces after it to come back to past shape).
Edit: I think that patch and network are helpful when you doing the first draft and you have curves that don’t sctictly connected together. Cons of that is heavy CP network behind which you can’t edit manually with CP movement (it`s too heavy to edit). Patch and network would help build better curves in the next iterations and use then sweep, blendsrf or edgesrf which will give you a more nice CP network which may be matched later with matchsrf. I think all stuff from this thirtysixverts channel should be obligatory to watch for everyone who wants to play with Rhino.
In other words: I wouldn`t worry about not perfectly matched patch or networksrf because both should be used for drafting not for final shapes.
If you still want to join it try to scale it down to tiny sizes, join it and rescale to past size. But it`s pointless in my opinion because gaps still will be there. You will reach your goal because it will be joined as one polysurface. Question is how to create surface to not have gaps there. For my knowledge only one answer is: to have clean CP network.
Here you have your exact file only scaled down and joined:
If you use the “Planar sections” option of Blend surface and pick sideways direction for it, then you don’t have to worry about having to trim the excess ends.
Thank you for the reply guys, will definitely check more deeply other surface tools and the thirtysixverts channel.
I also did more testing with the Patch to understand how it works. My first impression is that it wont align the isocurves with any edge/sketch line so you may need to increase the U and V spans to make it fit in non-planar boundary, right?
Using the Start Surface option it does align, but I was unable to fit it properly, no matter how lower I refined the Pull and Stiffness. (Tried also with G2 Curve Blend)
The first one is aligned with the top surface, and the second with the bottom one:
Going back to the first problem:
You could construct it from one single span surface. This will give you the best surface quality, but you lose precise control over the edges:
The main idea is to layout the large surfaces first and then build the blend-surfaces from that, since they are more constrained. Doing it the the other way around usually makes it hard to resolve the geometry nicely…
One of the outstanding use of patch command over meshes and point clouds (f.e. 3d scans) is that you can generate surfaces from messy mesh or messy point cloud. I needed to segment my scan before using the patch command to have it generated from one demanded surface (not from all).
If someone of you knows how to select demanded polygons before using the patch command I would like to know it. Segmentation is time-consuming. I know that I can change mesh into a point cloud and then use SelBrushPoints before using Patch but it’s also time-consuming. I’m not sure why I am able to select points in point cloud before using the patch command and I can`t select polygons in meshes before using same command.
Edit: the second way of special use patch is the possibility of making a nice surface from curves not connected in space (it will be average from all selected curves). It may be often a good starting point for surfacing.
@Konrad Neat result with point editing, Thank you. ^^
On the topic you linked they also solved a similar part using Patch - Starting Surfacing, looks like it is the correct way to use Patch with guide curves.
@mdesign That’s good to know, one of the reasons for me to start learning Rhino is for reverse engineering. Looks like this tool is much more useful! Thank you.
@theoutside Very interesting trick, will definitely be very useful. Thank your for sharing it!