I’m wasn’t sure what you meant by ‘sigil’ but imagine it’s curves making a shape. I found https://en.wikipedia.org/wiki/Sigil_(magic) when searching for what you might have meant.
If you have a design drawn in Bezier curves it often isn’t great for clean 3D modeling curves. I generally will redraw anything imported if I know I’ll ultimately be control point editing a surface made from them. If you have a profile for the top view of a seat like this I’d use it to make copies and then edit all the curves before using the Loft or NetworkSrf commands. RailRevolve and BlendSrf may also be helpful. In the video, a plugin called Tsplines is being used so if you want to do exactly what’s shown, you’d need that plugin installed too.
Thanks for your reply. I don’t intend to get the T Splines plugin. I just wanted to get some basic understanding what I have to do to get from a 2D vector graphics to a 3D model, so the result is a little bit more elaborate than just a simple extrude.
By the way: Are there plans to add a T Splines feature to one of the future versions of Rhino?
How to do from a 2D graphic to a 3D model depends on the shape of the 2D graphic and on what 3D shape is desired. More information would be useful to anyone trying to help you.
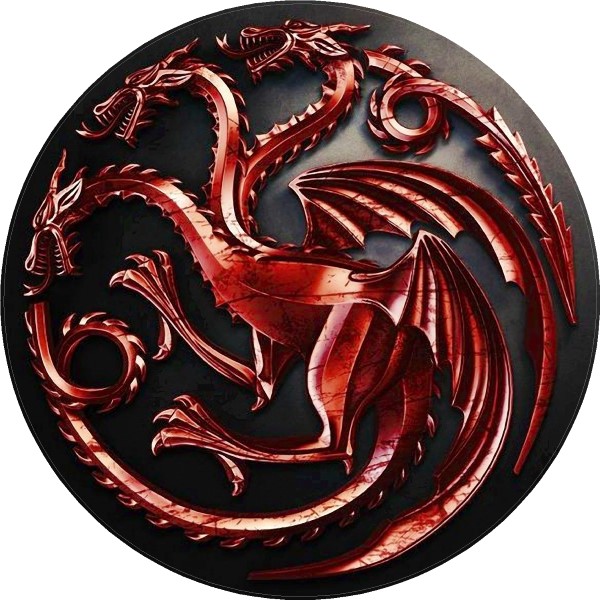
I have a 2D SVG file that should finally look like this 3D version:
I don’t want to spend so much effort in modelling the details, because the diameter will be approx. 50mm when printed out (I think I didn’t mention so far that it’s for 3D printing).
So my idea was:
Take the original SVG
Duplicate it and make a 10% smaller version
Connect both versions via extrude(?) - similar to what is done in the video with the bike saddle. But here is where I struggle, because I don’t know which command(s) I have to use.
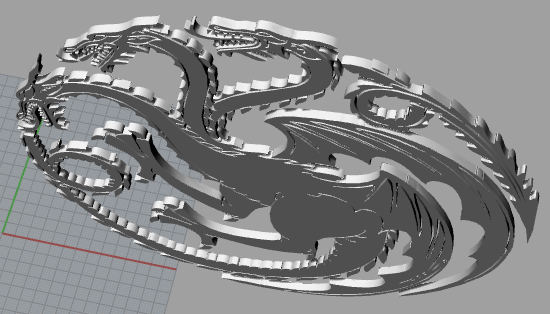
If I simply take the SVG and extrude it I get something like this (which looks quite boring):