Hi guys!
I’ve never posted anything here, and I’m kind of a beginner still.
Im studying industrial design and was always more of the photoshop Person, but now I really want to model a computer mouse ive designed in 2nd Semester.
As a beginner I tried some approaches but I dont really know how to start. Which surfaces should be modeled with which curves first? How do i model the concave part and blend it into the front of the mouse? I tried to follow mouse tutorials on YouTube but their geometry is very different.
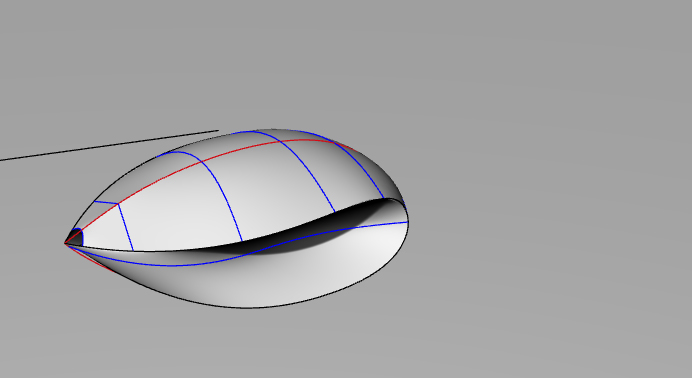
I did one model but the surfaces are terrible…
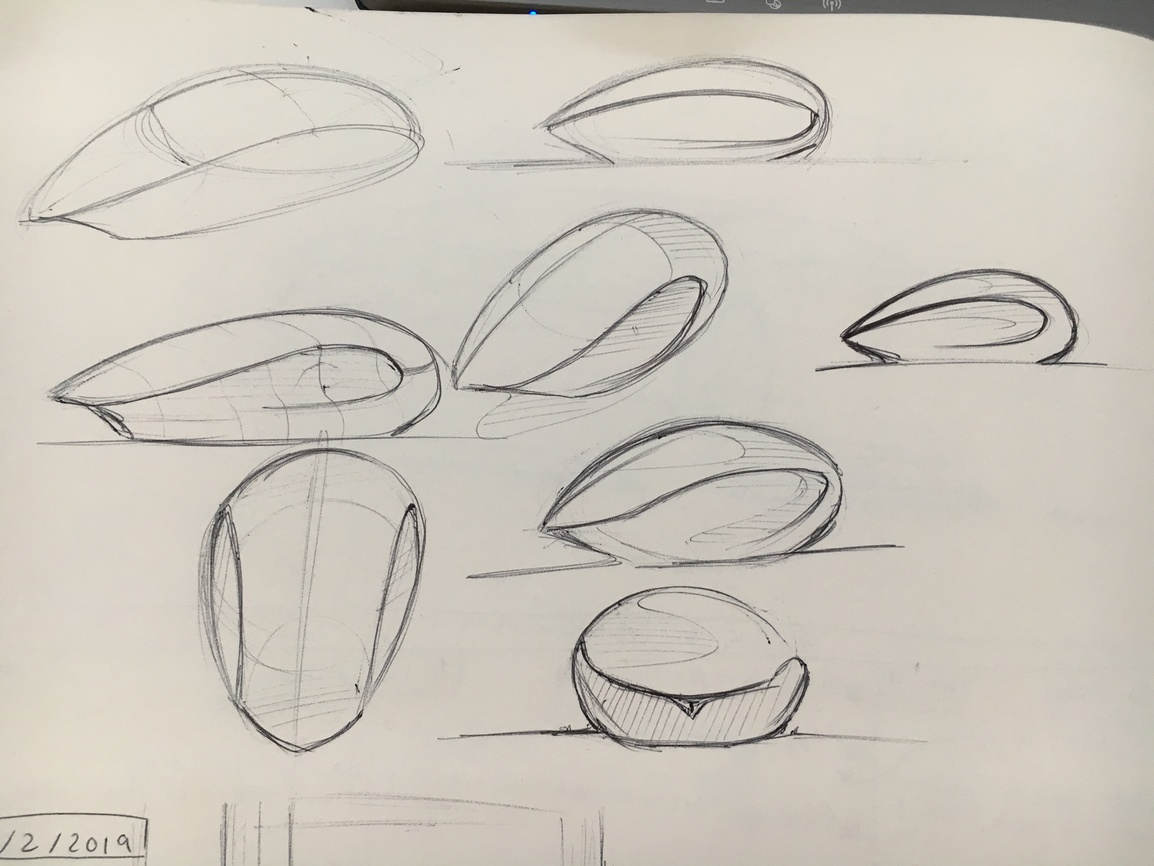
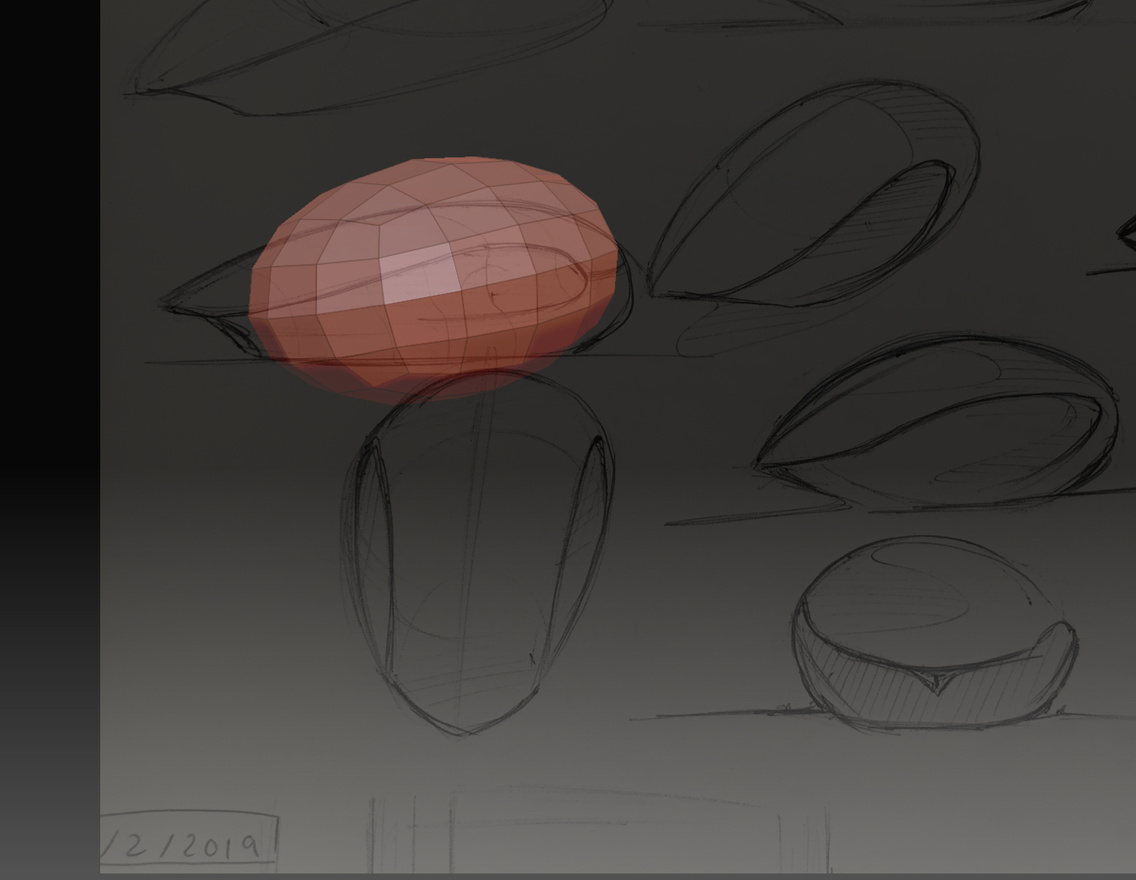
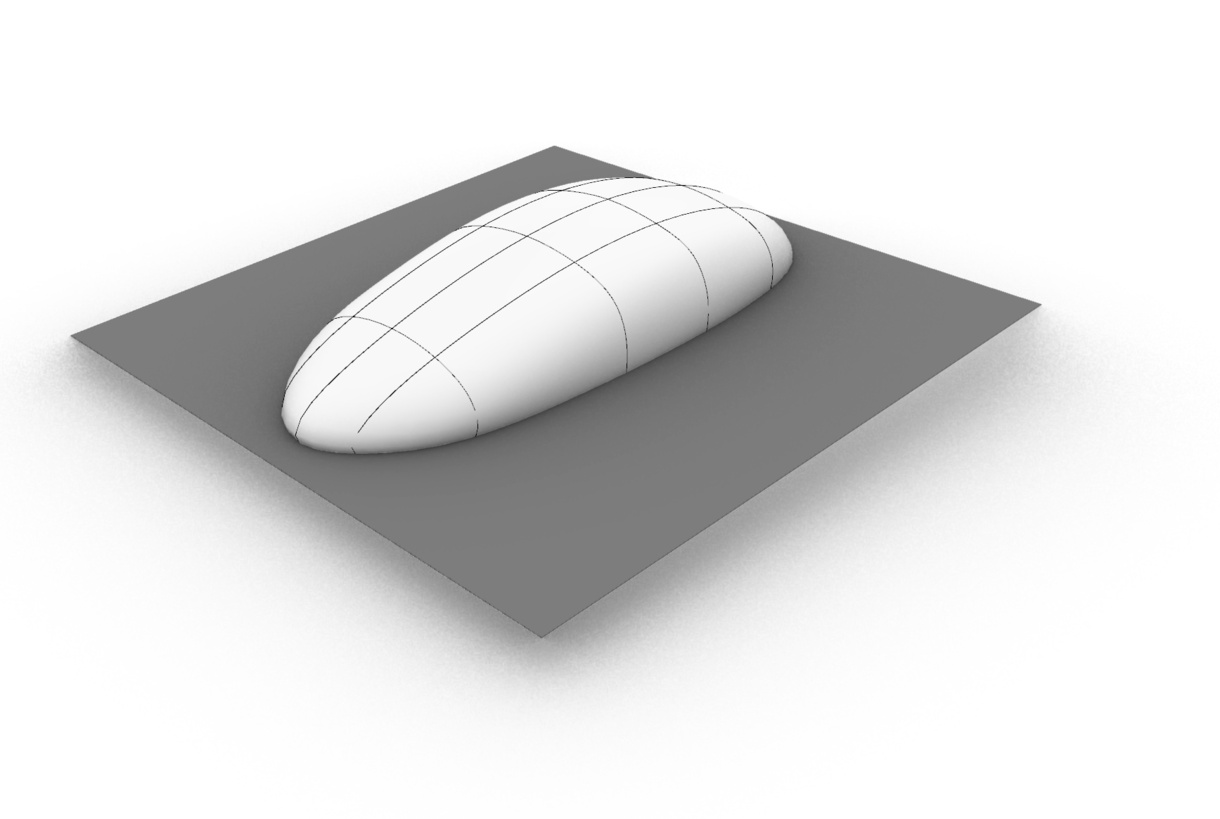
here u can see Sketches, a physical model of how the mouse should be, and my attempt…
reverse it, collect both NURBS and polygonal/hard-surface knowledge while doing this, try NetworkSrf, EdgeSrf, draw the curve directly on the imported mesh, etc.
oh my god!
Sorry for the late reply ive been away for the weekend. You guys took so much time to help! I really really appreciate this, thank you so much. Now I’m way more motivated again and can’t wait to try out all of your advices!
@_corellaman : This Looks fun and a very dynamic way to build shapes and Experiment around!
@vikthor : that is very very Close to what i want it to look like! how Long did it take you? thanks alot! It Looks so easy when you do it. I hope i can develop a better eye for how to Approach a certain Problem… .
@Adn_Kocc : thats cool! I love how all of your tips are different. That shows again how much possibilities there are in Rhino!
I tried using the loft method , but I couldnt get it right! I tried to build the curves like you did, with a little change in the concave part. What did I do wrong with the curves? Do they have to be connected at the front end?
Okay, After lots of dragging and changing the curves I kind of got something. But I had to add alot of cross section curves connecting the left and right side. Also it is very messy and im not sure how to fill the gaps… I still wonder how you got that clean result with only a few curves!
you go well with the idea, your problem was the vertex where you find the surfaces you have to round with a blend curve and then split see image.
In addition, the average surface is complete from one side to the other side.
with that I finish fast and I avoid working for longer.
Thank you so much again!
For the BlendSrf command: Do there have to be gaps between the surfaces I want to blend? I could not figure out how to have that rounded edge all around the model.
Sorry for asking more questions
Gaps like this, are they needed to have a “fillet”? (by reducing the size of the middle Surface)
Also, The front Looks Kind of weird. when I loft the three curves (which I changed as you described in your previous answer, Blendsrf + Trim) the front Looks like this:
do not worry, the good thing is that you are studying the piece
create a pipe along the contour of the middle surface then use trim to trim both surfaces, with that you get the necessary gap for the fillet
Thanks alot, again! How you do it makes sense and it Looks quite understandable, but again, my countless attempts failed.
Ive rebuilt this mouse for a couple of times, worked on it more than 20 hours and I still can not succeed. I am a beginner but I cant believe im not able to build it! very frustrated…
So I managed to somehow build the middle Surface so that i can create a pipe (Diameter: 1.5 ) Then I trimmed the other 2 surfaces with it: The front has to be narrow so that was already critical…
!
but then blending the surfaces does not seem to work! probably the gaps are too small? but i dont want the mouse to be super high! These Things happen all the time:
Try using the ChainEdges option in BlendSrf
Blend surface for both sides 1 and 2. It also has a similar way to control the direction of spans with the “Add shapes” button that is in the options popup window.
or use the Scale1D command to modify the height of the model that I have already shared.
Thank you, but when I scale it, the design of the mouse is not how I want it to be. I couldnt do it. The blending never works. I think I wont be able to do it.


 I love how all of your tips are different. That shows again how much possibilities there are in Rhino!


 How you do it makes sense and it Looks quite understandable, but again, my countless attempts failed.


