I have spend more time than I would like to admit messing with this trying to find a way to fillet the handle part of this knob to the rest of the shape. I even tried to make the shape with subd but my limited skills had me flying off track in no time.
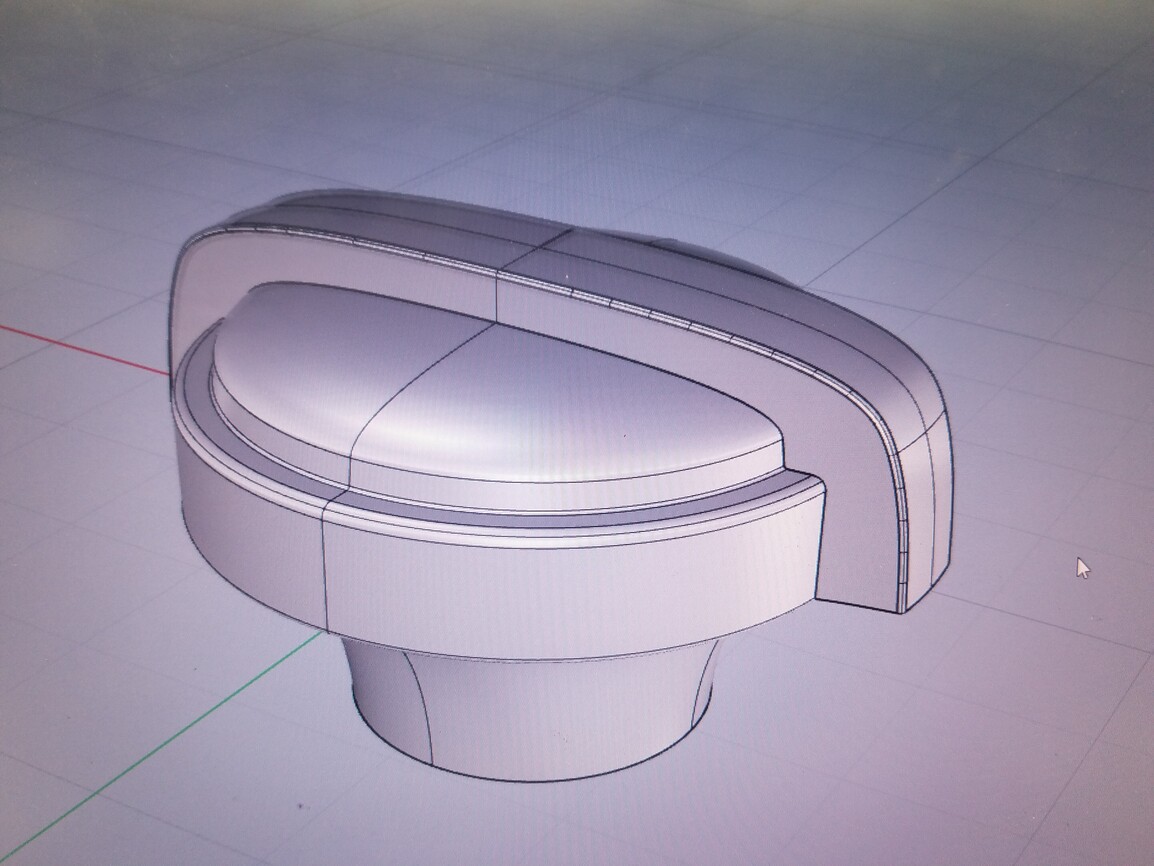
Can anybody show me how they would go about recreating this knob? knob.3dm (369.6 KB)
I had terrible luck with blend srf in the corner. The surface always folded back on itself. I even screwed around with variably thick pipe trims and this just looked like trash. Maybe, hopefully, its just my skills.
One of the things making this so tricky is the big variations in blend size - like in that “corner” of you knob - I’d increase that a little if you can. Variable pipe makes the sorta stuff you’ve got going - which is to say not super pretty or probably not “design intent.” To get the most control, on something like this you can use your pipes not as trim objects per se, but as a way of getting intersection curves that you can then edit. I’ll have some time later this afternoon to post a bit more if you still need help.
Hello - I think I’d start with the object as a hard edged thing and fillet the whole thing - hard to say without the object but I would say that areas like this -
are going to add maybe unecessary complication - maybe better, if the design allows it, to cut off the whole thing flat and add the fillets as separate operations. I’d make sure that bottom curve is tangent there as well - unless that slightly out of tangent edge is needed for some reason - that takes away one tricky fillet-
As Pascal pointed out, making those bottom surfaces line up will definitely make your life easier. Here’s how I would lay out my trim curves on this so that you can get a bit more of a variable feel to things. A lot of these primary curves were created by starting with OffestCrvOnSrf, and then rebuilt. The blends between those main curves were made with BlendCrv. This is the “manual” way of dealing with this stuff, but on tricky projects, the manual way is often the only way that works.
Thanks for the great advise guys. OffestCrvOnSrf, and then rebuild. I’ve not done that before. Very nice tools. I will try this out tonight.
OffestCrvOnSrf, and then rebuilt
Dear @cfischer.engr
i think you should have a closer look at the end of the small step / notch / slot:
for filleting there is a simple rule - first the biggest Radius then to smallest Radius - but sometimes this is not possible or is not the design intension.
trying to solve a detail with pure fillet / rolling ball is a great approach to understand the geometry - then with a further step you can build more complex blends / transitions.
your attempts above show that you try roll a ball / sphere along an edge, where the ball can not reach all surfaces - because some edges are concave with smaller radius.
so this is a fast attempt with less complex pure rectangular surfaces … than all rolling ball fillets…
(G1 only)
i think the small step might end like this.
Wow Tom and Jim,
Excellent results!
Jim yours looks really good. I tried filletsrf like you mention and it does a better job than I thought it would. However I’m struggling in rookie land when it comes to the blended area like you say. filletsrf makes a mess of that area but it looks like you somehow trimmed out the ugly bits and used a curve network or something to patch it up. Can you elaborate on your method?
Thank you all for the feedback. Its been a good learning experience so far!
First of all if you want a pure filletsrf solution you could make it like this: knobx2.3dm (566.0 KB)
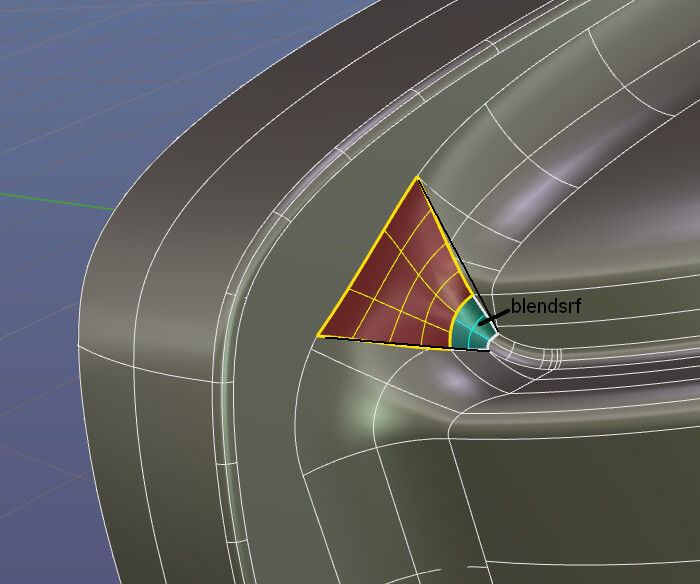
Yes the idea was to get rid of the pointy fillet. and spread that transition out over a wider area. I first drew 2 lines which were used to trim back the surfaces to be blended and then made a blendSrf for the cyan surface (see pic below). Then I originally made the red surface as a 2-rail sweep but I didn’t like the way the 2rail surface twisted so I rebuilt it to 4X4 and used matchSrf to match the 4 edges. That looked good but was not quite accurate enough to join so I inserted a few knots and repeated the edge matching again and that was accurate enough to join. I rarely use the refine option in matchsrf it usually just makes a mess.