Overlay to the original plan out of Rhino - adding luminosity information only:

Before switching to (3D) CAD (AutoCAD) in the late nineties I had the privilege to start learning to draw in ink on a physical drawing board, one of these giant machines, equipped with a pantograph arm, mine a surplus example from the fifties, of off a ship yard. Twenty seven years after using one of these for the last time, as a student of architecture, I can still “feel” the muzzle memory of every movement of it.
It was a real brain distorter to work on complex non orthogonal forms with one of these - pain and pleasure at the same time.

I adore drawings of the quality of the one above - drawing skill wise.
During the research process I stumbled across a number of vintage copies of such drawings. And even those copies, in most cases, are crumbling. The one above making for a rare exception being still original.
To my knowledge the design displayed has only made it to the stage of elaboration represented. No prototypes I know of and not even scale models have been executed. Working on the reconstruction of the shape, combining the 2D information to 3D curves and surfaces, I was surprised how very well consistent a large portion of it was, and even more admirable: how consistent of a 3D form took shape, design and proportion wise, compared to the 2D impressions. This - to me - is a dizzyingly crazy skill.
Even more so since a number of details did not prove to be consistent and therefore proofed the drawing to be a child of brain rather than of measurements of any kind of a mock up.
The inconsistent and missing information and unsolved details of the form let it appear to me much more interesting of a work.

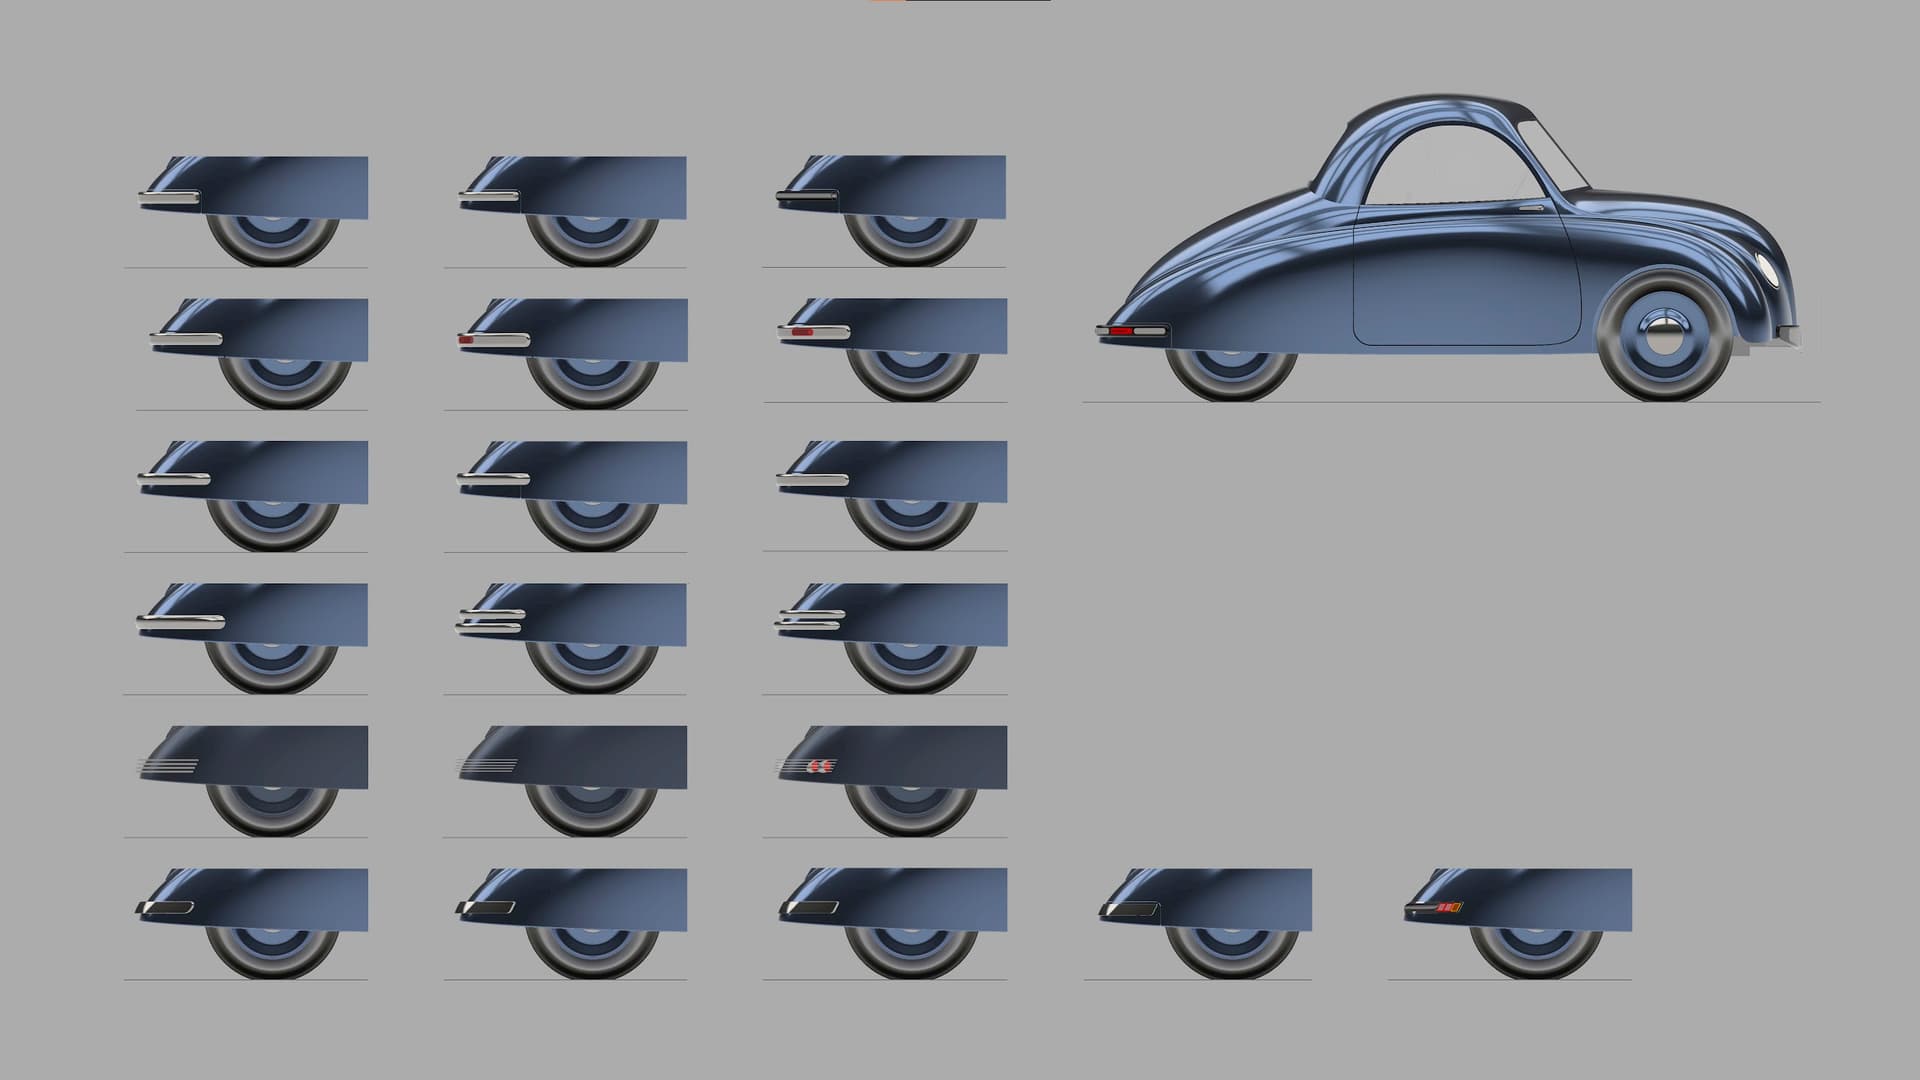
And not at last all the missing parts, like bumpers, door handles, rims, hub caps, rear lights,…let it appear all the more delicious of a prospect of an exercise to play around with.

.
.
.

.
.
.

.
.
.
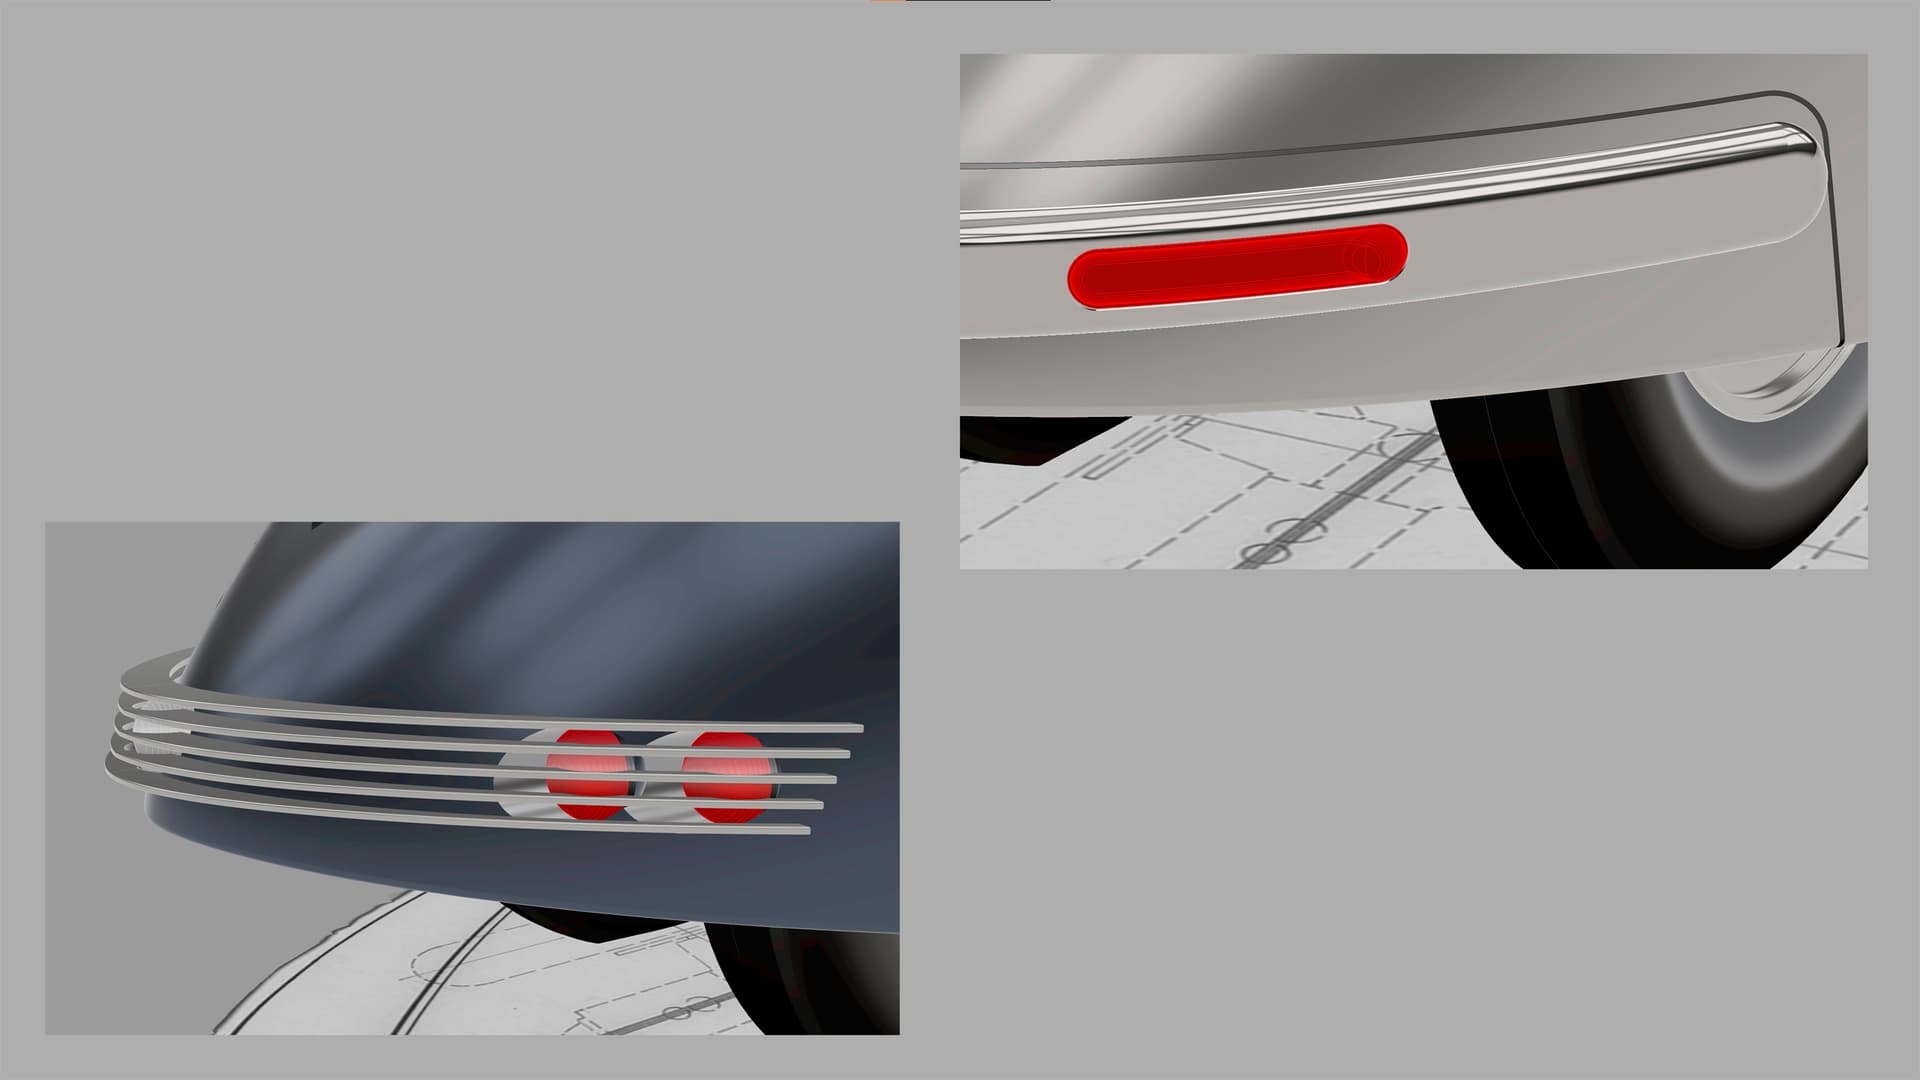
Wanting to check whether this bumper could be mounted bypassing the bodywork and being somewhat forgiving to Parisian parking culture I came up with this sketch:

.
.
.
And had to check how resulting forces could be transmitted to the frame:

.
.
.
Learning the face was to be somehow solvable I switched to the rear bumper. And back and forth between the rear and the front.
.
.
.
.
.
.

Throwing in the design of the door handles and rear lights and wheels on the way, in hope of finding consistent solutions amongst the different elements as well as to the over all design of the car and fitting into the contemporary model range of the concrete brand of its time and corresponding with the contemporary means of production I ended up with the following.

.
.
.

.
.
.

.
.
.

.
.
.

.
.
.

.
.
.

.
.
.

.
.
.

.
.
.
Looking at samples like these in between:

.
.
.

Detail of one of the few nicely preserved copies that have stranded at my desk.
.
.
.

This one - being one of the more crumpled ones - ending on the wall.
Hope this exercise to be somewhat entertaining and my thoughts about the design not being taken too seriously. It was great fun for me complementing the repetition of “the R8 bible” and trying out what I intended to learn via Sky Gs (@sgreenawalt) tutorials.
.
If there is interest in some screenshots of in between stages of the surfacing I would be happy to share.
.
Regards from the past.