I know that if I use the unroll command I can get perfect flattened surfaces of the 3d model. However, when I use the custom mapping tool in Rhino - The tool will flatten the surfaces in random unrelated sizes. Causeing the user to go in and manually grab the vertex and resize the surface for proper mapping. Is this a WIP to have Rhino flatten the surfaces as they are or is there a better way to use this tool.
Am I understanding you correctly that you are using Unwrap, and you don’t like the results? By going in an manually grabbing vertices and resizing the surface, do you mean you are using the UVEditor to change the mapping mesh?
Are you using the custom mapping to change the mesh? or for the UV mapping which is it’s intended purpose ? I am fairly new to all this but I use the function to transfer a UV from a Mesh object to a poly-mesh, which is the only way to FLATTEN an object ( which does not always work BTW)
in this view the original mesh I converted the cab using meshtonurb then using custom mapping was able to refer to the original mesh to assign the UV to the poly-mesh object, which you can see on the texture as well as the truck object. You can also see the FLATTENED section of the poly-mesh. But, Rhino will NOT maintain the UV coordinates when you FLATTEN an object, it just will not work that way. I have been struggling with this process and how to resolve this issue in some way with different software products for years!
Im using the UV editor. The unwrap does not work in most cases, As seen in the screen shots and using nurbs not converted meshes Rhino will completely randomize the surfaces. The screen shot shows a simple surface if it is more complex it will take forever to select the surface, find out which one it is, move it, scale it, and repeat - over and over.
I feel that Rhino should be able to layout the surfaces as the surfaces are. Not randomly and random sizes.
I understand better now, when you select unwrap, have you gone into your mesh and selected the edges you wish to become the seams where the UV will be split? That will make a lot of difference. in your picture, there would be a seam around the top edge, and bottom edge of the seat as well as at least on vertical on the edge face ( back center for example) for the edge of the seat. As to why it places them in random locations and random sizes is it is basically a surface projection and not FLATTENED or UNROLLED. I see from your image there is a texture image on screen that at sometime you used to edit the UV and it will also try to fit the UV to the size and shape of the bounds when you layout the place mark for the UV.
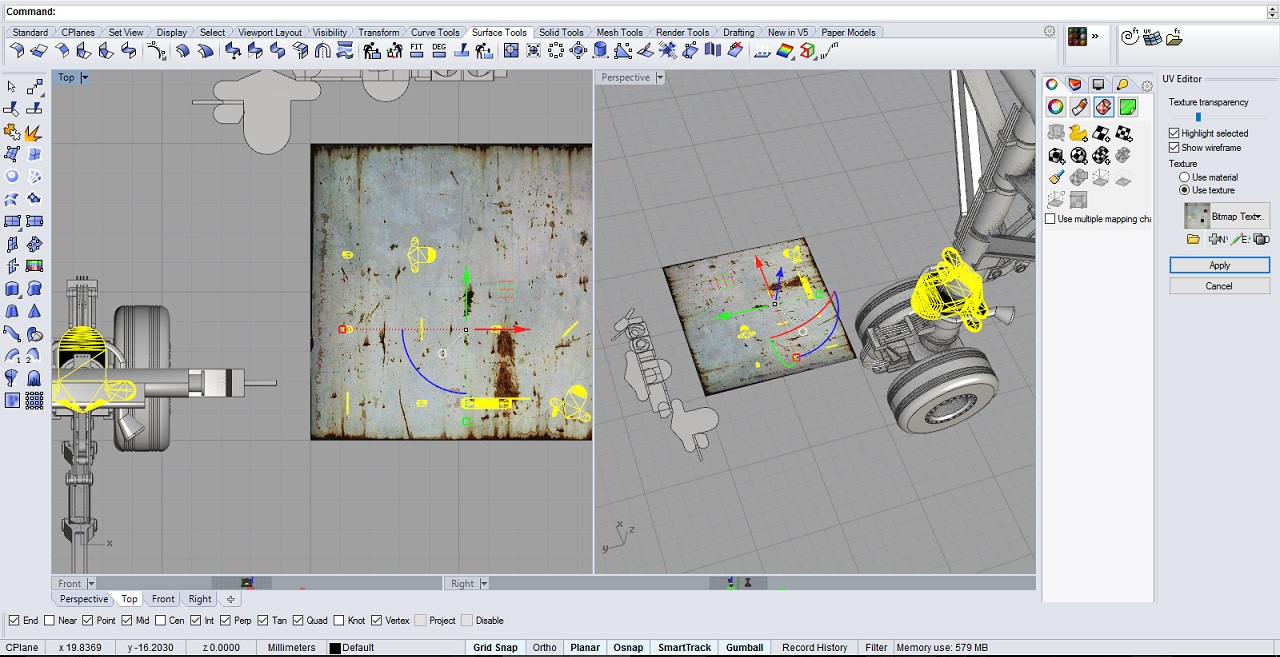
Here I selected the seams I wished,
Here is the result on the UV square that I designated ( far to large BTW ) of the seam selection, and on the left side of the right viewport the result of the same area flattened…
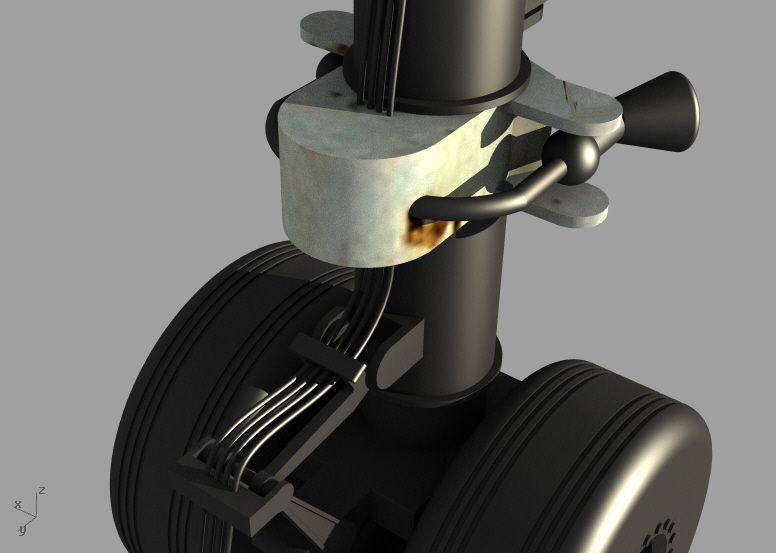
Hi, While yes it is a simple object it will be rendered with a veneer. While some might throw a box map on it and be happy the top and bottom will have the grain going the same direction but the banding will flow with the direction of the banding - thus a box map would not work… Like in the image of the wheel you would need to scale and align the randomized surfaces up to get realistic results and seen by the pixelization of that mapped surface. Also, the link provides the basics of the tool and works great with bodies of that shape only.
You are running into a fundamental limitation of Rhino’s texture-mapping implementation.
Such a chair is usually made from molded plywood – edges always look very different from the surfaces (hence may not get simulated with one and the same texture map).
The most professional way to deal with this problem is assigning separate materials to sub-surfaces of polysurfaces and also using dedicated UV’s for just the portions of the model covered by the respective materials. This unfortunately isn’t possible within Rhino.
There’s two workarounds:
You may extract the surfaces which comprise the edge of your chair and assign a separate material.
As wood is opaque this method should work fine – the same strategy doesn’t work with more complex (transparent) materials though.
Alternatively you could create a dedicated combined texture for both surface and edges inside an image Editor, see attached image.
Hi - hifred, Yes thats what I do when I render such items and its great that you shared this. I think it will help alot of noobs following this thread… But, I want to get back to the randomized layout that Rhino does when using the UV editor. I can have two peices of the same size on a 3d model and when I use the UV editor to mapped them Rhino will flatten the surfaces in different sizes and layout. Meaning one will be up and down and the other will be smaller or bigger and left and right. This is what my problem is.