If you are looking just for the glass pane, you do not need the bounding box, because the glass pane will be a box already. But to be honest all this may depend on the design you have for the windows. Is there any chance that you can share a small portion of your Revit file? That way it is easier to give you an answer, just the screenshots in this case are not enough (at least for me ![]() )
)
1 Like
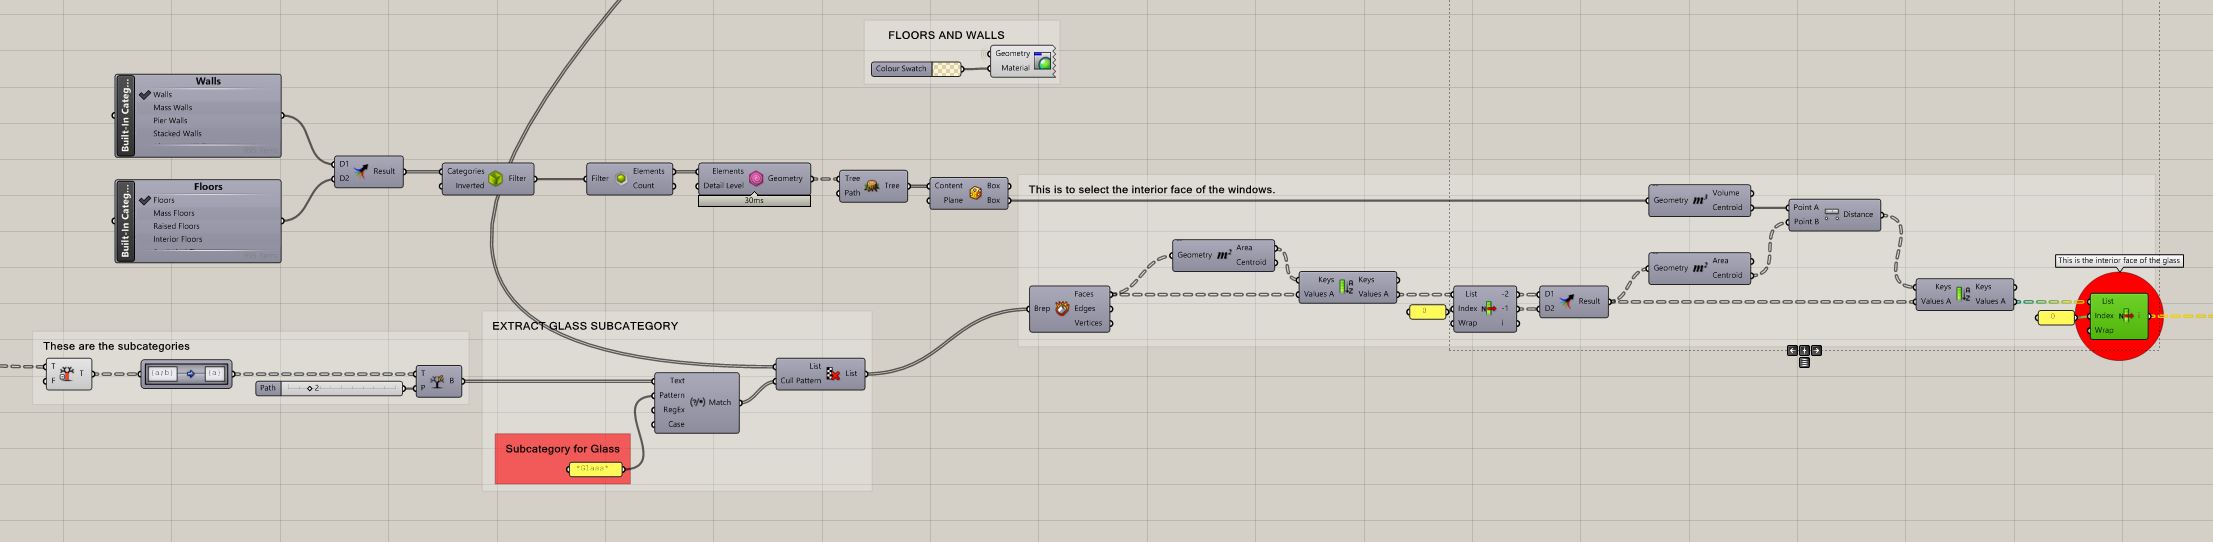
This is what I can share with you. It is the initial segment of the script where the necessary geometry is filtered. This version does not include your latest update that selects only the glass surface. I hope you can assist with that. The Revit model is merely a test model, so it contains no confidential information. I hope this will help. And let me know if there are any improvements can be made.
20240410_SelectingWallFloorWindow_V01.gh (45.3 KB)
20240408_ModelV4_V01.rvt (5.3 MB)
Hi @H_Kramer,
I just incorporated the new part I sent you for the interior faces of the glass and it works.
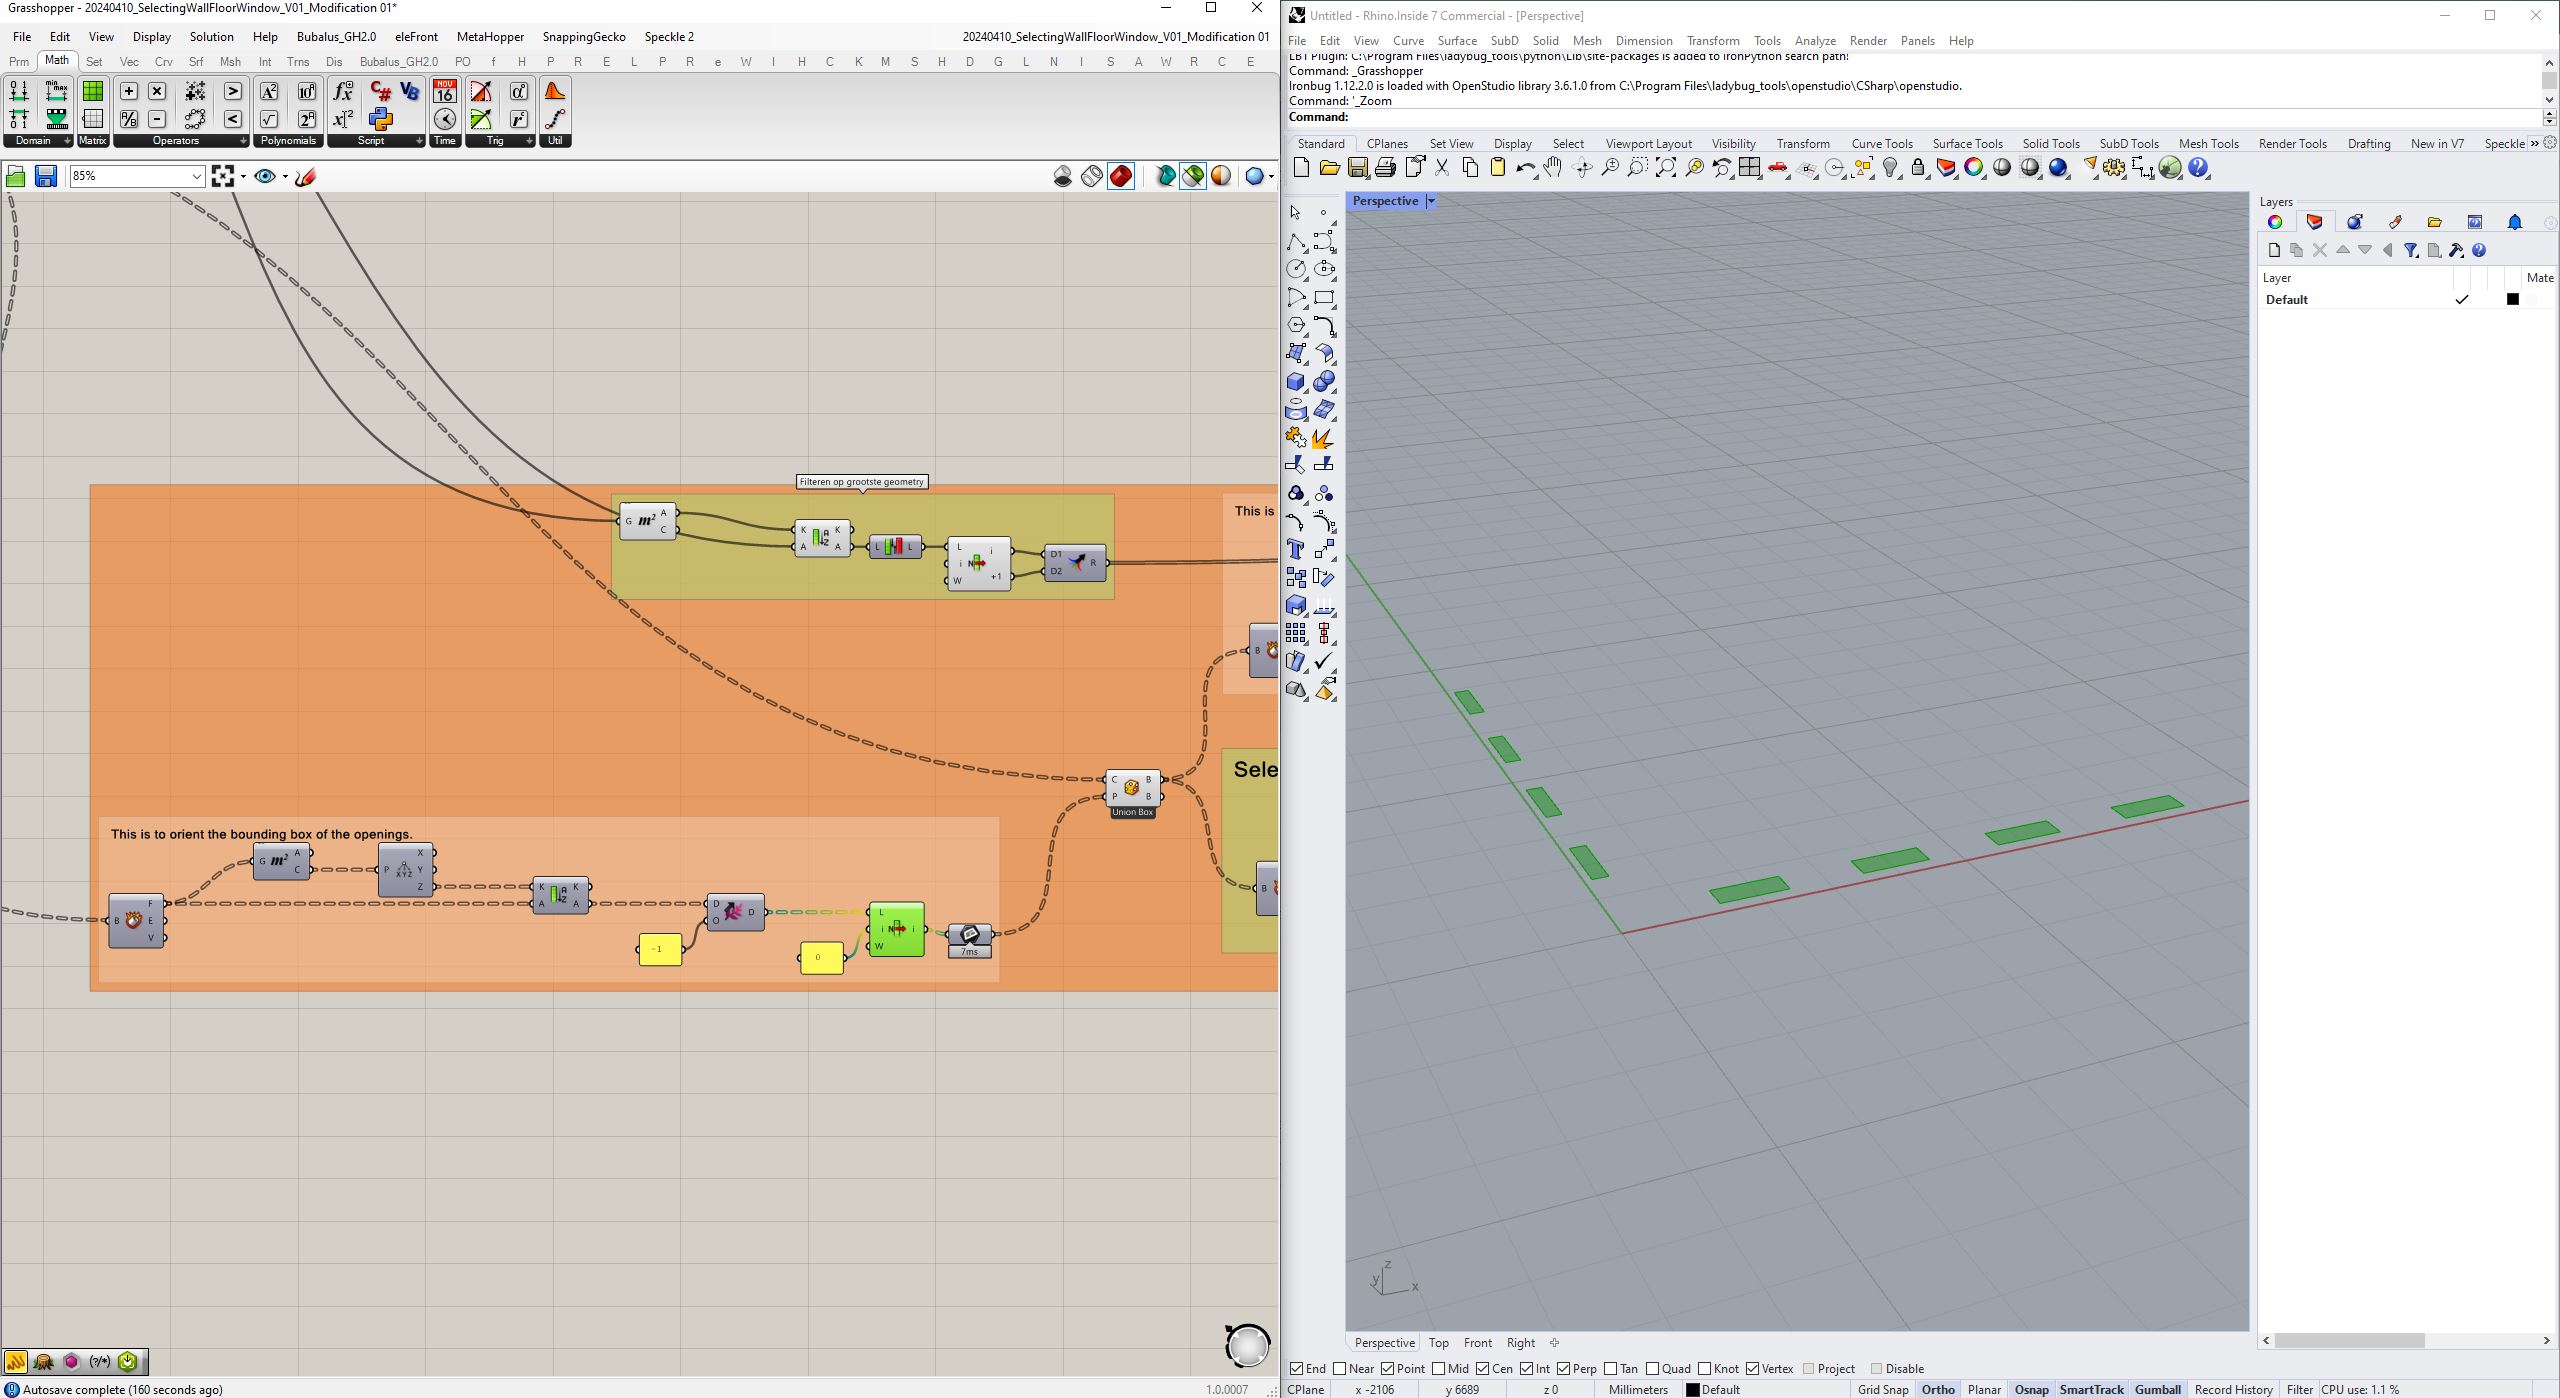
Regarding your problem with the bottom surfaces of the bounding boxes, I do not understand the problem you have, because if I select the component I can see all of them, not just one. If this is the file that works, discard the new file you were referring to. I removed the bounding box part in the file I sent you for the interior faces of the glass because in that case you do not need it (or at least I do not need it ![]() ).
).
Here you have your file with the integrated part of my last script.
20240410_SelectingWallFloorWindow_V01_Modification 01.gh (57.2 KB)
1 Like
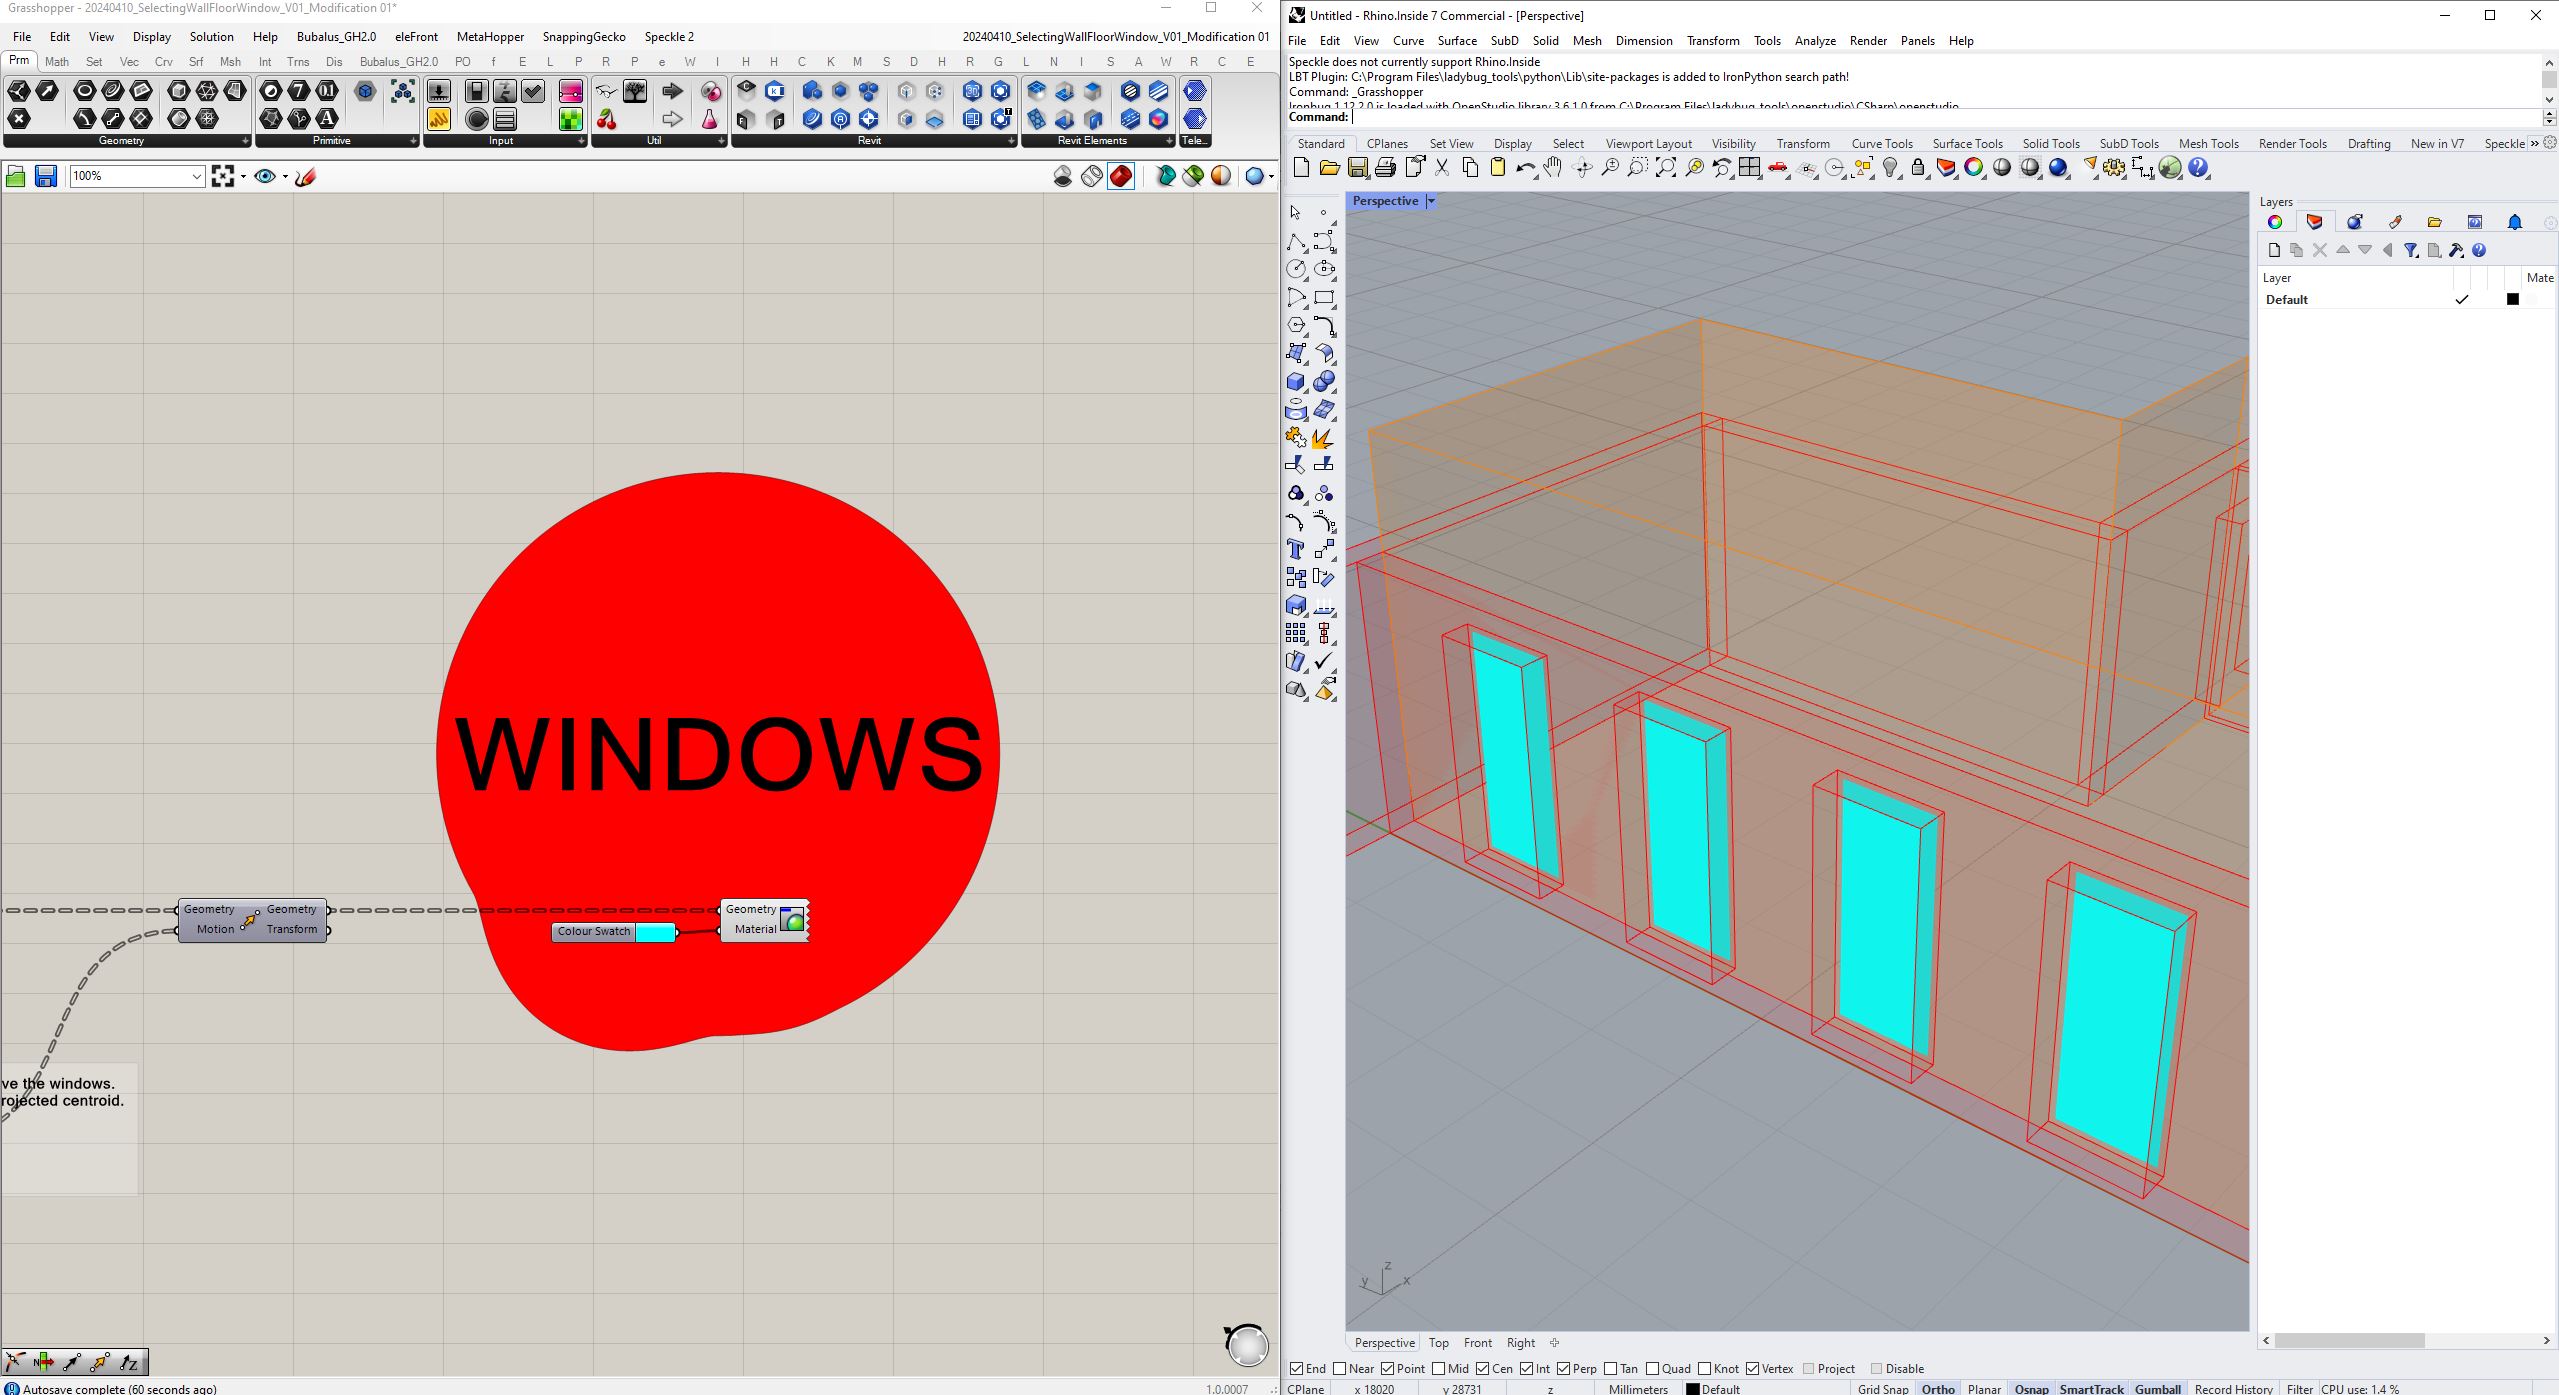
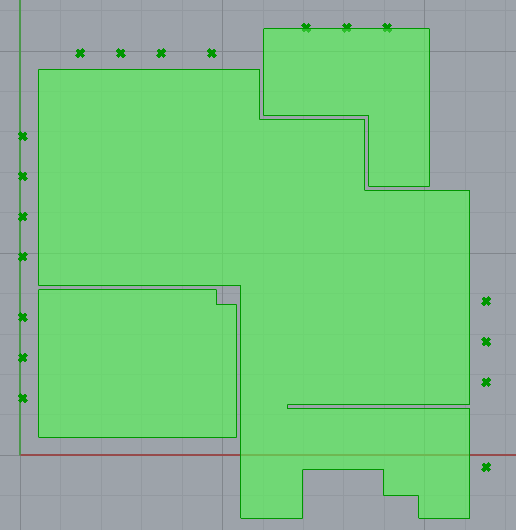
This indeed does work, but I found one issue. The surface of the glass is in front of the wall.
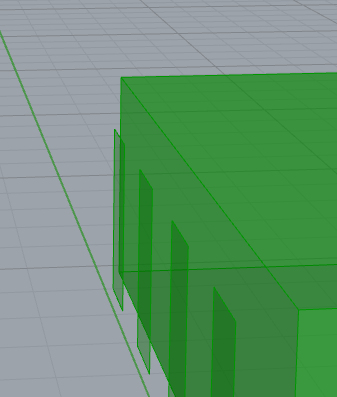
How can this be solved?
Hi,
If I open the last file I sent you this is the result I am getting (and I have not modified anything, just the groups to highlight the geometry ![]() ).
).
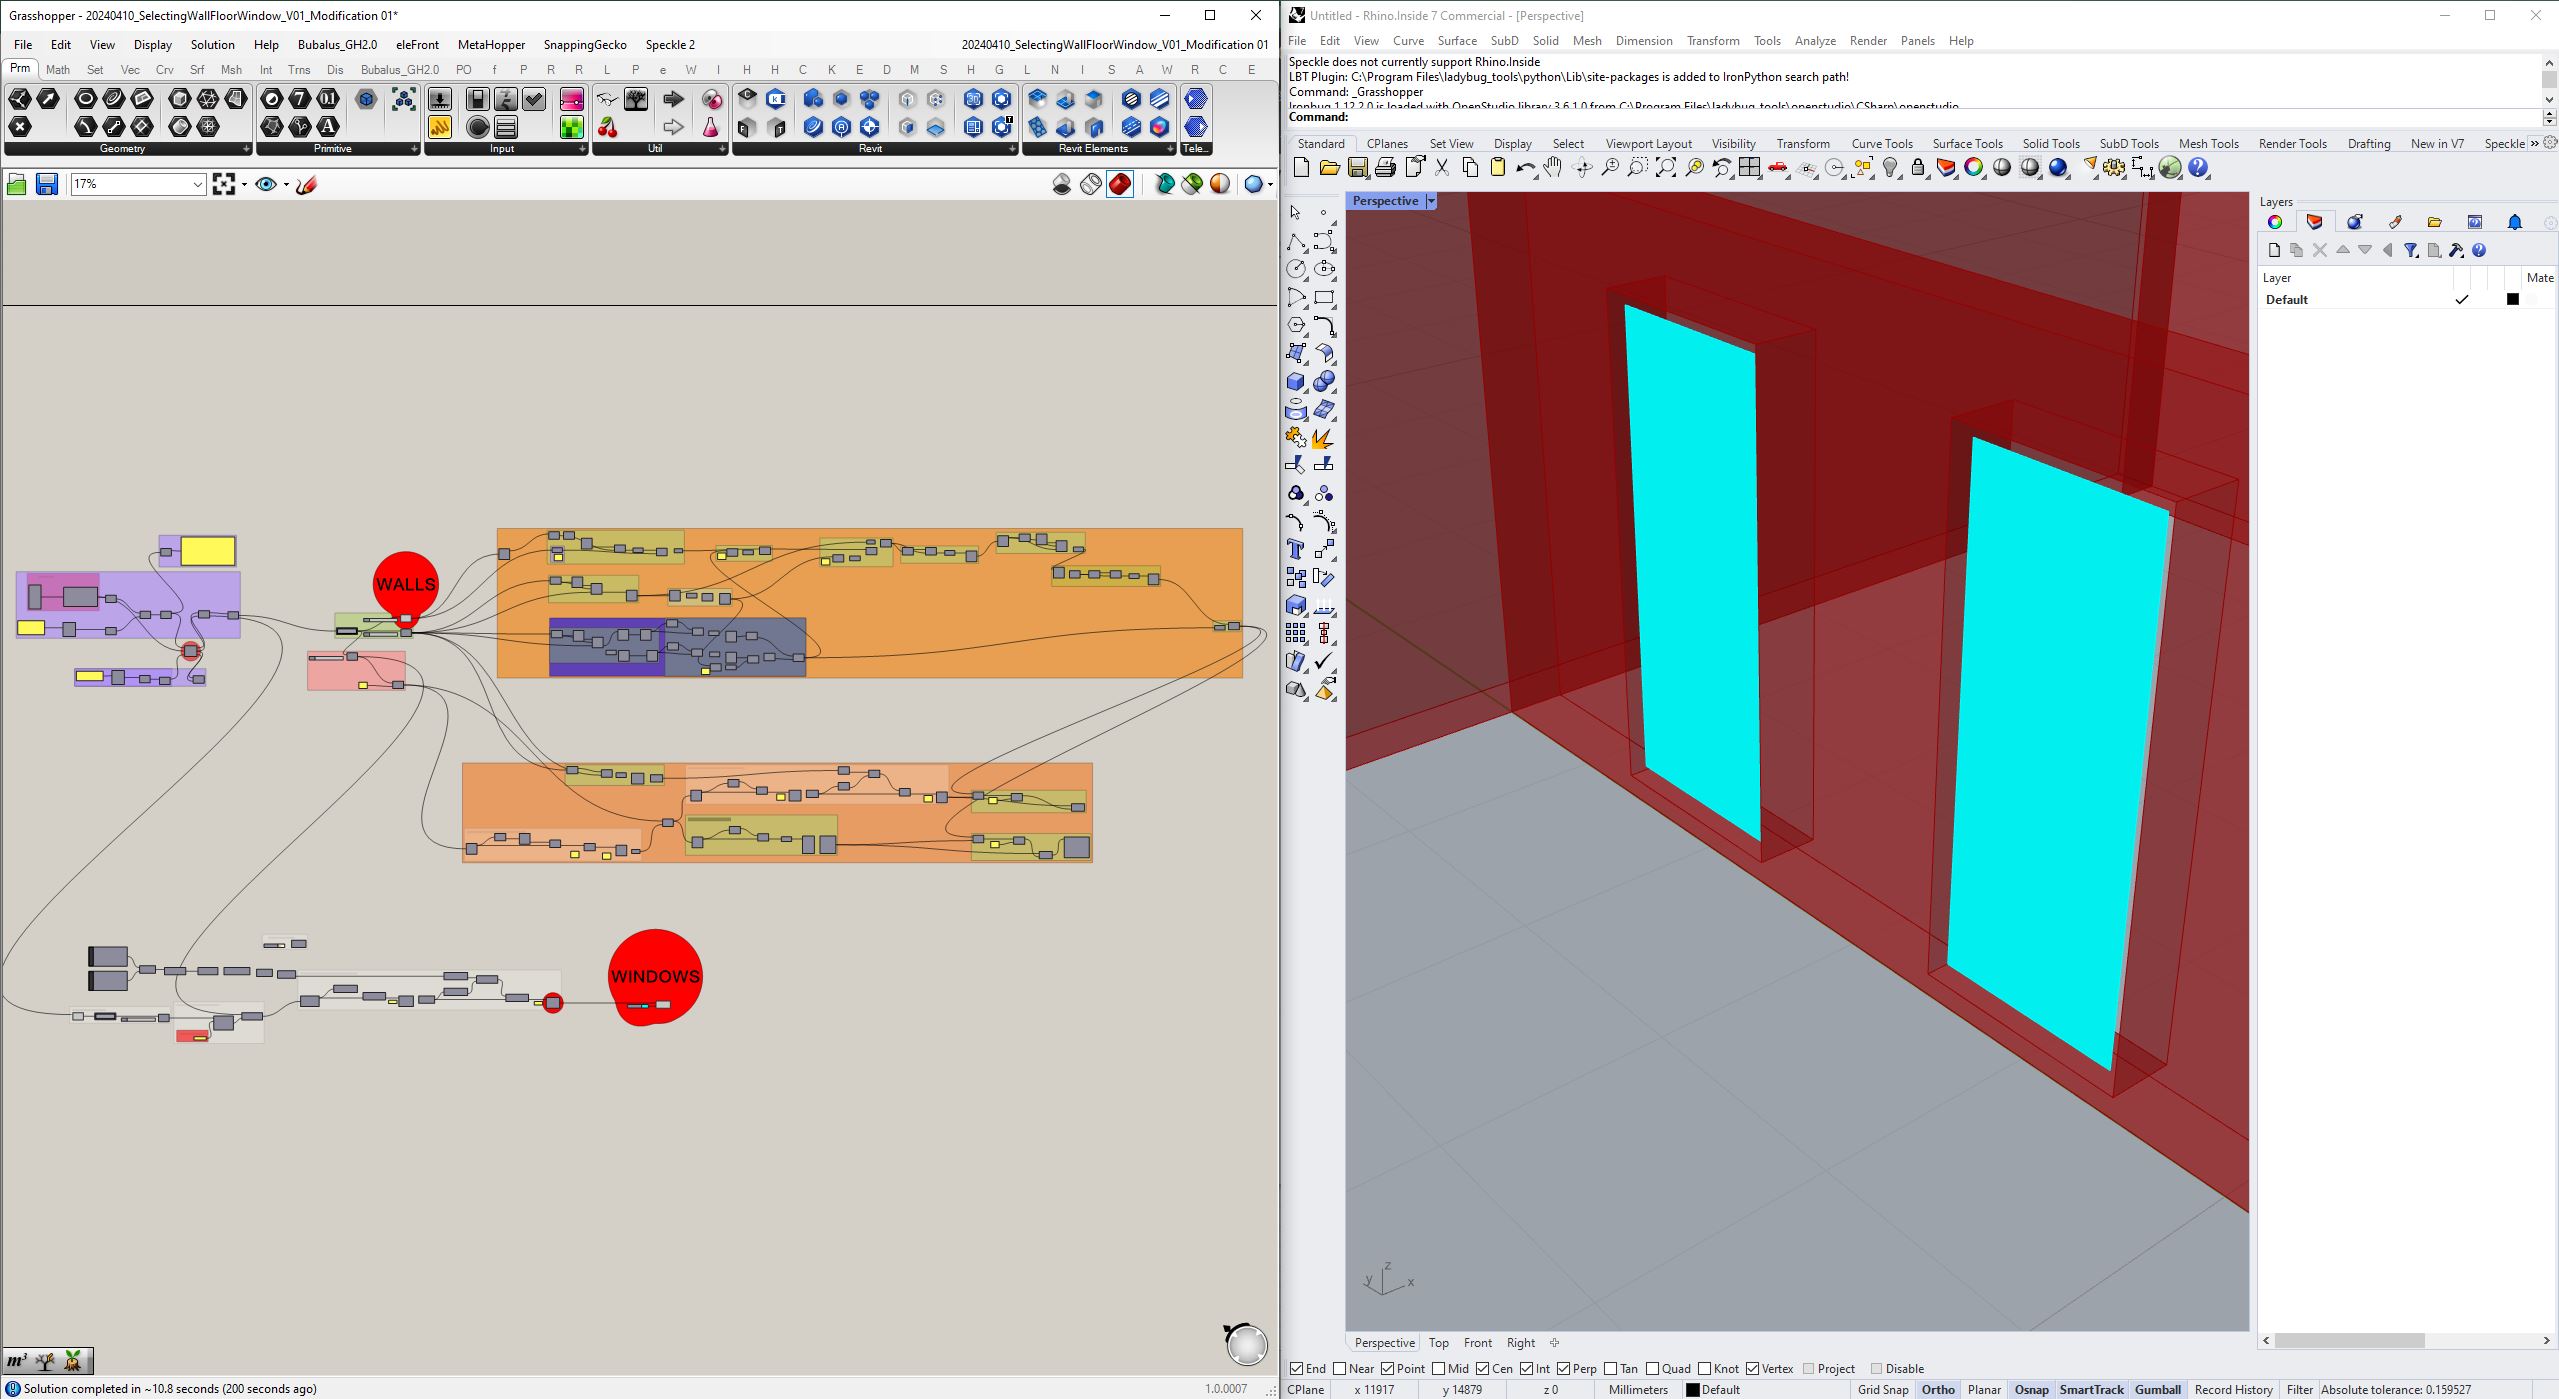
The image you sent looks like you are comparing it to the room boundary. Is this correct? If that is the case you will need to project or move the surface of the windows to the volume/brep of the room.
1 Like
I have not made any modifications to your script. The surfaces that define the glass/opening must be on the same plane as the room’s Brep. How can one project or relocate the surface to the appropriate position on the room’s Brep?

I already have a solution to remove the last surface that doesn’t belong to the room.
Hi @H_Kramer,
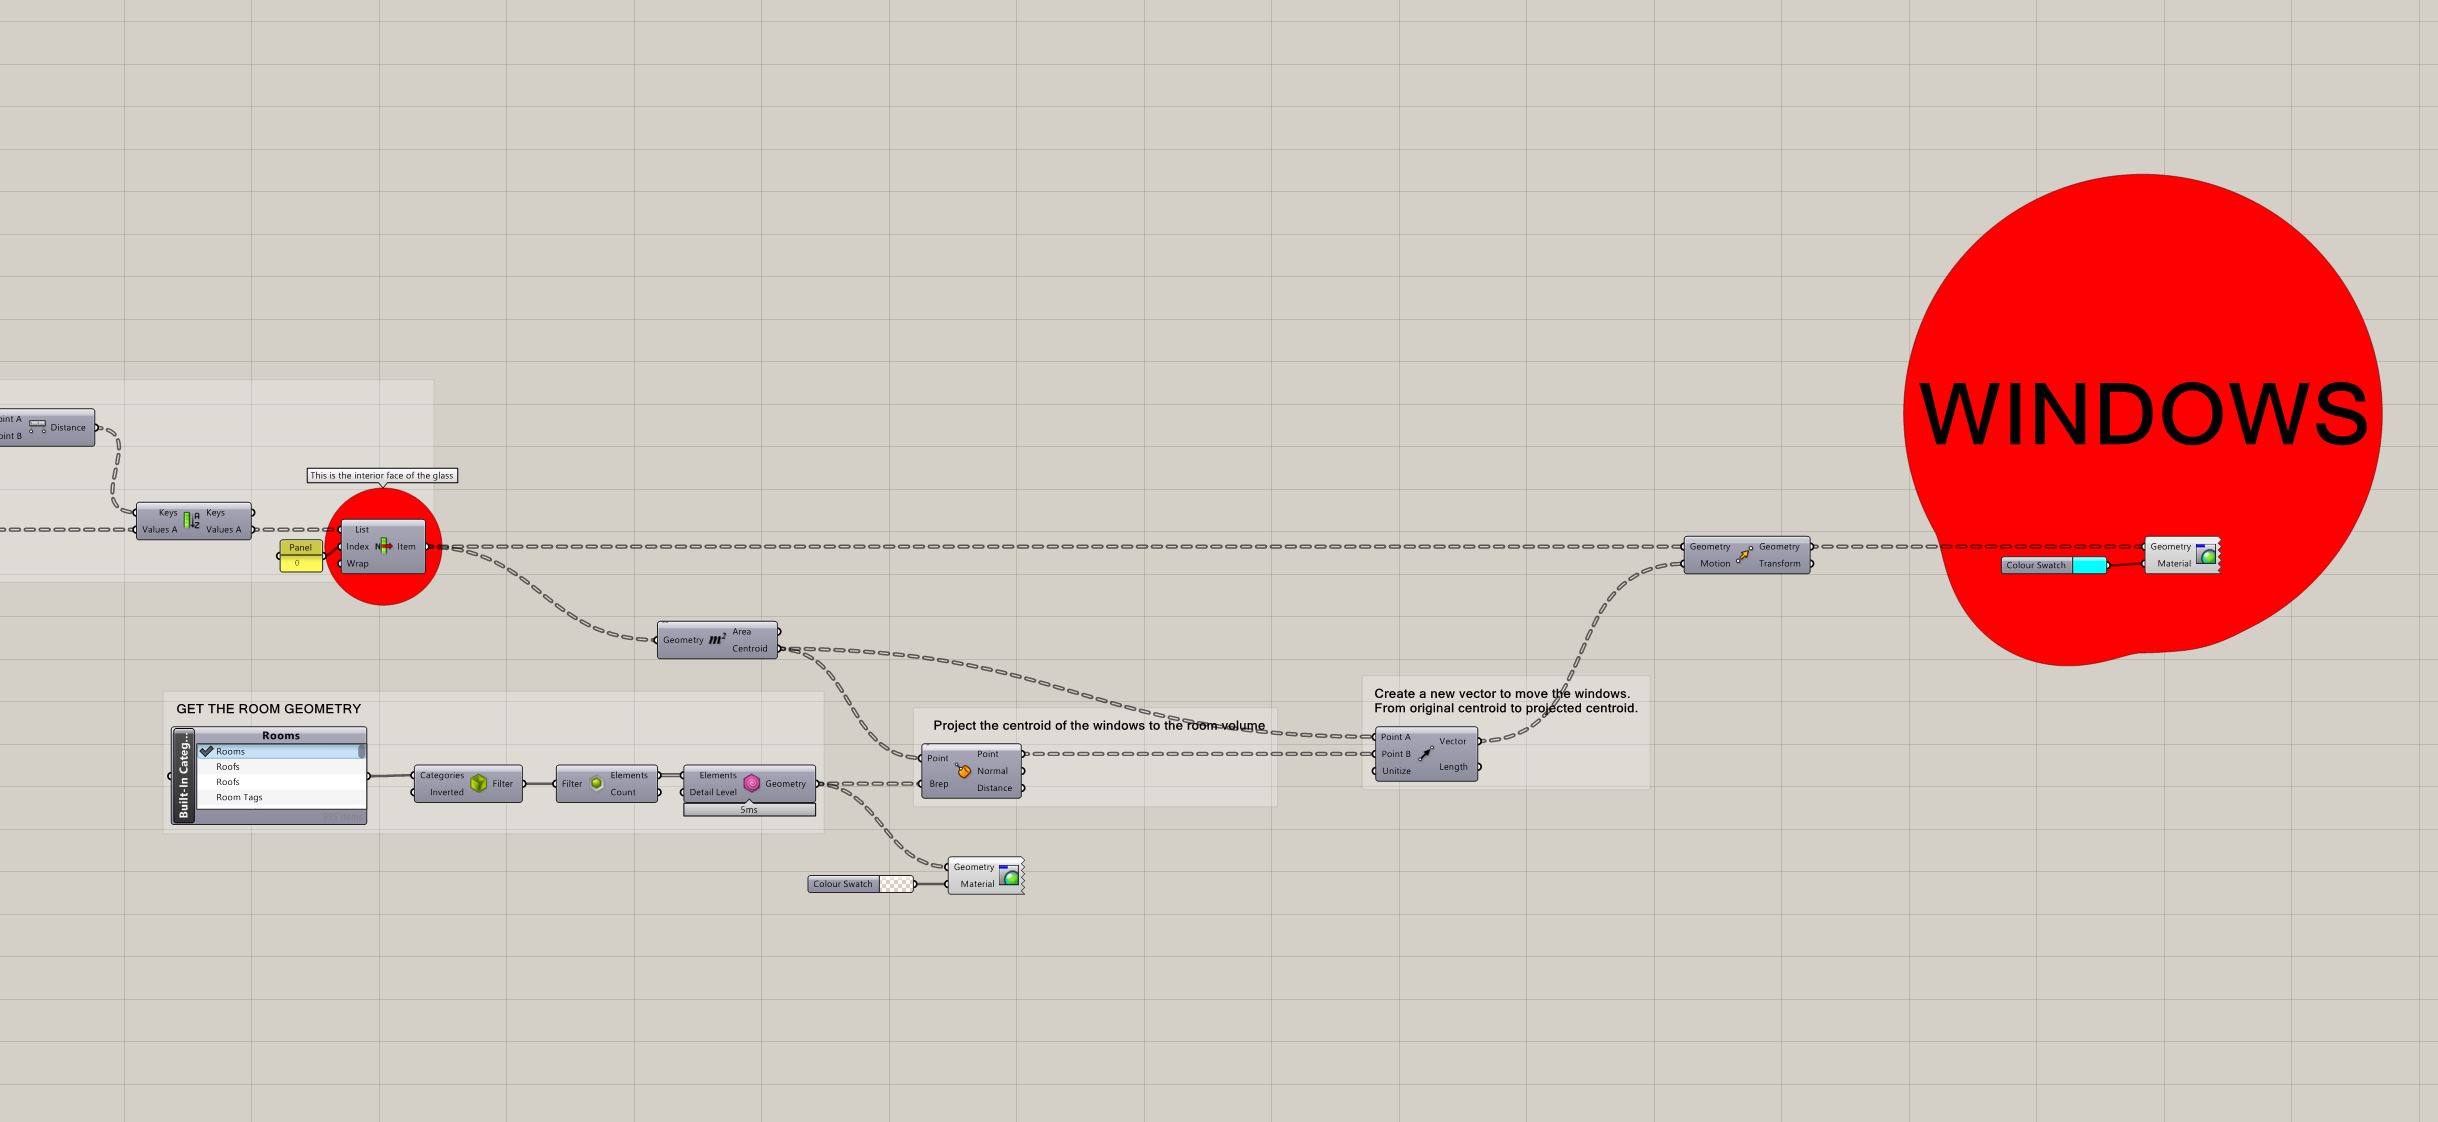
here you have the solution. Just calculate the centroids of the windows and project them to the room. With these two points you create a vector to move the windows to the position you want.
20240410_SelectingWallFloorWindow_V01_Modification 02.gh (56.0 KB)
1 Like
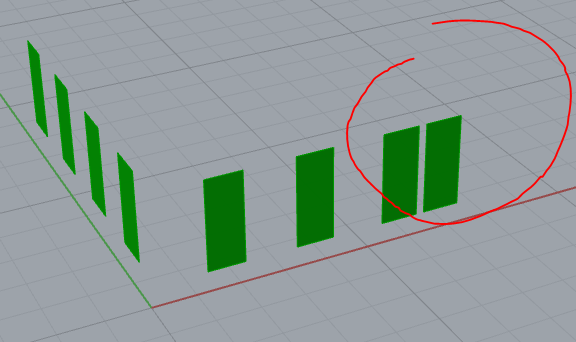
Why does the window surface move closer to the other window surface?
For two reasons:
-
I did not see that because I did it very quickly

-
Because that is the surface that you remove with the solution that you mentioned before.
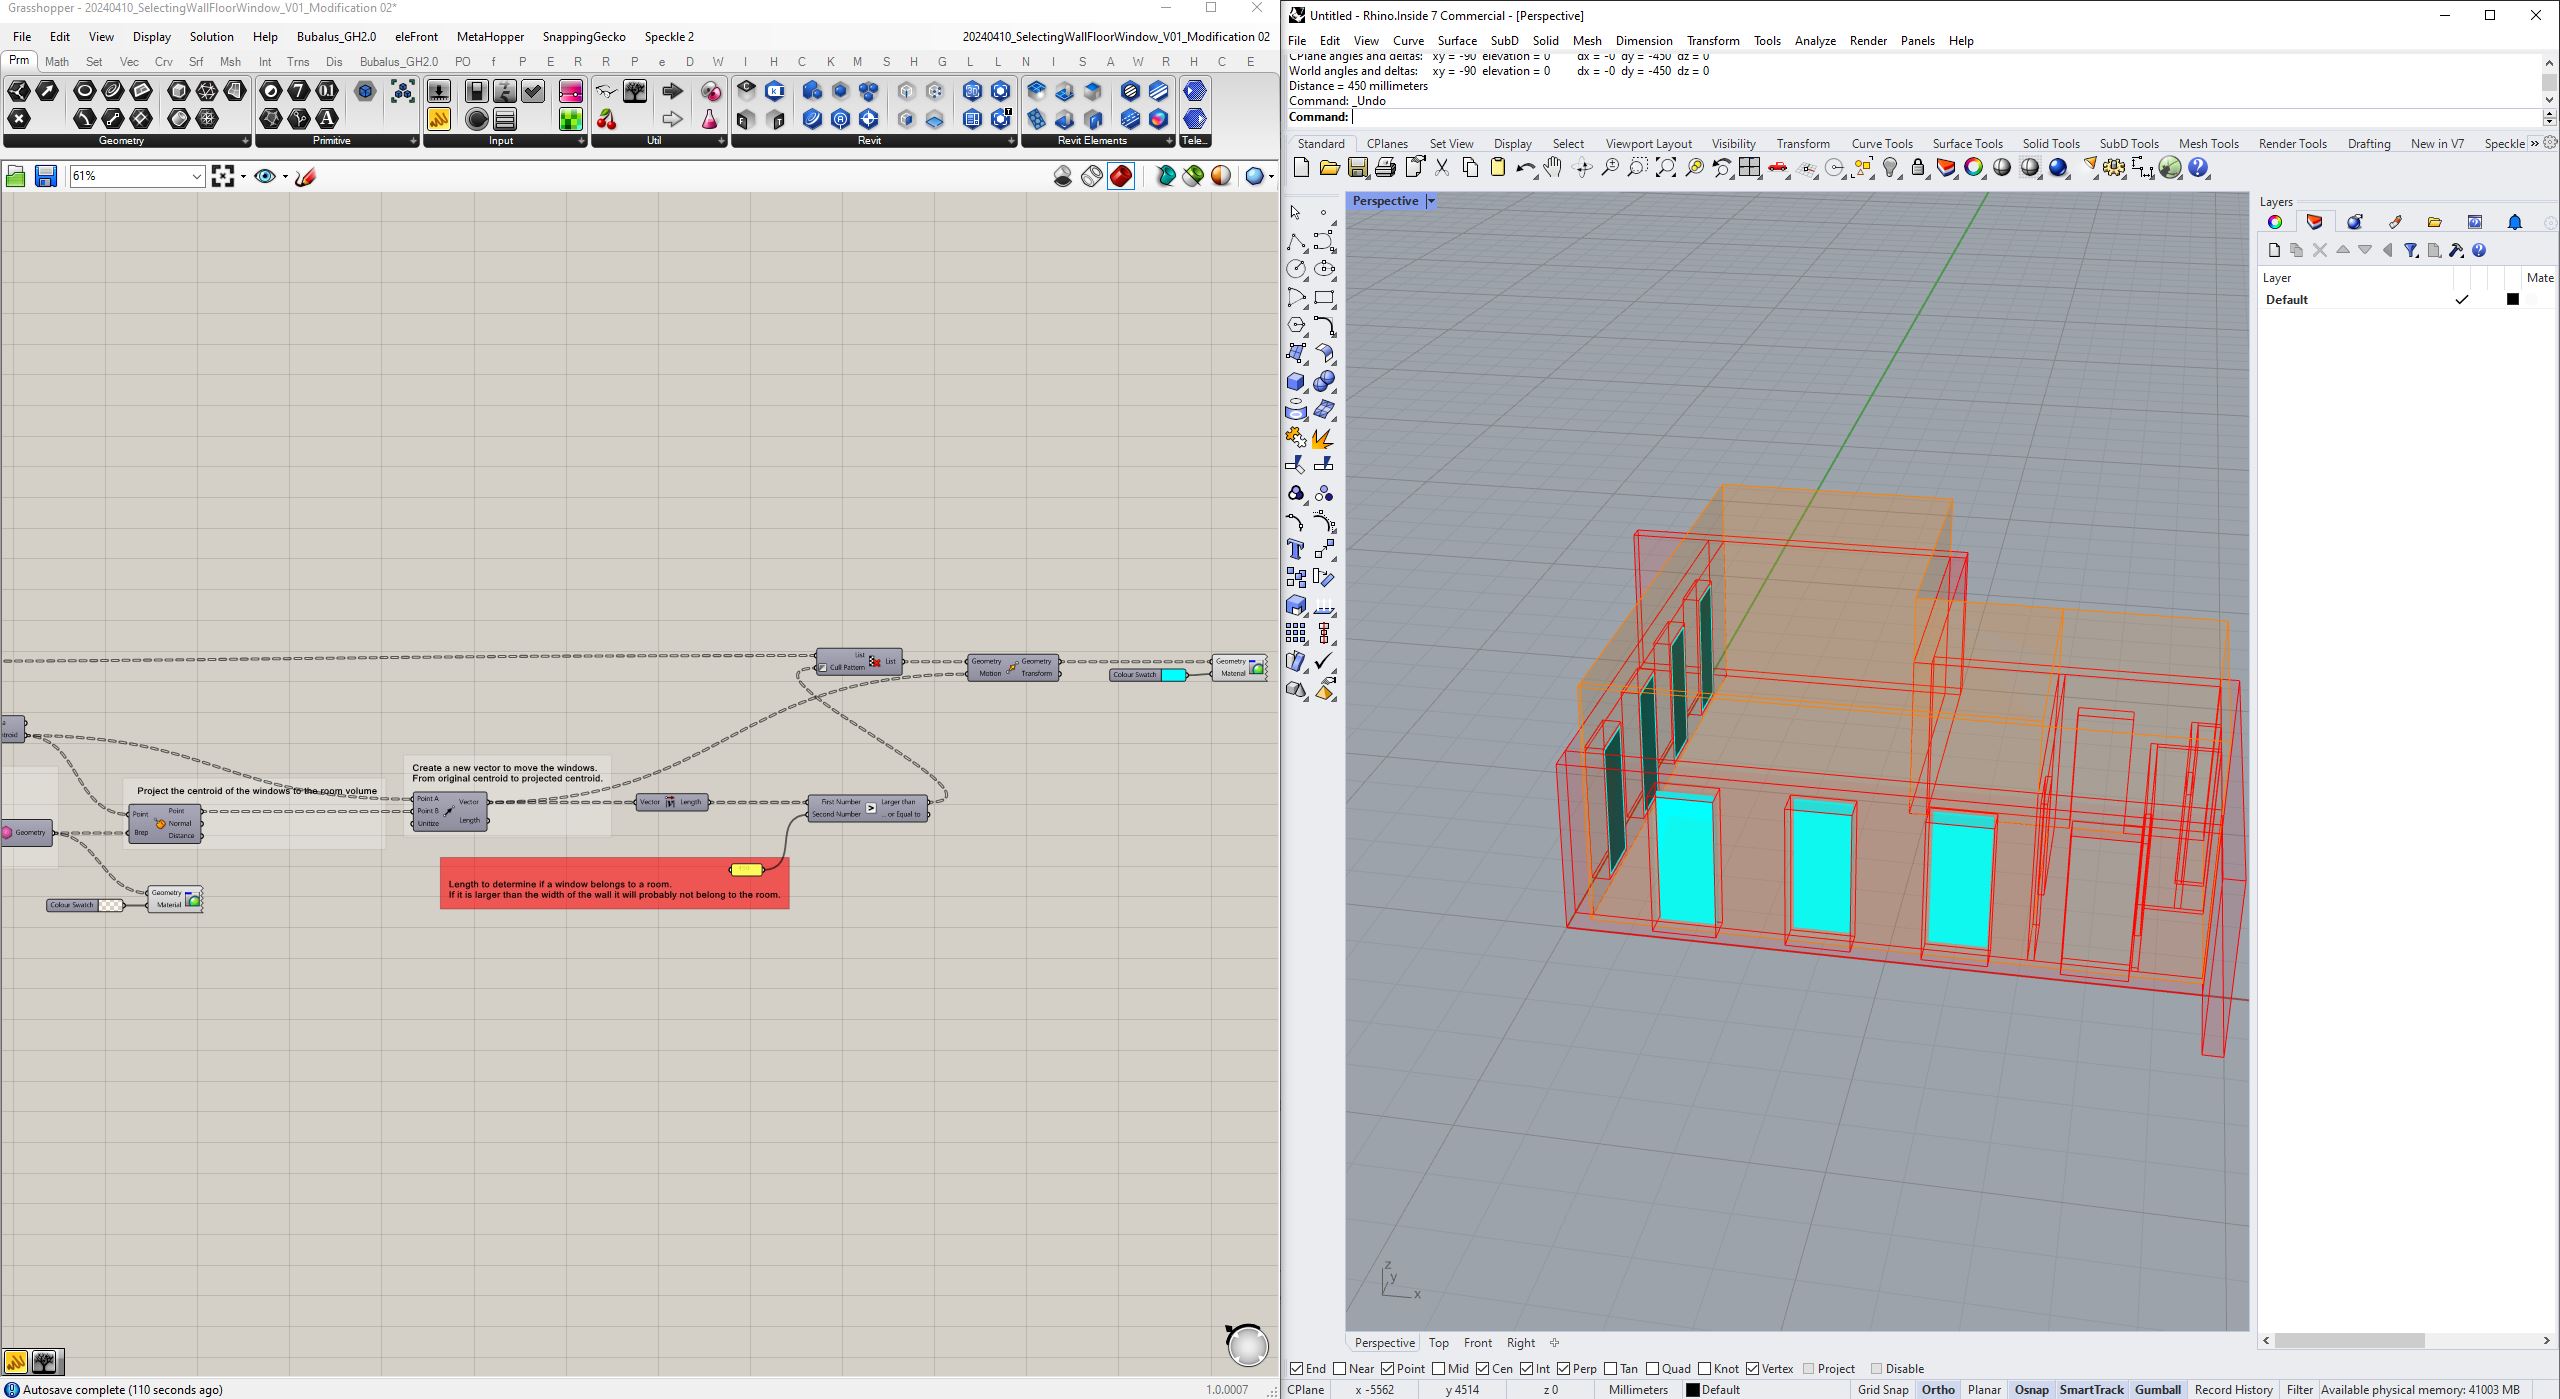
You can also remove that surface in another way: just measure the length of the vectors and if they are greater than a certain quantity (usually the width of the wall is enough), you remove that surface. I am certain that there is probably a design where this logic does not work, because I am not always able to predict all the potential scenarios ![]() .
.
20240410_SelectingWallFloorWindow_V01_Modification 03.gh (56.2 KB)
1 Like
Thanks this works. I even added a way to automatically determine the distance for the ‘greater than’ component.
1 Like
Somehow in the end im getting more then 8 surfaces? Is there a way to filter for surfaces that are in the same spot?

Hi @H_Kramer,
you can try to use this solution if you flatten your tree (but that may have other consequences later in your script ![]() ).
).

Duplicate surfaces.gh (10.8 KB)
Having said this, you may need to consider why you are getting those duplicate surfaces, to make everything easier
1 Like
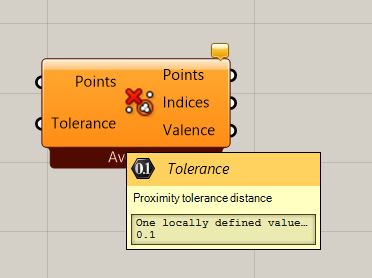
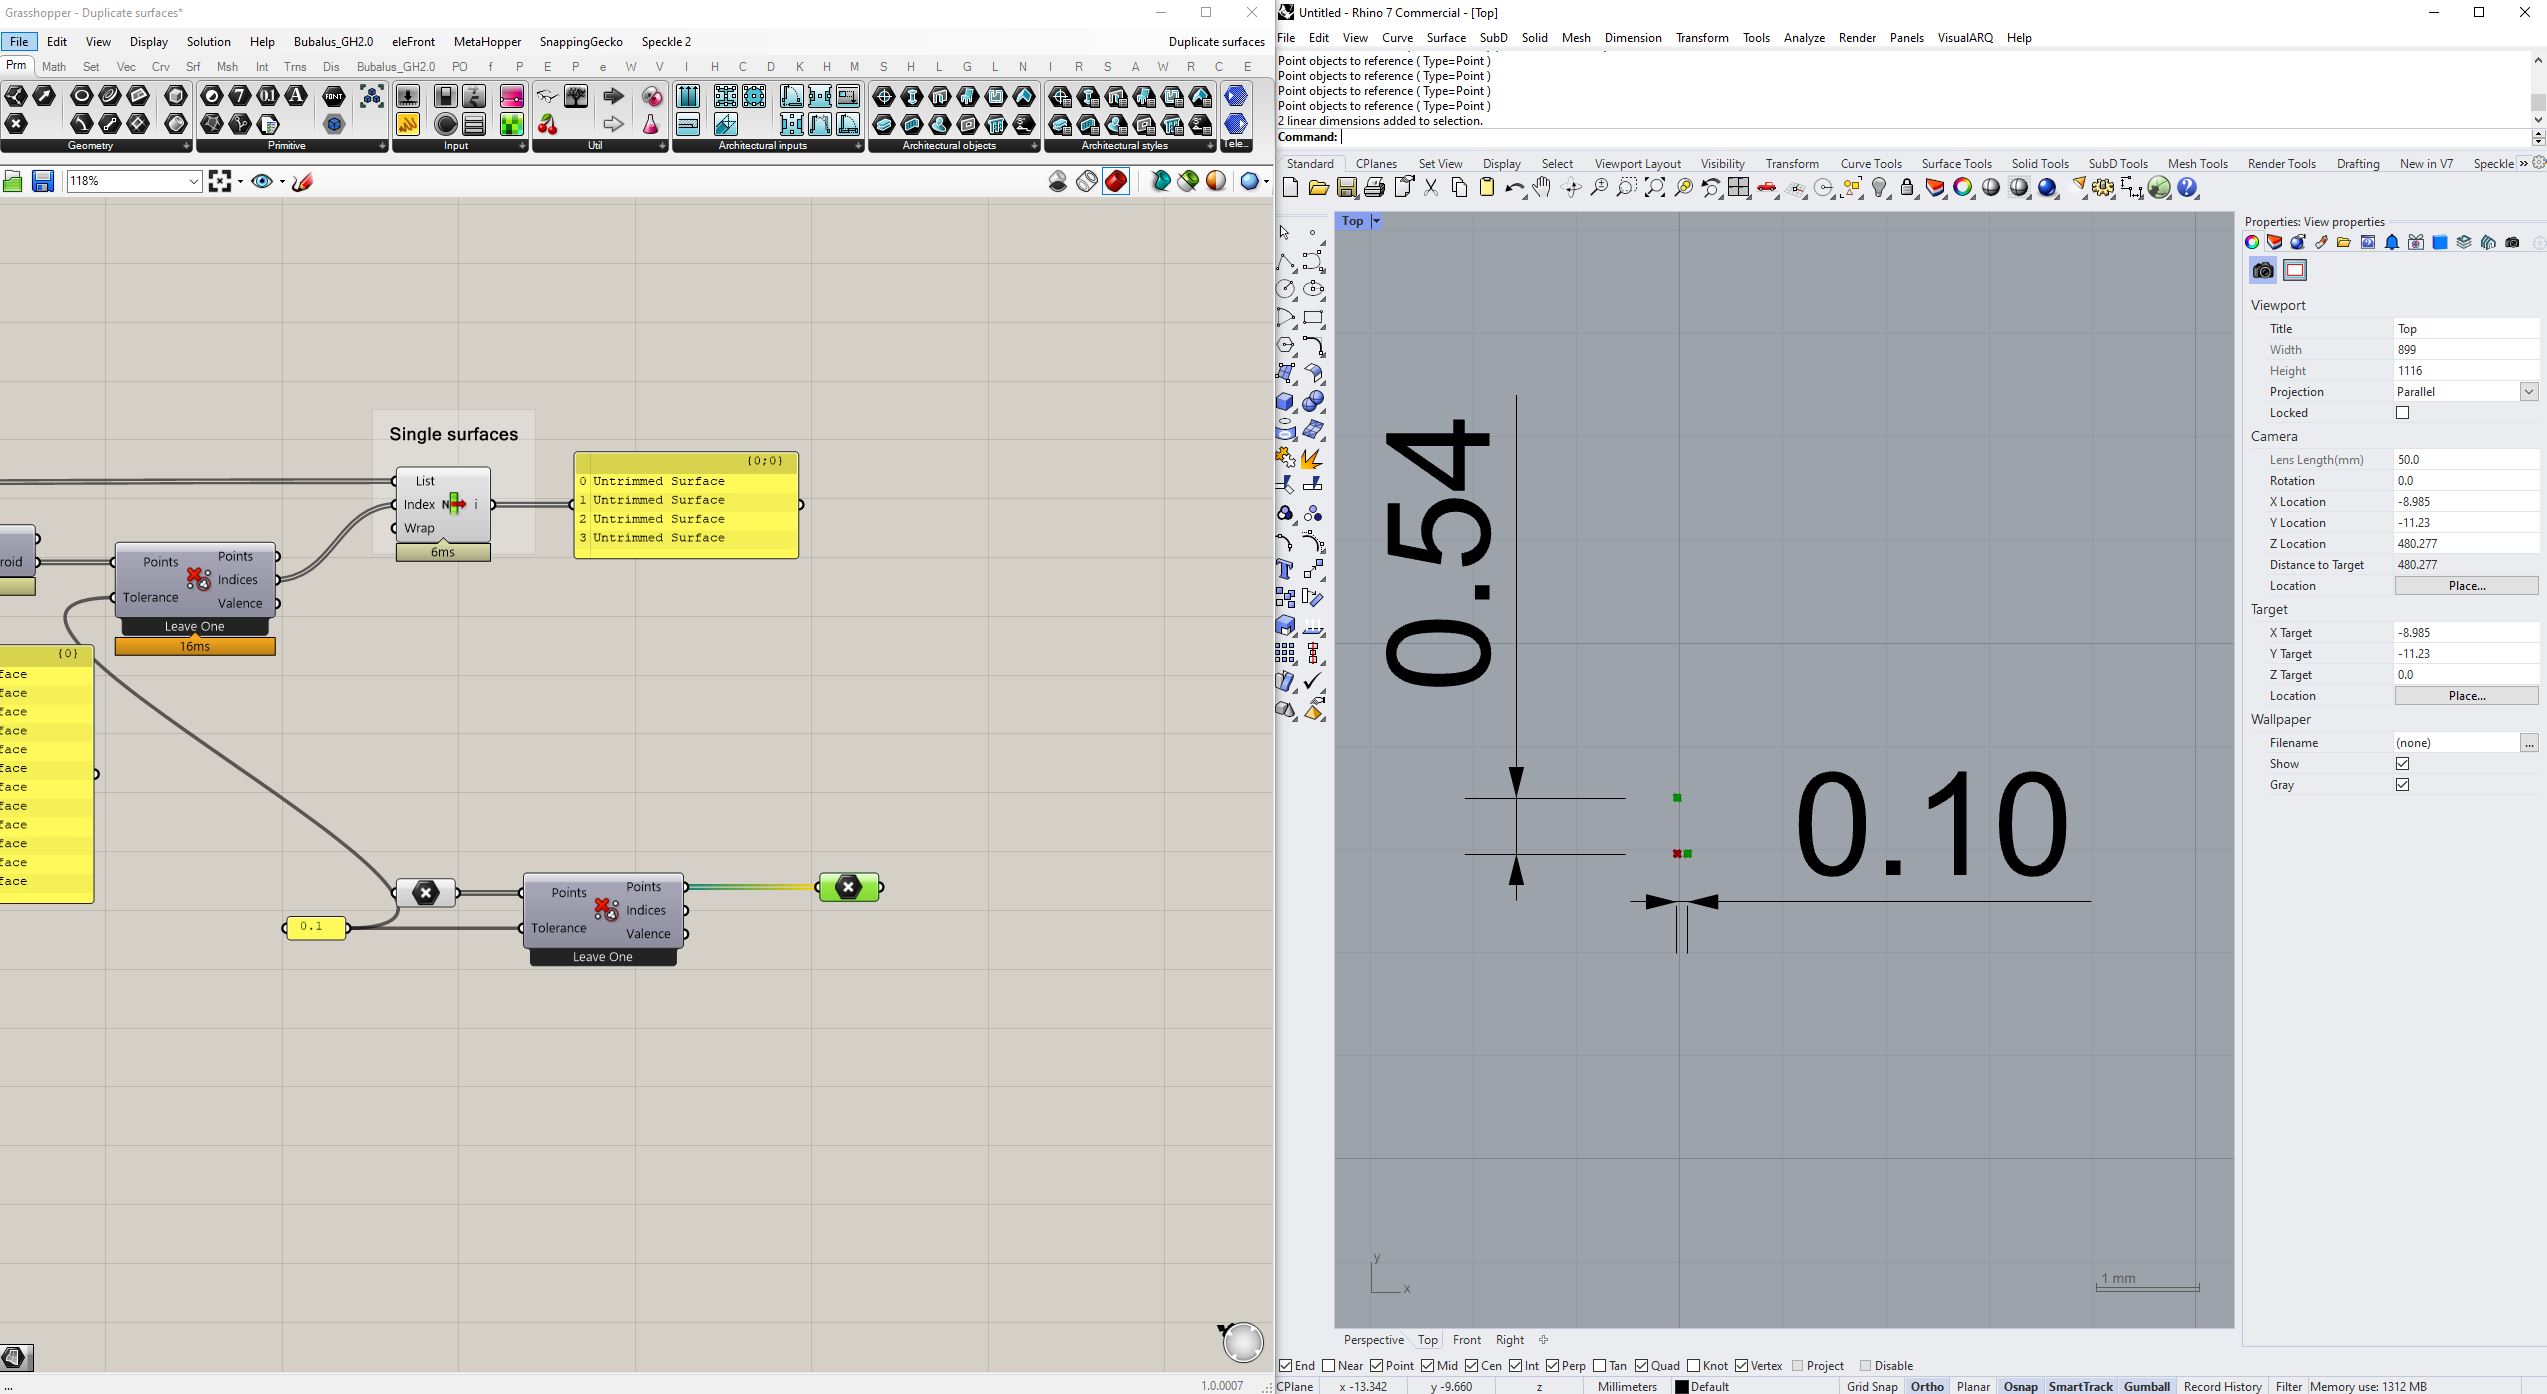
So far it seems to wurk but what is the ‘0,1’ tolerance based on?
The tolerance is the distance to compare the points. Basically in that script you are comparing the centroids of the surfaces. If the distance between them is 0.1 or lower, then the points are considered to be the same point and they are culled. Then you apply that same culling patter to the surfaces.
1 Like
Ah, i see. Thanks!
Hello @fcegnam It has been nearly a week since our last correspondence. During this time, I have made several updates to the script. However, I have encountered some issues that are beyond my current understanding, resulting in the script breaking.
I have modified the script to calculate the daylight factor for multiple rooms by selecting "Rooms’ in Revit. This modification allows me to create the geometry for all the rooms. However, I am experiencing some errors when defining the glass surface, the window frame, and moving the glass surface. It appears that some of the points are being grouped together incorrectly.
Maybe you can have a look at the script? I have already set up 2 rooms in the Revit model.

2024416_DaylightfactorScript_V10.gh (77.1 KB)
20240412_ModelV5_V01.rvt (5.5 MB)
Duplicate post
1 Like
My apologies. I had directed the first post only at @fcegnam. I was hoping to get a wider audience with a separate post.
Hi @H_Kramer,
Regarding the grouping of the points (that I assume is your main problem ![]() ), the problem stems from the tree structure that you are using and that you create earlier in the script. I will try to shed some light on this (but I may be completely wrong as this my not match what you need).
), the problem stems from the tree structure that you are using and that you create earlier in the script. I will try to shed some light on this (but I may be completely wrong as this my not match what you need).
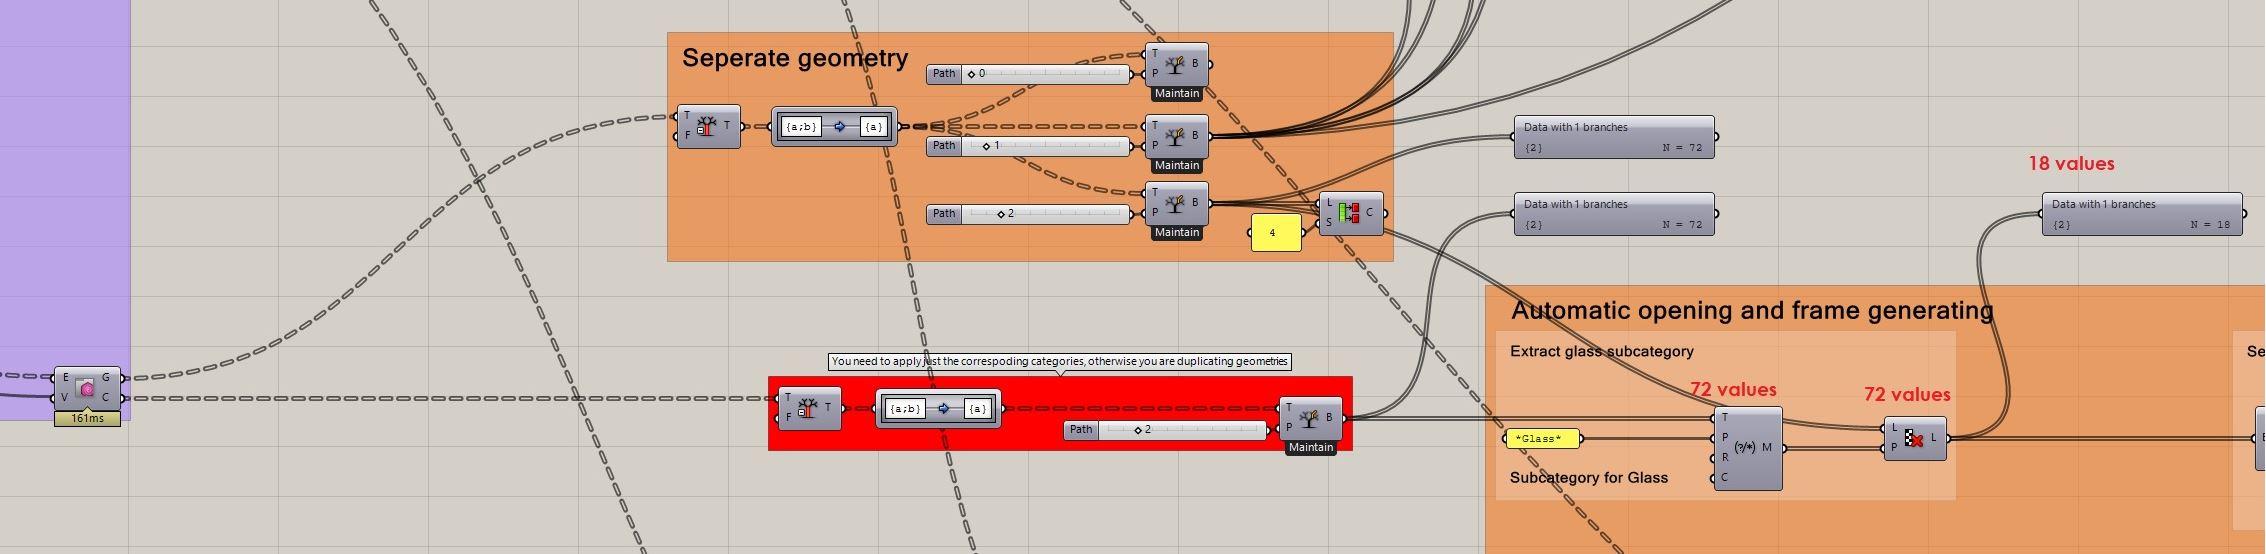
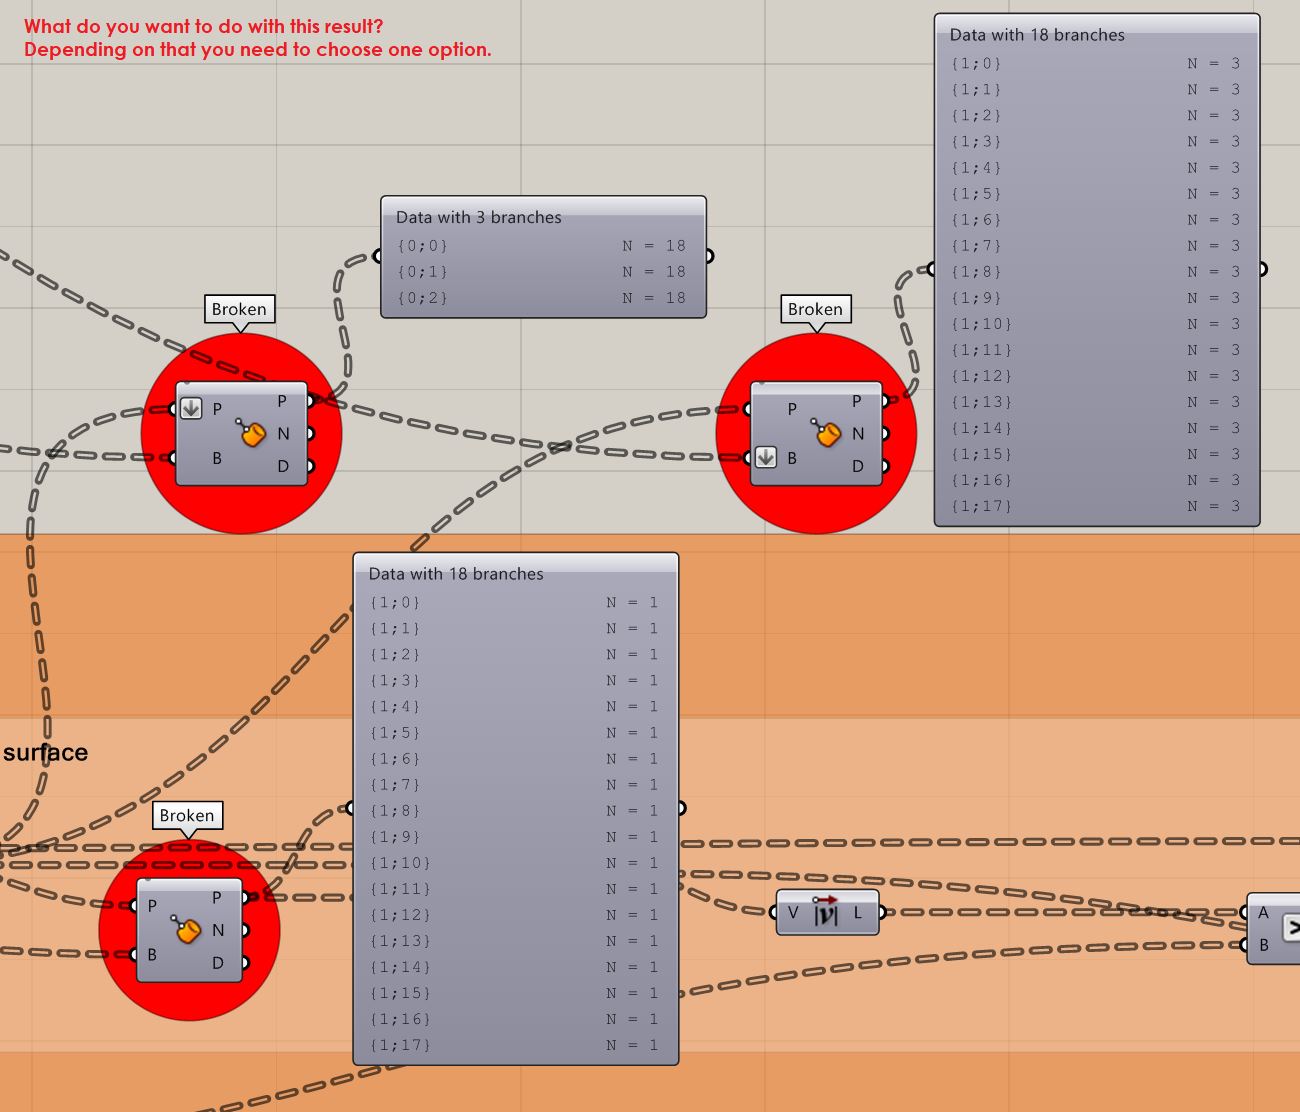
The first problem you have is how you extract the glass. You are comparing trees with different amount of values and that results in 324 values when you should only have 18 (as you only have 18 windows in your file). This is duplicating the geometry, do you really need it that way?
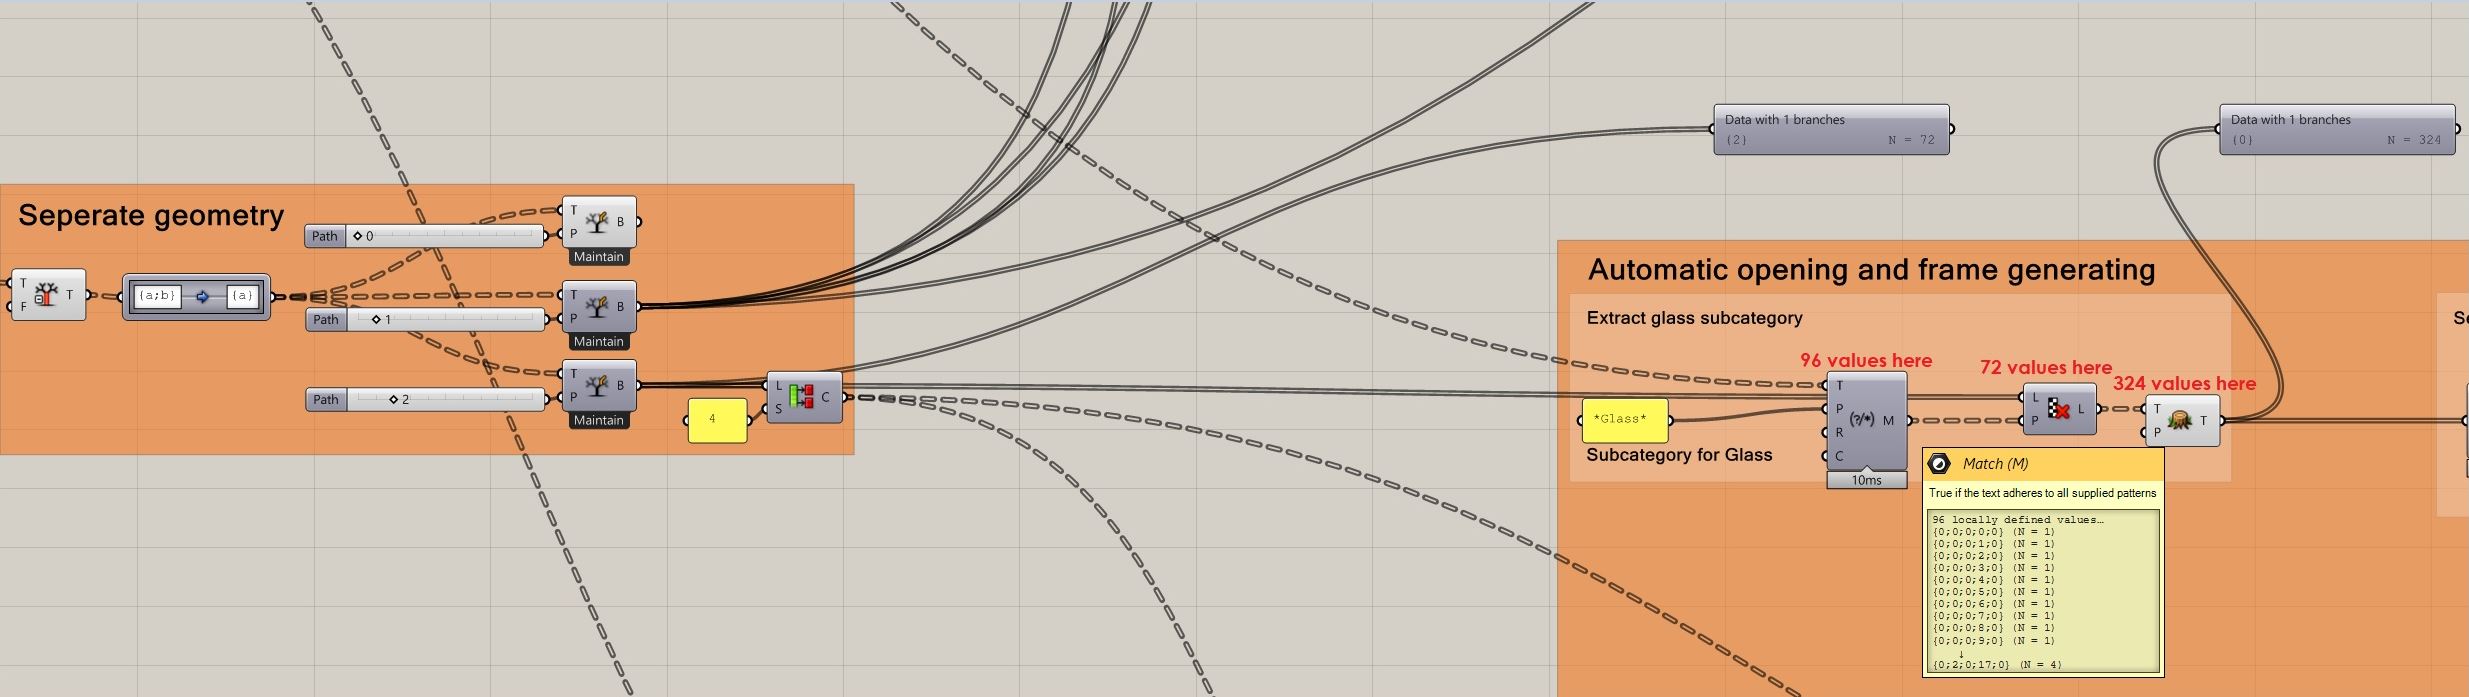
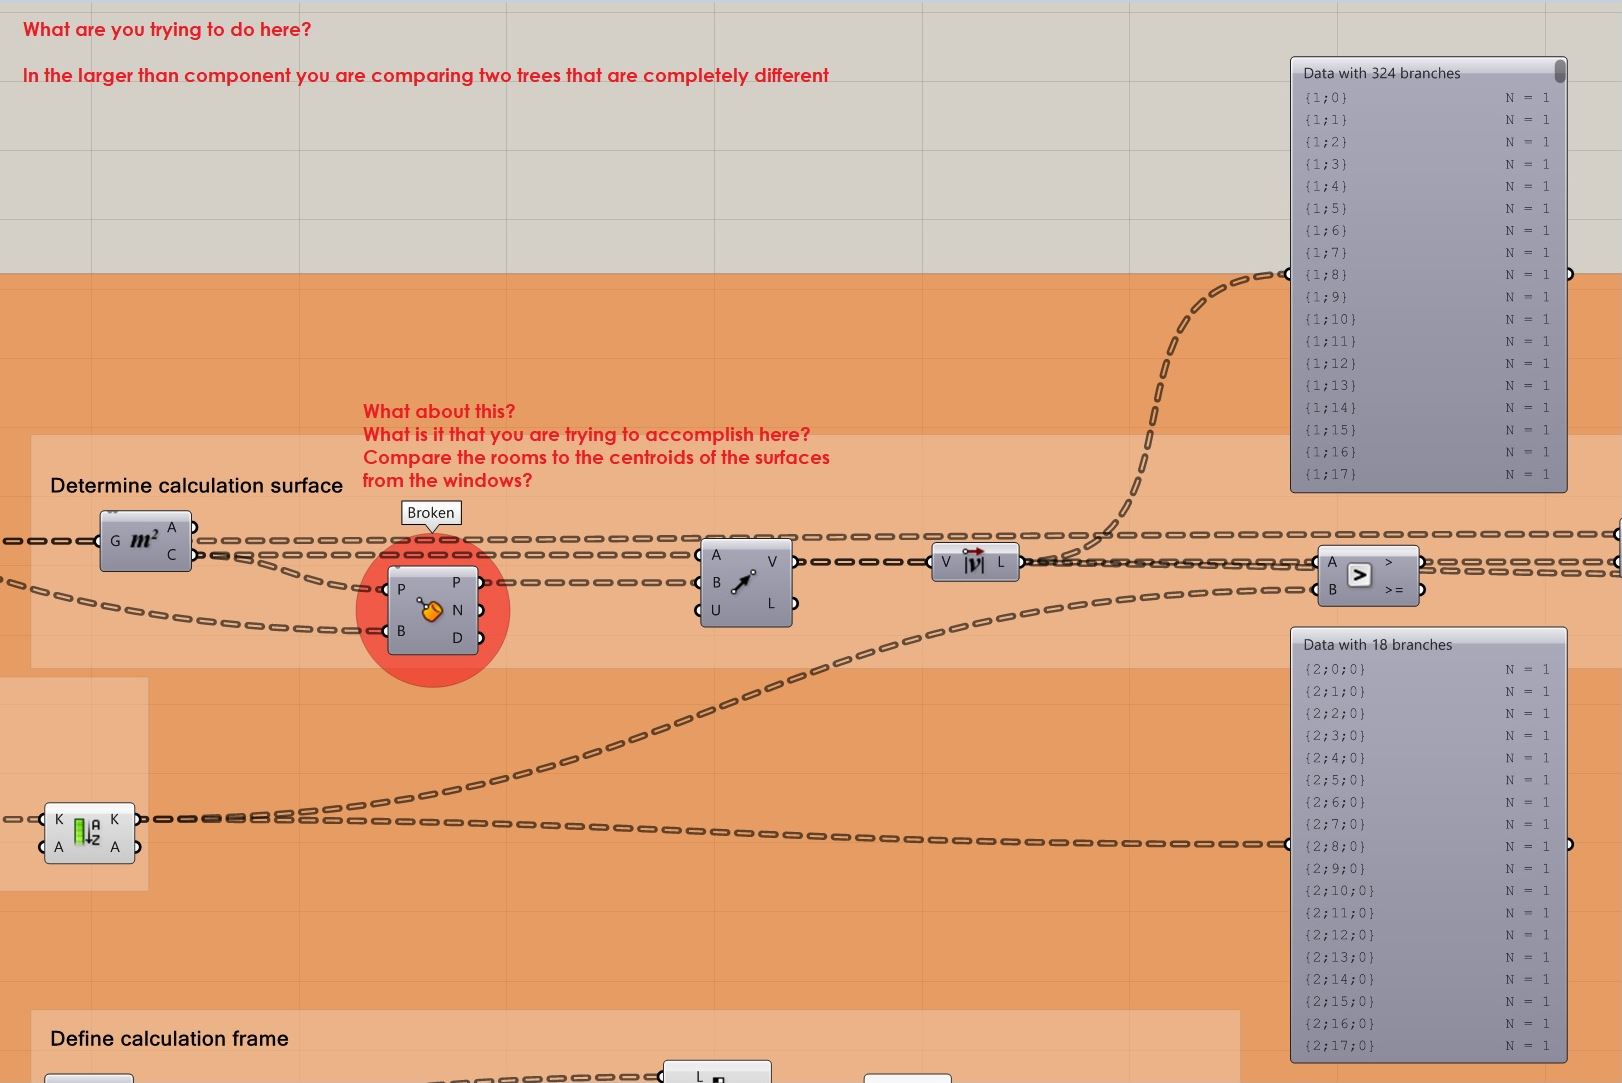
In the Brep Closest component that you are labeling as broken, what is that you are trying to accomplish? Depending on you data structure you are going to group the points in one way or another.
Also in the Larger Than component, you again have problem with the data tree structures. 324 branches are compared to 18 branches and the indexes of the branches are completely different (1 and 2).
Hi @fcegnam,
-
Wow, this reply is lengthy;). I trust that I have comprehended all aspects correctly and can provide accurate answers to your questions. The initial point to note is that a tree structure is being utilized to seperate each group of Revit Families. The rationale for this approach is to streamline the data flows.
The implementation of these components will be attempted:
-
Previously, I eliminated the surfaces that occupied the same position, utilizing the ‘Cull Duplicates’ component.
-
What I’m trying to accomplish with the ‘Brep Closest’ component is to move the glass surface on to the room geometry
I hope that flatten or grafting will improve some problems.
Perhaps there are additional enhancements available to rectify the tool?