In the design process, it is necessary to create surfaces that are smooth based on a set of curves - as few as possible.
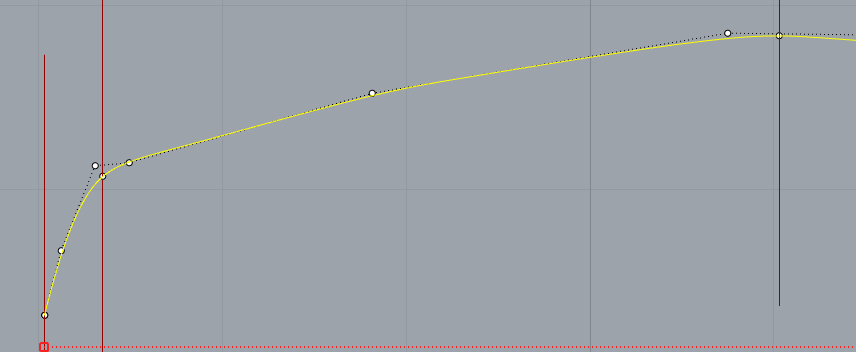
The surface must be smoothly curved between the normal curves in the same way creased surface like this is:
The underlying curves will change often (100s of times) so time spent creating this by hand is just wasted.
Built by hand has the problem of ensuring it touches all the normal lines to tolerance AND eyeballing smoothness between the normal curves - a process that is very time consuming.
As soon as any of the normal curves are adjusted, the entire process must be repeated over and over and over and over and over…
I would like to find a way to intelligently create a radiused curve that touches all the normal curves and has a curvature between the normal curves that ensures no changes in the sign of curvature and flows into and out of the radiuses smoothly.
Use the rebuild component to rebuild each line to 4,3
each line has a tangent ( = End Point -Start Point). Your curves are all in one plane, so you have a z-axis of this plane. Take the Cross product of the plane z axis and the tangent. This is the normal vector you need. Move inner cps, with ‘Point Deform’ in normal dir.
‘Curve’ each line as much as you want , but make sure curvature is somehow similar at all curves
Draw circle on intersection - this is the way to do ‘chordal’ fillets
‘Intersect’ both curves at this circle, use ‘Shatter’ to split, keep the curve further away from the intersection point.
Use Blend Curve, make sure to pick factors which let the controlpoints be spaced equally.
This is probably why I wasn’t sure if this is what you want. The point is, if you want perfect curves with exceptional great blends/fillets, than this is the way how you construct them. In Rhino, in GH or any other CAD. Creating a proper “theory” eleminates most issues with curvatures, such as unwanted inflections, wavy flows or more when working with surfaces later on.
pick factors which let the control points be spaced equally.
Can you expound on this a little. I think what you are saying is choose values for Fa and Fb that space control points equally because control point spacing indicates continuity ie, equal spacing = a continuous blend
Interestingly, split fails in Rhino even though all curves are in the same plane
each line has a tangent ( = End Point -Start Point). Your curves are all in one plane, so you have a z-axis of this plane. Take the Cross product of the plane z axis and the tangent. This is the normal vector you need. Move inner cps, with ‘Point Deform’ in normal dir.
I have read this a few times. this paragraph deals with 3 topics:
1 Finding the tangent of the end of the line
2 creating a vector for moving control points
3 moving control points
1
each line has a tangent ( = End Point -Start Point
the tangent of the line is probably not the last Cp - first Cp as far as I can see. It is possible to get the tangent from curve analysis though
Do we want the tangent where the circle intersets the curve or where the curves meet.
I dont understand what we are trying to achieve here
2
Take the Cross product of the plane z axis and the tangent
a product is the multiplication of two things, in this case I suspect we are multiplying vectors, one from step one, and the second being the X axis?
I assume we are using this:
I have no idea how you would do that in Rhino…
3
This is the normal vector you need. Move inner cps, with ‘Point Deform’ in normal dir.
I am not clear where the “inner Cps” are. The ones that touch the circle after we have shattered the curves and deleted the parts inside the circles perhaps?
Deforming = moving i assume?
Why are we moving control points, and by how much?
Are we moving the Cps to bring the line up to intersect the normal curve?
Apologies for not getting this immediately. I lack the necessary years of experience. Im sure others will find this useful tho )
Sorry I had absolutely no time last week. “Theory” is the technical term for creating curves or surfaces properly before applying fillets or blends. The idea, model low curved parts first, make sure they almost always positional match. This is not always possible, but if its possible it will create perfect conditions for blending operations.
Really just remodel my initial image. Step by step.
Create some lines.
→ Use Line or Polyline
Rebuild to a single-span curves of “order” 3 or 4 (degree is always cpcount -1 ) .
→ Rebuild or IncreaseDegree command
Enable cp display
→ Press F10
Move inner control points in normal. If this is not the perfect normal direction, who cares.
→ Use the mouse
(Perfect normal movement can be achieved by tweaking Gumball options to ‘relative’)
Create a circle at intersection point.
→ Circle from center, (Endpoint snapping enabled)
Trim curves at the circle
Blend curve.
→ Blend command
→ While in blend command, use factor sliders or shift key to move cp in blending direction
→ ideally the outcome is a curve with equal spaced cps. Slightly sharper blends tend to concentrate
on the center, Smoother blends have more space in the middle. Its a design choice.
This is a chordal fillet. If you know how to construct this, you can reproduce this in Grasshopper.
In GH its cumberstone due to different component namings, smaller pieces; but once you understand this you can reproduce it.