It’s a bit off topic, it’s a project for a friend who’s new obsession is Archery. So we want to 3D-print one custom since this is really crucial and his girlfriend is the HR manager of Formlabs now (best SLA desktop printers and hugely funded)
made a little Rhino video where I’m at:
My question is, how you would model it to control this contour?
Looking at the picture I’d consider this 3 separate shapes:
1 cylinder type shape for thumb (only needed at the end)
2 lower outer shape with upward protrusion
3 inner hollow shape looks like its sanded into a bowl.
Model these 3 separate with enough extension outward.
Next in the topview draw 2 freeform curves to be projected with history enabled. These projected curves one for each large shape define the edge from where the 2 shapes will be blended with a blendsrf.
With enabled history you can keep editing both the surfaces and curves untill you feel like you have a good setup.
Than on a copied set, trim excess surfaces and create a blend surface between them.
Undo and refine untill satisfied.
As a last step boolean out the cylinder type hole and blendedge the edges.
Hope this makes sense, but unlike you I’m on my phone on a Sunday evening
-Willem
You might want an extra surface to cut off the bottom flat and apply a blendedge as well
Also you might want a projected cus curve for the inside hole as well and use a blendsrf there too
I was just messing with this as I had a little time and needed some practice. Not sure if it’s something you can use for an idea on how to do it yourself.
I don’t have continuous surfaces so I can’t fillet the edges properly. Will have to try again but wanted to send you something.
As you suggest towards the end of the video, I’d probably model it in T-Splines/Clayoo - sub-d, but failing that I’d do it in much the same way as Willem has suggested.
The other way would be, working with the model you already have, draw a nice smooth curve/ring where you have your magenta sketch on the image you’ve provided. Pipe and then split it along the length, delete the bottom proportion of the torus. Extract Isocurve from the main model Split and hide the top section leaving a 2mm gap(ish) then use SplitEdge and BlendSrf with tangency or curvature to get you closer to the form you want. I’d try to get the pipe to bisect or come close to the two quadrants of the top and bottom ring of the model:
From there you can section the model, rebuild the curves and try again?
I had a quick look on Google and saw that someone was making one from a spoon - they’re the shapes I see in the images that you’ve provided and that’s where I’d start in this instance for the main 3x shapes rather than driving it with profile curves: https://tinyurl.com/lelba2w
[You can also trim the outer an inner walls differently to get a better blend between the surfaces if they are too sharp or too soft and you can’t quite get the look by cycling through the options within BlendSrf]
Thanks so much @Willem@gman & finally @2DCube will take your feedback and work another version and get back with the results today we will print the 1st two versions.
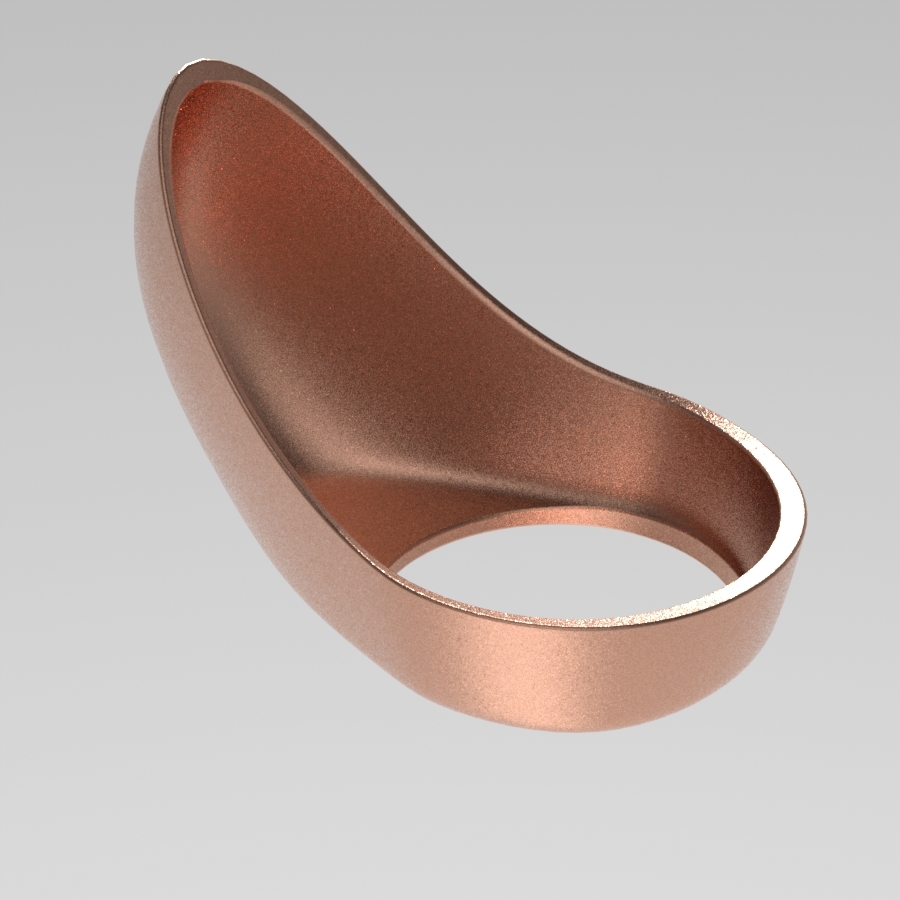
here is a render of the last one. but it’s not done.
Would work myself back into Modo as well over the next months. Will certainly check out the capabilities of MeshFusion. problem of modo is that it’'s construction capabilities and rhino import export is a bit complicated. But I think it’s worth it to be versatile in both programmes even there is a CAD importer. So constructing the overall shape and dimensions in Rhino and export to Modo or even use the scanned data to do a little retopoly in modo which is a single click operation now. and then work with (magnetic) background object modelling (using the imported mesh as reference. And then model everything quite easily in Modo.
MeshFusion in Modo is also really powerful - finally you can freeze everything and import back into Rhino or print it from Modo.
I hope you’re going to cite https://www.vermilarchery.com/pages/about-us for the original design? From what I can gather you’re trying to recreate their product, not develop your own…
It’s one thing doing stuff like that for your own purposes but be careful using someone’s IP and posting about it in public forums and banging a Formlabs logo on it.
@2DCube Andy, it’s still a personal project as discussed. it’s my friend and his girlfriend. she is working at Formlabs and can print it for him. If you you do a research on archery rings they are all very similar.
If you think in patents or design patents this is not patentable since it is so generic. But it’s an interesting discussion patents and design patents in a future of instant manufacture.
This is only the start, I think I will evolve this project by combining multiple features to create the best archery ring ever and applying Arabic patterns looking like this, but contemporary Arabic design – a whole new level my friend!
@hannesgrebin - I get you, I think the Formlabs logo threw me a bit. I thought it would have had your mate’s name on it rather than the company his GF is the HR manager for.
My old man’s deep into his archery but I’ve never tried it, I was just answering a post on the forum as it’s an interesting shape.
Might be worth building it in GH so that you can parametrically modify it for different sizes too?
Here we go!!! Thanks mate for this model, we will test it as well. This is cool stuff that your dad is into it as well. I never tested a bow but my friend was persistent like a cockroach with (I even called it cockring many times), so finally I gave up and put my hands on this. Never knew how people can get so obsessive with it, maybe it’s burnt into our hunter DNA
Honestly I just put their label on it to make everybody happy - the boys who control the printers will love their butterfly materialised as well.
Wanted to get into grasshopper in the near future for texturing work and you are right this would be cool to drive the parameters.
Our motivation to do this, was that it’s extremely expensive to get some of the rings to Germany and if managed you have to order 3 of different sizes to match your custom one and then it’s not really custom. So the whole point here for me is it to experiment on this small scale project to use scanning (the thumb), retopology and reverse engineering different models to let my friend to test the best features and set up an easy tool pipeline to easily control the overall shape (our thumb rest is now a bit wider) to finally build the best custom ring.
I’ll keep u updated with the progress, I’m really not interested in stealing someone’s IP - but it’s interesting how motivating it can be just to make someone extremely happy like a baby and get real world feedback.
[Disclaimer: thumb rings are not allowed in recurve shooting and as such I have no experience with them].
I’d be careful with what I’d put on that surface. Any unevenness could eat the bowstring rather fast, I’d think.
Then again, some people enjoy using time on restringing their bows.
I’ve barely had any time practicing for the Norwegian indoor championship coming up at the end of this month
Good evening everyone. Some updates: fitting is custom hence perfect. But not yet proved in action. Printed in a durable resin hence printing speed of 5 hours. Will post a in field review later this week As @wim said he critisised as well, that they unknowingly placed the supportive geometry on the front and he had to sand it. Will change it in a next upcoming piece. We will print v4 where there is a bigger lid for the string (the little bulge at the lower edge)